Artsy Layered Overlay
Two weeks ago, in my “Gradient Blend” post, I showed you how to create a stunning large photo layout. And earlier this year in my “Masks And Wands” post, I showed you how to create an overlay using the Magic Wand.
Today I’m going to show you another way to use a large photo for a layout but this time with an artsy overlay. And I’ll show you how to create a different kind of large overlay using a piece of artsy/grungy paper and the Magic Wand tool.
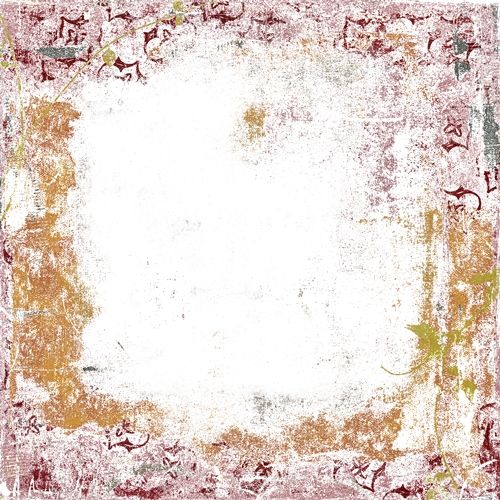
Note: I created the overlay in the featured image at the top of this post using a paper from “Grunged-Out (nineteen)” by Joyful Heart Designs.
We are now mid-way through September and quickly approaching the official beginning of Fall here in the Northern Hemisphere. Fall is my favorite season. And my favorite place to enjoy Fall is in New England; specifically in Vermont.
If you browse through my galleries, you’ll see a lot of layouts that are Fall themed. Since I’m feeling “Fallish”, I thought it would be fun to use that theme in conjunction with today’s technique.
Big Photo
Before I get started here’s a quick reminder, I use Photoshop Elements (PSE) 2024. If you use a different version, some of my screen shots may look different than what you see on your screen.
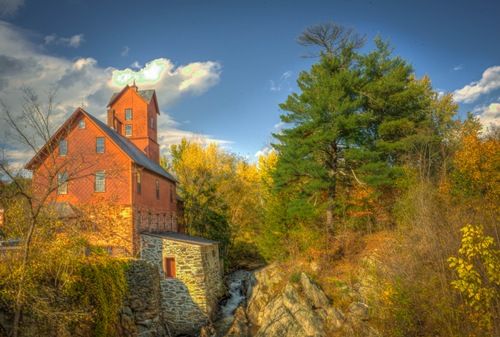
I already have some lovely fall photos from trips to Vermont. Some of which are from a very small town called Jericho which is about thirty minutes from Burlington, Vermont. There’s a very famous and picturesque old grist mill in Jericho.
I wanted to use one of my pictures today. But just as I did a couple weeks ago, I wanted to make sure I used a photo that you could download if you wanted to follow along. As luck would have it, I was able to find a picture of that mill on Pixabay:
I always find it important (or at least very helpful) that I decide which big “focal point” photo I am going to use before I create the overlay.
Pick Paper
With the main photo identified I can now look for an artsy/grungy paper that will be the basis of my overlay. I want to find a paper that has interesting patterns/designs that will add a nice accent to my photo. Typically, I have the best luck looking through my grungy paper collections. But I also can find nice options in the artsy paper collections.
While color is of some importance it does not have to limit my paper selection. Why? Because I’m primarily concentrating on the “look” of the design. I can always recolor things to fit my photo later.
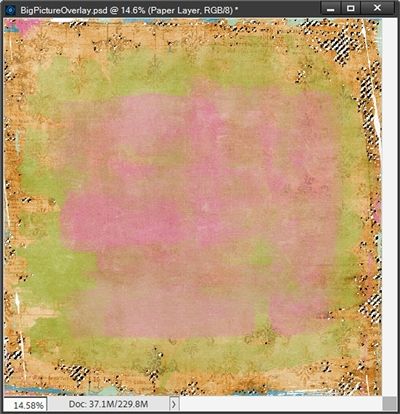
I ultimately decided to use a paper from “Grunged-Out (sixteen)” by Joyful Heart Designs. I’ll start with a 12×12 blank file. Then I pull that grungy paper into the file:

Now, I have some surprises for you. First, I generally cannot make a piece of paper available to you for free. But Jenn Howland of Joyful Heart Designs was kind and gracious enough to allow me to provide you with a link to that specific piece of paper. If you want to use that exact paper just click here and it should immediately download for you.
Secondly, Jenn has also provided a coupon code (JHD4YSC3off) for my readers if you’d like to purchase the entire pack or some other paper/product:

You can click the image above and go directly to Joyful Heart Designs’ shop at Oscraps. If you have any trouble either downloading the free paper or using the coupon code, please just “Message Me” and I’ll get back to you as quickly as possible.
Note: If you’d rather use a different paper, That’s perfectly fine. You can just look through your stash of supplies and find an artsy/grungy paper that has a design you like.
I know you’re probably looking at that pink in the paper I’m using and wondering what could I possibly be thinking using that with the fall photo? First off, I won’t be using that part of the paper. And even if I were, remember, I said I could recolor things to fit the photo.
I’m really looking at only using the browns, orange, the greenish-gold, white and blues…I promise, no pink.
Now let’s create a layered overlay…
Make Selections
I open the Magic Wand tool. In the Tool options, I click on the New selection icon and set the Tolerance to 32, uncheck Sample all Layers and Contiguous, then check Anti-aliasing:

Then I just click once on one of the darker brown dots near the lower left corner (circled in red) to select the pixels on the paper that are similarly colored:

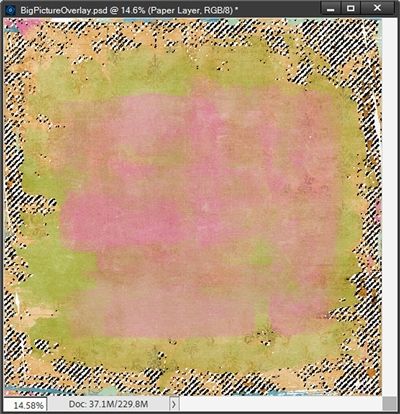
And here’s how the selection looks:
You should be able to see at least a few marching ants. That didn’t select as much as I’d hoped. No problem, I can add additional sections of brown to the selection. I’m going to zoom in fairly close near the bottom of the paper:

Note: If you’re following along using the same paper, and click on the same spot I did, that doesn’t guarantee the Magic Wand tool will select the EXACT same pixels. I can click on the same-colored pixels and get different selection results each time. So, keep that in mind when making your own selections. And don’t tell anybody I told you this but, sometimes I have better luck starting with the “Add to” selection option rather than the “New” selection option.
There is some text (and other areas) that are a lighter shade of brown that I want grab. But I want to be a bit more “selective”. I don’t want all of that tone.
In the Tool options, I click the Add to selection icon, set the Tolerance to 10 and leave the other settings as they already are. Then I click on a spot that has that lighter brown to select those pixels. Then I zoom back out so I can see if I got all (or at least most) that I wanted:
While finishing that selection I also added some of the medium-dark orange.
Note: If at any point it seemed like I wasn’t getting all the brown/orange that I wanted I just continued to click in other areas to increase the selection. I also lowered the Tolerance even farther, to as low as 5, to limit the pixels being selected with a given click. But if I clicked on a spot that ended up grabbing more than I wanted I just pressed Ctrl-Z (undo) to deselect the most recent selection.
But this looks pretty good right now!
Now here’s where the “Layered” word in the post’s title comes into play.
Since I’m creating an overlay using multiple color selections from this paper, I’m going to keep each color’s selection on its own layer. I do this so I have the flexibility to recolor individual selections (or portions of), erase (or mask away) sections that may seem out of place or unnecessary, re-order layers in the Layers Panel or play with Blend Modes once I transfer the overlay to my photo.
So, I’m going to create a new layer using the current selection by pressing Ctrl-J. PSE then creates a new layer (Layer 1 for me) directly above the base paper and cancels the selection.
I’m going to hide the paper so you can see what the first selection looks like for me:

Note: If you’re following along using the same paper, remember that there’s no guarantee that your selection will look EXACTLY the same!
I could save this as a standalone PNG file at this point if I thought this would make a nice artsy/grungy edge sometime. If you’re following along and want to save your current “selection” as a PNG, feel free to do so.
To make my next color selection I need to make the paper layer active in the Layers Panel.
Now, to keep this a bit shorter, I’m going to follow the same process above to select the other colors I mentioned earlier. Rather than take up a lot of room with excess images, I’ll only show you each color’s finished selection the same way as I did directly above.
Note: If you’re following along using the same paper, you can make whichever additional selections you choose. You do not have to try and duplicate the ones I make!
There were some additional areas of brown that I wanted to include so I select those. Some portions of this selection were “repeats” but that’s okay. When I finished the selection, I again created a new layer from the current selection (Ctrl-J) – Layer 2 for me and it is directly above the base paper:
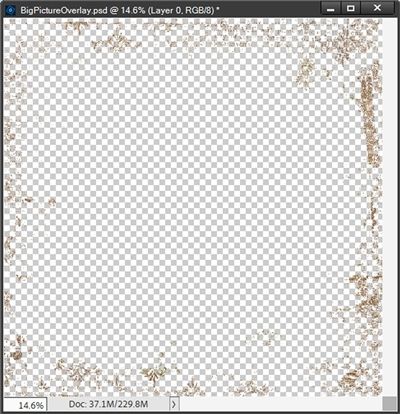
With the addition of this new selection, ultimately some of the browns will show up much darker/nicer!
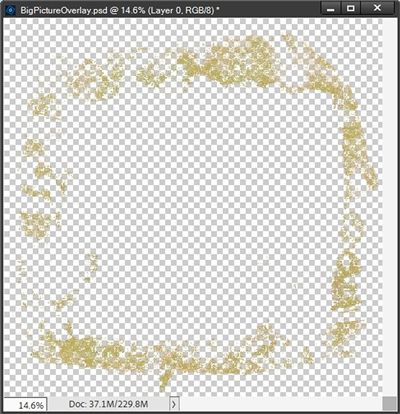
Once again, I make the paper layer active, then go on to select the greenish-gold areas. When I finished this selection, I again created a new layer from the current selection (Ctrl-J) – Layer 3 for me and it is directly above the base paper:
Making the paper layer active again, I go on to select the white and blue areas. When I finished this selection, once more I created a new layer from the current selection (Ctrl-J) – Layer 4 for me and it is directly above the base paper:
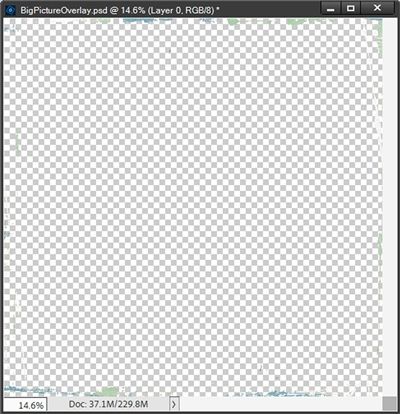
This doesn’t look like much right now. You probably can’t see much if any of the white and there is very little blue. This will all show up much better when I place the final overlay layers over the photo.
Here’s the composite overlayer:

I know that probably looks like a lot of grunge…maybe too much. But let’s wait and see how it looks over that big photo.
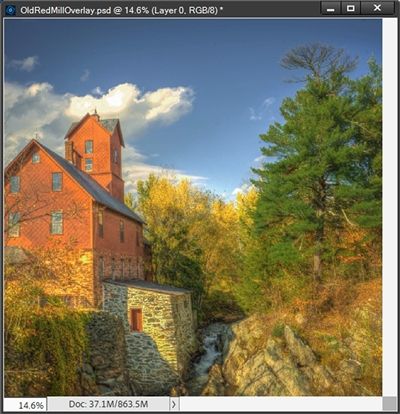
I’m going to open a new blank 12X12 file and pull in the photo of the old mill:

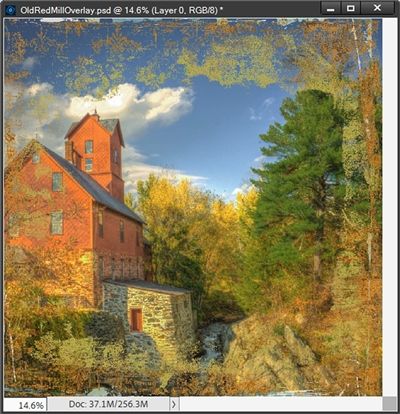
I grab the top-right corner anchor and drag diagonally until the photo fills the top of the file. Then I grab the bottom left corner anchor and drag diagonally until the photo fills the bottom of the file. Then I nudge the photo to the right so more of the mill is visible and the water is near the center:
Then I go back to the file which contains my four overlay layers. I select those 4 layers in the Layers Panel. Then holding down the Shift key, I drag those four layers over to the new file with the photo:

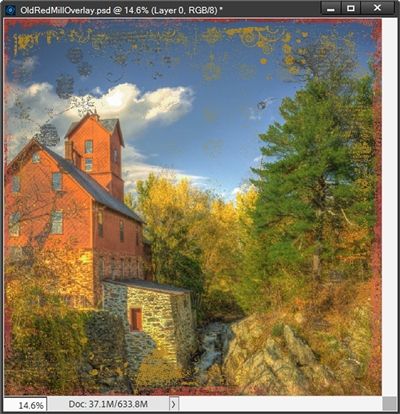
I’m fairly happy with this. But I am very glad that I kept the four different color selections on their own layer. As much as I like the blue and white (Layer 4 for me), it’s more intense than I thought it would be. I’m going to lower the opacity of that particular layer to 80% so it’s not quite so pronounced:
I like that much better. I’m actually pretty happy with the way this turned out and I can go on to finish my layout!
And here is an example of that same photo with a layered overlay I created from a different paper:
For that overlay I used a paper from “Dark-a-Delic (two)” by Joyful Heart Designs.

This overlay also resulted in four different selection layers. I actually ended up recoloring two of the selection layers and moving the first layer below the second layer in the Layers Panel and changing its Opacity to 70%.
And here’s one more example using that same photo with a layered overlay I created from a different paper:

For that overlay I used a paper from “Color Crush 5 (grungy greys)” also by Joyful Heart Designs:

This overlay also resulted in four different selection layers. This time I just recolored two of the selection layers…no other changes.
Overlays created using this technique are not meant to be used exclusively on large photos. The entire overlay (and or individual selections(s)) can be layered over a piece of paper to create your own artsy/grungy paper.
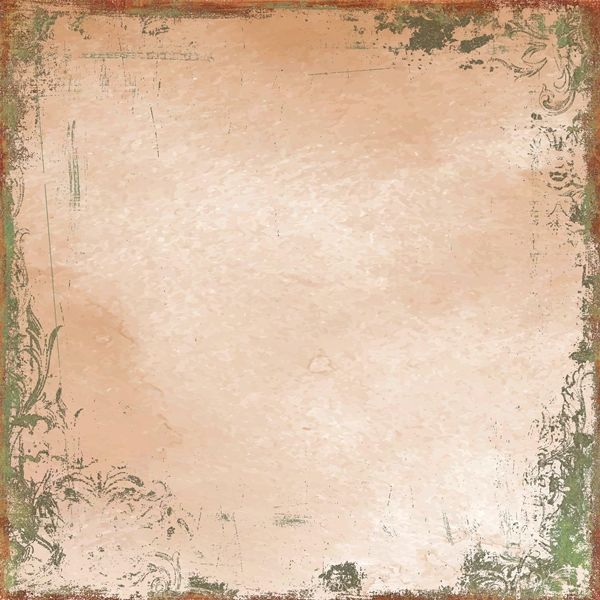
Here’s an example using an earth-toned watercolor background and the overlay (without any recoloring) that I created for the old mill example directly above:
Do you remember earlier I mentioned that when I create an overlay using this technique, I can recolor things? I can also go in and brush away any areas that might seem unnecessary or out of place.
I’m going to use a different paper and create another set of overlays to show you how I would do that.
I’m using a paper from “Grunged-Out (twelve)” by Joyful Heart Designs and I pull that into another 12×12 blank file:
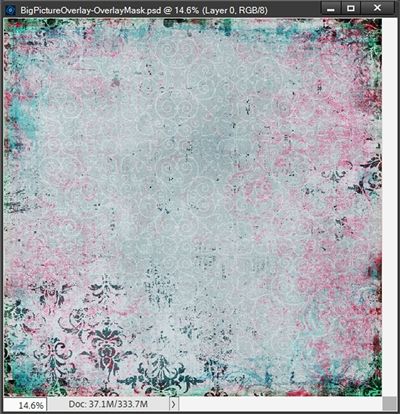
I ended up with 6 different selection layers that turned out looking like this when I placed them over the red mill photo:
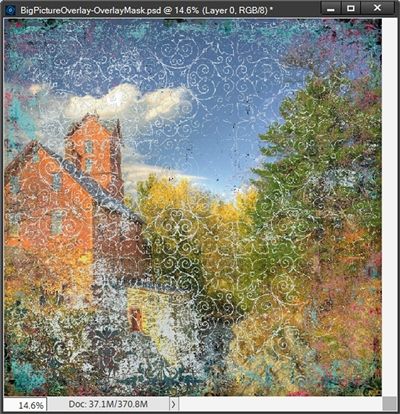
I intentionally selected that whiteish flourish design for some other project. And clearly this looks horrible on the mill. But that’s what this is all about. Showing you how to fix that!
With that “flourish” layer active in the Layers Panel I click on the Add layer mask icon.
Then ensuring that my color chips are at the defaults (press D) I grab the Brush Tool and select the “Pastel On Charcoal Paper (63px)” brush from the Dry Media Brushes group. In the Tool options I set the Size somewhere between 800-1000, the Mode to Normal and the Opacity to about 50%:

Ensuring that the Layer Mask is active, I just start brushing away parts of that flourish layer (sometimes adjusting the brush size up or down) until I like the result:
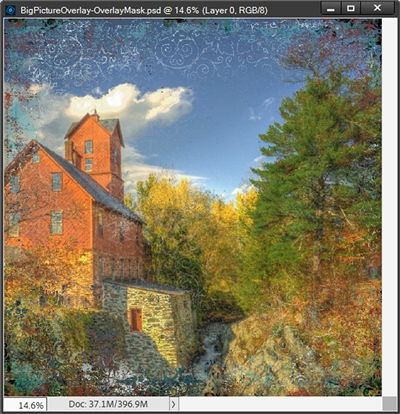
And since I was fixing things…I also masked away parts of several other layers to clean up that nice blue section of the sky. Then I changed the hot pink layer to a nice red color (#8b321f) and reduced the Opacity of blue layer to better fit the photo.
See how easy it is to make all these changes by keeping each selection on its own layer?
Again, whenever I create an overlay using this technique, I have several options. First, before I even copy the layers to a photo, paper or other project (having made no changes to colors) I save the file as a PSD with a unique name (generally driven by the name of the paper I used). Sometimes I leave the paper (hidden) within the PSD just for ease of reference.

This preserves my original selection layers. By doing this I have the flexibility to create countless iterations of a given “composite” overlay simply by changing colors, opacities and even layer order. Better yet, I have the option to make different selections!
I also have the option to save the original composite overlay (paper hidden) as a PNG file. It won’t be easy to change much of anything at that point but it could still be a useful overlay!
And clearly the goal of this post was to generate an overlay for a big picture. So, the next option is to copy/drag all of the selection layers to the project in question. Once they’re on the project, that’s when I will make any modifications to the overlay layer(s).
I hope you’ve enjoyed learning about creating a layered artsy overlay and will give it a try.
Oh, my goodness…I almost forgot to include the layout I created using the overlay on the Old Red Mill:

If you’d like to see more details about this layout you can find it in my 2025 Gallery. The title of the layout is “Old Red Mill”.
Additional Tips

This technique works best with artsy/gungy paper having distinct colors/designs that will be easy to extract.
You don’t have to create multiple layers when making an overlay. Layers just make it easier to modify later if necessary.
And you don’t have to make multiple selections from a given piece of paper. If there’s only one selection you want to make…that’s all you need!
You can make selections from more than one paper at a time when creating your overlay. To do this all you have to do is bring whatever papers you want to use into the same file. Then create the desired selections from each. Then it’s just a matter of keeping track of which selection layer came from which paper.
When making the extractions from the paper, if your first selection doesn’t yield the desired results, press Ctrl-Z to Undo and try again.
If you want the Magic Wand Tool to include more like-colored pixels, increase the Tolerance to 40 or more.
If you want the Magic Wand Tool to include fewer like-colored pixels, decrease the Tolerance to 10 or less depending on the color you’re trying to select.
Use the Add to Selection icon in the Tool options to select more than one set of colored pixels.
Don’t be afraid to use a paper that has colors you might not want on your current project. Remember, you can change those colors once you’ve created a selection layer.
If recoloring a layer remember to click the Lock Transparent pixels icon in the Layers Panel for the layer you want to recolor! This will help avoid the potential for a lot of jagged edges.
Experiment with changing the Blend Mode or the Opacity of the selection layers for even more fun options.
Consider saving your selection layers as both a PSD file and a PNG file in addition to simply copying them to a project.
Above everything…just be creative!
Thanks for reading this week’s Tuesday Tip. Remember, if you have any suggestions or questions please don’t hesitate to “Message Me“. Check back next week for a color pop tip. Click “Follow Me” to stay in touch. I hope you have a wonderful week!
