
Ragged Edges
If you’ve been scrapping for any length of time, you’ve likely seen your fair share of paper tears. Over the years I’ve written two posts about them: “Creating Torn Paper” and “Torn Paper Brushes”.
Today I’ll show you how to create some interest on a simple tag by adding a jagged edge. I don’t mean to confuse you; this will not be the same as tearing paper!
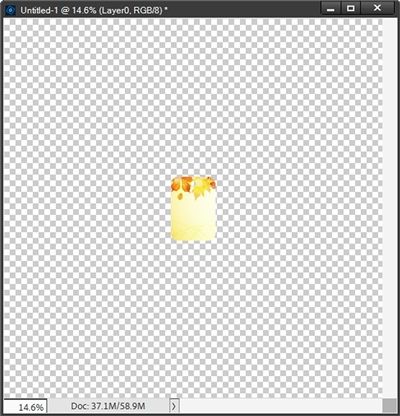
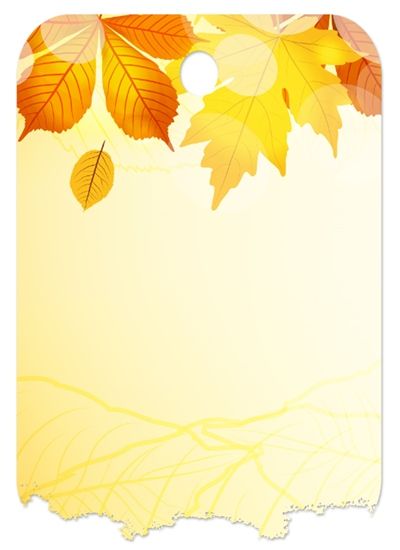
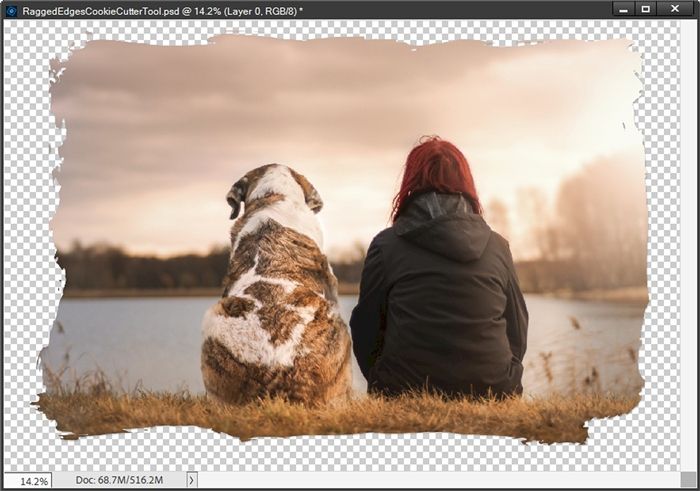
Jagged (tattered) edges are distinctly different from paper tears. The primary difference is that jagged edges typically will not have the underlying “white” that happens when we tear real, physical paper. If you take a look at the featured image at the top of this post, you’ll see what I mean.
Jagged edges are more about adding interest and a bit of dimension to a variety of elements (cards, tags, mats, etc.,), photos and yes, even paper.
And as with a lot of techniques in Photoshop Elements (PSE), there’s usually more than one way to achieve an effect. And there’s no exception with jagged edges.
Waxy Crayon

Before I get started here’s a quick reminder, I use PSE 2024. If you use a different version, some of my screen shots may look different than what you see on your screen.
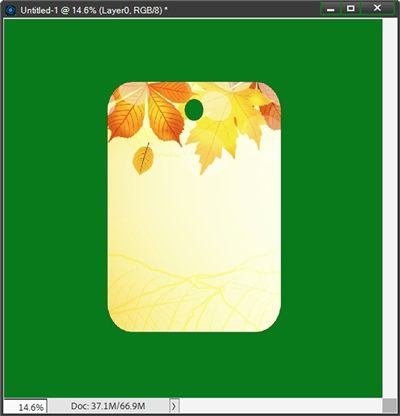
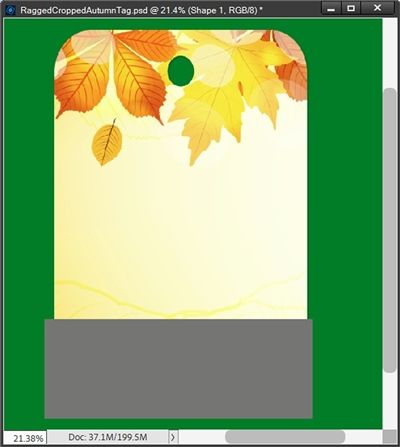
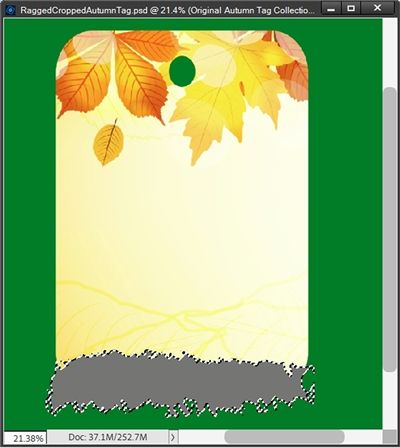
I’m going to keep this as simple as possible today. As usual I’ll start with a 12×12 blank file. And I’m going to pull in a nice autumn tag from a set I found at Creative Fabrica:

I’m using the tag at the far right in the top row of that image above:
Next, I’m going to re-size this tag so it is roughly 5” wide by 7” high and change the color of my background (Layer 1) to medium green (#097b1b):
This will just make it a lot easier to see how things change as I apply the effect. Next, I reset my Foreground/Background color chips to the defaults (press D).
Note: If you’re following along, you can use any tag, card or even a photo that you like. And you can re-size the element to whatever size will make it easy for you to see without having to constantly zoom in/out. Also please ensure that your color chips are set to the defaults (Press D).
I click on the tag layer to make it active in the Layers Panel. Then I grab the brush tool. In the Tool options, I click on the down arrow to the right of the Brush. PSE opens the Brush picker dialog box:
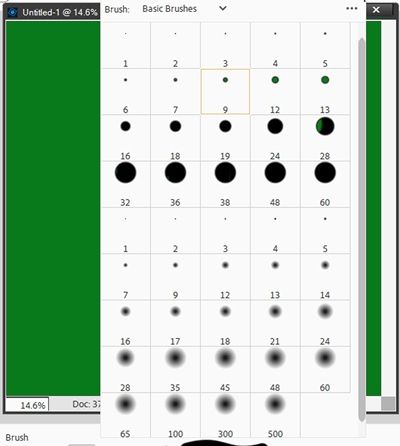
For me the picker shows the PSE Basic Brushes set. This was the last set I used. If you’re following along, you may see a different set.
I then click on the down arrow to the right of the Brush set name (Basic Brushes) and PSE opens the list of all brushes currently installed on my system. I select the Dry Media Brushes:
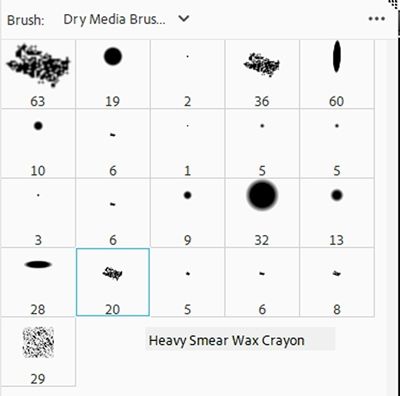
I choose the Heavy Smear Wax Crayon brush. Then back in the tool options, I set the Size to 150px, the Mode to Normal, and the Opacity to 100%.
Note: I chose that brush size due to the size of the tag. If you have a much smaller (or larger) sized tag, you will want to adjust the size of your brush accordingly.
Ensuring that the tag layer is still active in the Layers Panel, I click on the Add Layer Mask icon. The Layer Mask should now be active at this point:
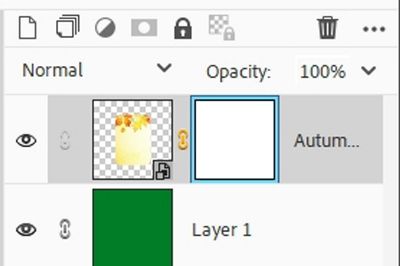
Note: If you’re following along, my Layer Mask has a blue outline. Yours could be outlined in a different color. If you don’t see an outline at all, be sure to double-click on the layer mask to ensure that it is active.
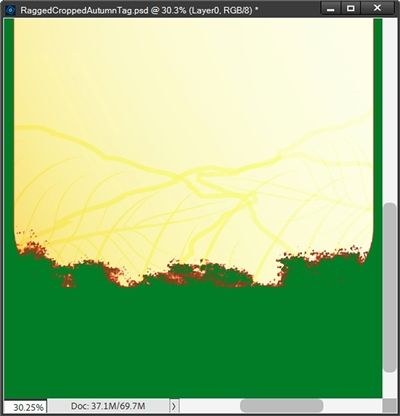
I double-check to ensure that my Foreground color chip is black. Then I click and drag my brush somewhat haphazardly across the bottom edge of the tag:
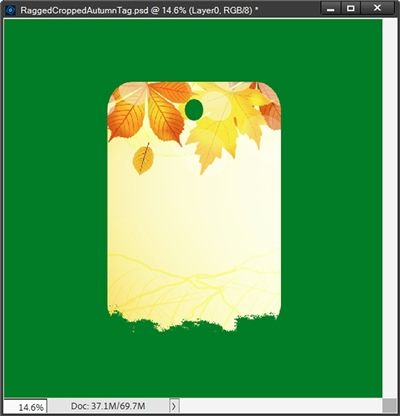
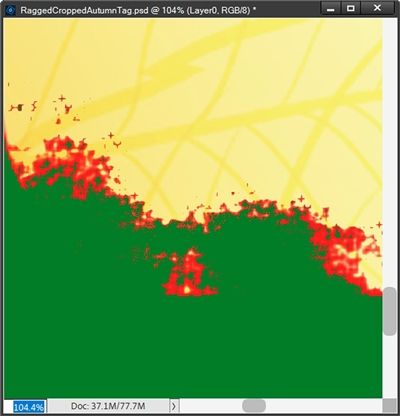
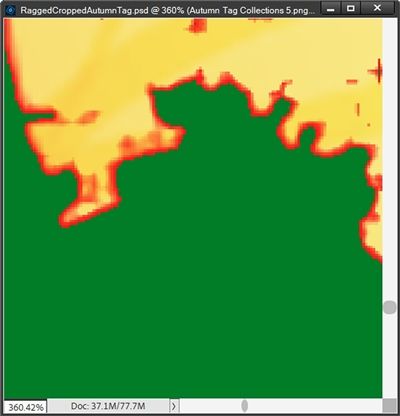
I am going to zoom in fairly close so I can see the bottom edge better. There likely are going to be some stray pixels after that brushing:
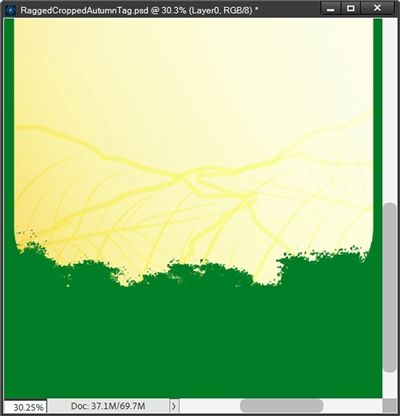
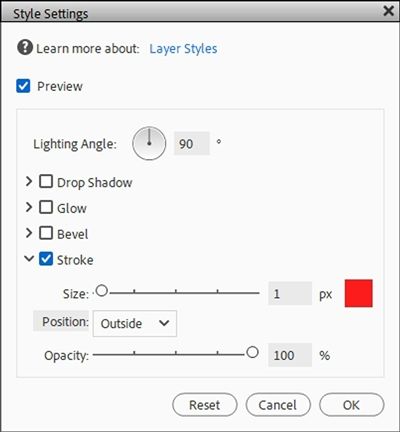
As you can see, there definitely are some stray pixels. But that’s okay…and to be expected. This is fairly easy to fix. I go to the top tool bar and select Layer->Layer Style->Style Settings. PSE opens the Style Settings dialog box.
I click the box for Stroke, set the Size to 1px, the position to Outside, the Opacity to 100% and leave the Lighting Angle at 90 degrees. Then I set the Stroke color chip to a vibrant red (#ff0202):
I click OK to confirm and here is what I see:
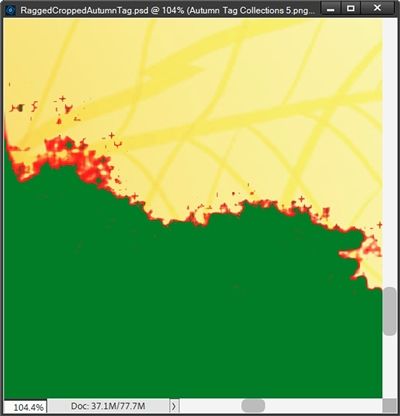
Well, that’s worse than what I thought it might be. But again, easy enough to fix. In the Brush tool options, I open the Brush Picker and choose a Hard Round brush either from the Default Brushes or from the Basic Brushes.
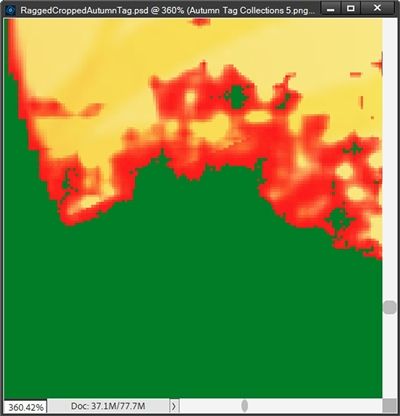
I set the Size to 15px, the Mode to Normal, and the Opacity to 100%. I ensure that the Layer Mask is still active. Then I zoom in more so I can get an even better view of those errant pixels:
Note: Once again, I chose the brush size based on the size of the area in which I’m working. If you have a much smaller (or larger) area, you will want to adjust the size of your brush accordingly.
I’m not concerned with any of the red in the body of the tag. Those won’t be a problem. What I am most concerned about are the red areas that definitely are not connected to the main body of the tag. These are the pixels I’ll want to “erase”.
Remember the rules about Layer Masks…black conceals and white reveals. If I want to erase the red areas, I need to ensure that my Foreground color chip is still set to black. Then all I have to do is brush over the red areas that I want to “erase”.
And here’s a look at my first pass over the left most portion of that jagged edge:
I’m going to zoom in closer one more time to let you see one thing before I finish:
Can you still see all of that red? This means there’s still room for improvement. The one thing I wanted to point out is this; The stroke is only 1 pixel in size and is positioned to be on the outside edge of the ragged edge. All those larger “chunks” of red that I see are clearly other errant pixels that can be erased. Again, easy to take care of.
The key to finishing this step is being careful not to get too close to the yellow sections when brushing away the red. It’s the size of the red “stroke” area that’s concerning. Even as I brush close to (or even over) some of the yellow parts…the 1-pixel red stroke will still be there. Gosh, I hope that makes sense!! But don’t worry, that red stroke will be going away very shortly.
Now, there may be places along the ragged edge where some of the yellow should/could go away if it looks too jagged or disjointed. That’s a call I’ll need to make as I traverse the remainder of the edge.
For right now, I’m going to lower/raise the size of the brush to cover the areas I want to clean up a bit more. And this will also require that I zoom in even farther so I can get a better look at any yellow that should also be removed.
SPECIAL NOTE: As I do this brushing, it is imperative that I remember the Stroke is still active. All of the red will not go away. Even as I brush over some of the yellow…some red will remain! That is because any remaining yellow will still have the stroke applied!
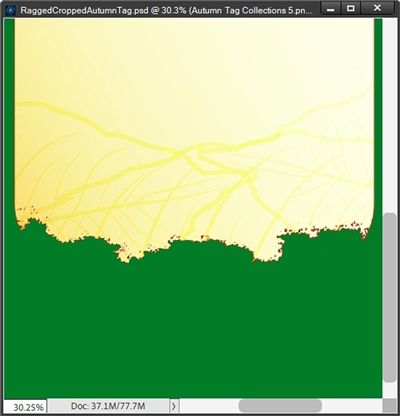
And here’s a look at my second pass over that left edge:
That’s a whole lot less red…right? Now I’ll finish this so you can see the entire edge after the cleanup:
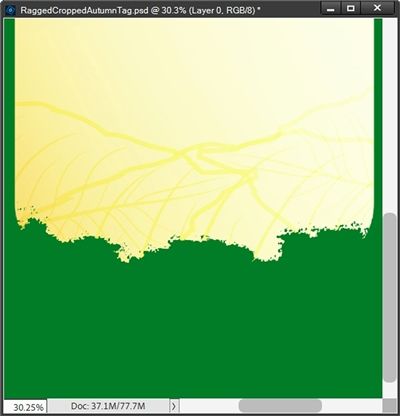
Now to get rid of the remaining red. In the Layers Panel, I right-click on the tag layer and PSE displays an option drop down and I select Clear Layer Style.
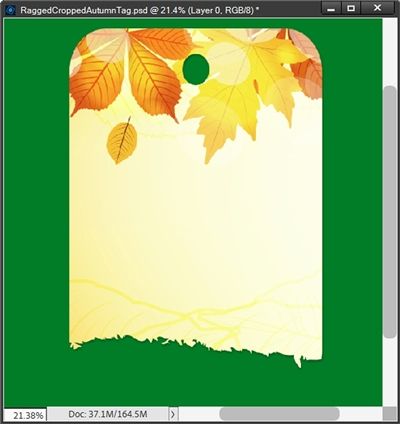
And here’s the final jagged edge:
Now, I’m going to simplify the tag layer so I can permanently combine the edits I made using the layer mask with the tag itself. Then I’ll add a simple drop shadow to the tag:
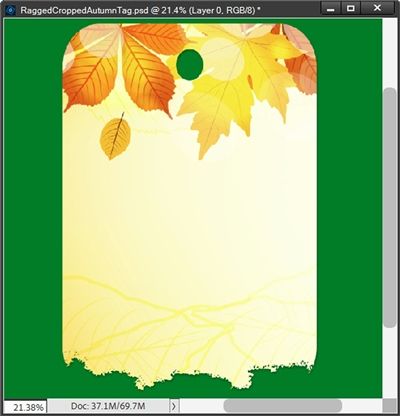
The settings I used for the drop shadow are: Lighting Angle 120 degrees, the color chip set to a dark grey (#4f4d4d), Size of 13px, Distance of 8px and Opacity of 50%.
That looks like a nice jagged edge. Now, I can save this “new” tag as a PNG file for later use. But before I do that, I need to remove that green background and I should probably re-size it so it’s not quite so huge…perhaps something more in the area of 3” wide by 5” high. But that’s not 100% necessary.
Whatever size I go with, I just need to crop the entire file to size and save it with a unique name. I named mine: Autumn Tag 5 Jagged Edge. And here’s my finished tag:
I hope you enjoyed learning this technique. Now, remember…you can do this on a lot of different elements like photos, cards, tickets, labels, ephemera, paper pieces, even whole paper sheets if you like.
But there is another way to create a jagged edge using an oft overlooked PSE tool…
Cookie Cutter Tool

For this example, I’m going to be using a little known (or at least little spoken of) tool…the Cookie Cutter. This tool allows you to quickly crop an image into a specific shape. It basically just cuts away the parts of the image that fall outside of the chosen shape.
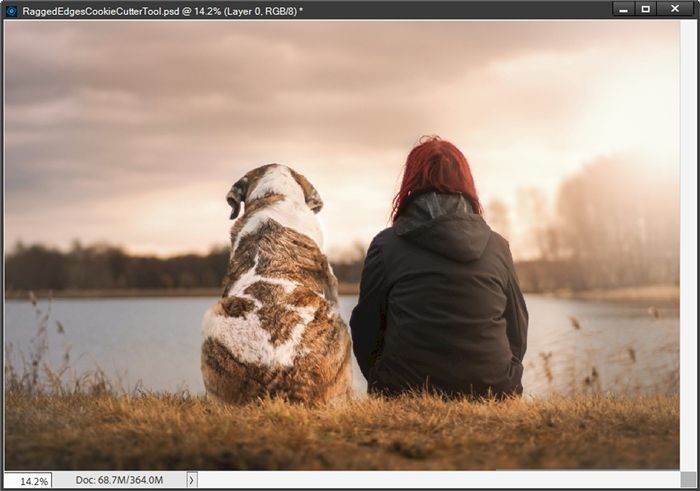
This time, I’m going to use a photo of a woman with her dog by a lake from Pixabay:
Note: If you’re following along, you can use whichever photo, element or even paper that you choose.
Once more you’ll be surprised that I’m just going to work on this photo directly. But I will immediately make a duplicate of that photo in the Layers Panel.
I rename the duplicate to Woman & Dog. If I wanted to be extra cautious, I could save this file as a PSD but it is not necessary.
In PSE, the Cookie Cutter tool is located within the Tools panel at the far left of the workspace. It is nested within the Crop tool which is found in the MODIFY tool group, usually the first item in that section:
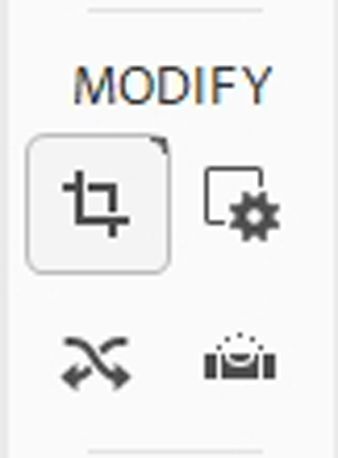
All I have to do is select the Crop tool and PSE will open the tool options bar. Then, I select the Cookie Cutter tool:

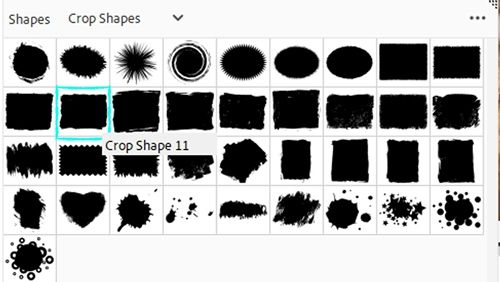
I click on the down arrow to the right of the Heart Card Shape. PSE opens the Default Shapes. Then I click on the down arrow to the right of the word Default. PSE opens the popup list of different groups of shapes:
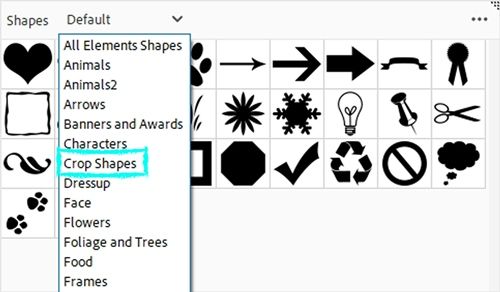
Then I select the group named Crop Shapes. PSE opens the Crop Shapes options and I select Crop Shape 11:
I click anywhere outside the Crop shapes window and PSE closes that dialog box.
Note: If you’re following along, you can use whichever crop shape suits your project.
With the Woman & Dog layer active, I click and drag the shape to the desired size over the photo:
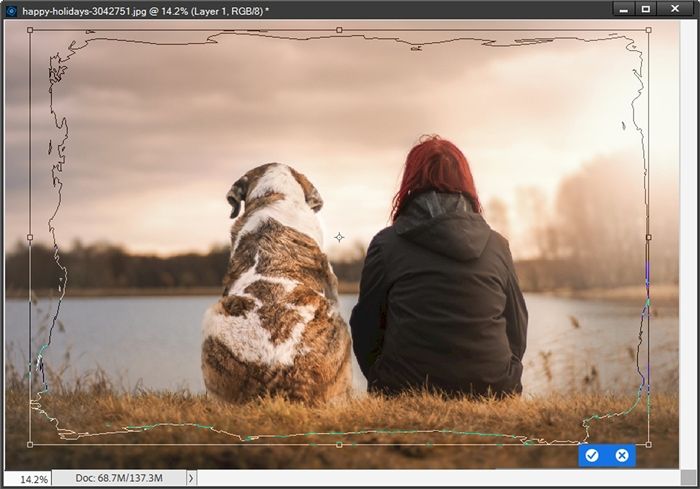
The Cookie Cutter tool actually immediately crops the photo to the shape as “drawn”. Because I didn’t hide the original photo, I can still see the entire image beneath the cropped photo. This helps me decide if I’m happy with the size and position of the shape in relation to the photo.
Using the bounding box anchor points around the shape I can resize it. If I place my cursor inside the box, I can move the shape. And if I hover the cursor over one of the corners until I see the double headed arrow (rotate cursor) I can even rotate the shape.
I’m happy to keep my shape in its current size/position so, I click the check mark to confirm and hide the original photo:
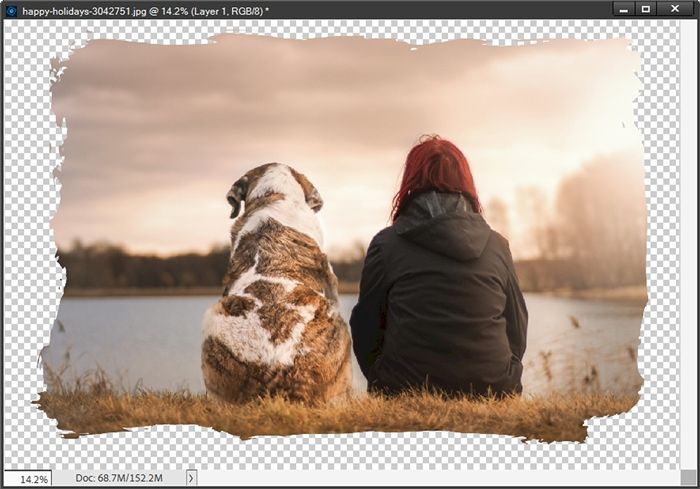
And there’s my photo with a ragged edge.
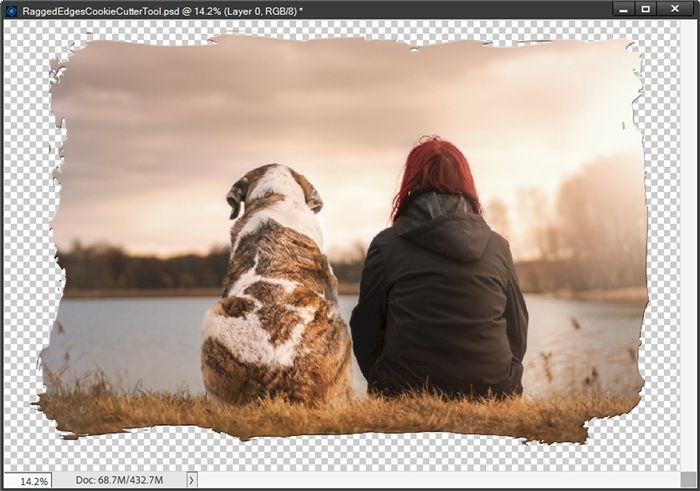
I want to add a light bevel to the cropped photo to make that ragged edge a bit more pronounced. With the cropped photo layer active, I go to the top tool bar and select Layer->Layer Styles->Style Settings.
PSE opens the Style Settings box and I click the Bevel box to open the bevel settings. I then set the Lighting Angle to 120 degrees, the Size to 10px and the Direction to Up. I click OK to confirm and here’s my photo with a more pronounced edge:
Alternatively, I could add a simple drop shadow (instead of the bevel) just as I did with the tag example above. Using the exact same settings of Lighting Angle 120 degrees, the color chip set to a dark grey (#4f4d4d), Size of 13px, Distance of 8px and Opacity of 50%, here’s how the photo looks now:
The shadow doesn’t have the same effect as the bevel. You can try both options and see which works best for you.
I can now crop this file to size and save it as a PNG file with a unique name. I named mine Woman & Dog Cropped. I don’t need to save this as a PSD file so I can close the file.
Now, you may be wondering, since I used the Cookie Cutter tool, am I restricted to using only Crop Shapes for this technique? The answer is absolutely not. I could have used any of the shapes in PSE. I only used the Crop Shapes group because I was going for a jagged edge look.
And I could just as easily have created a separate ragged shape (from any of the PSE shapes) using the “normal” Custom Shape tool and then just clipped the photo to it. Using the Cookie Cutter tool is just quicker.

But it won’t be so easy to create a ragged edge using the Cookie Cutter method (specifically the Crop Shapes) on the bottom edge of the tag I used in the first example. Specifically, because I don’t want to crop around the entire shape, only the bottom.
So, this is a time when I will create a separate shape to create the ragged edge. Before I do that, I need to duplicate the tag layer. Next, I change my Foreground color chip to a medium grey (#777676).
With the duplicate tag layer active I grab the Rectangle Tool and drag out a shape that will cover the bottom portion of the duplicate tag:
I simplify the new shape and reduce the opacity to about 30% so I can see the tag underneath. With the new shape active, I grab the Cookie Cutter tool, select Crop Shape #32 then click and drag over the tag where I want the shape to create the jagged edge:
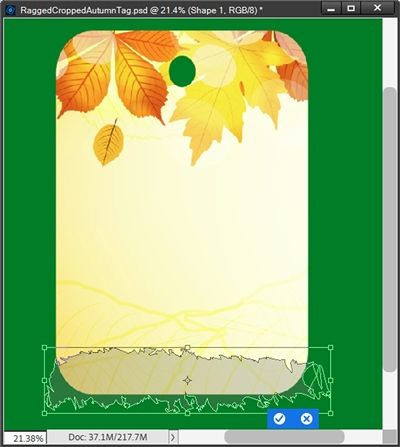
Note: Just to be clear, the top of the crop shape “outline” will become the jagged edge. If I wanted to use the bottom part of that “outline” I could rotate or simply flip the crop shape (Image->Rotate->Flip Layer Vertical) so the bottom edge would be at the top.
I’m happy with it the way it is. So, I click the check mark to confirm and return the opacity of that now cropped shape to 100%:
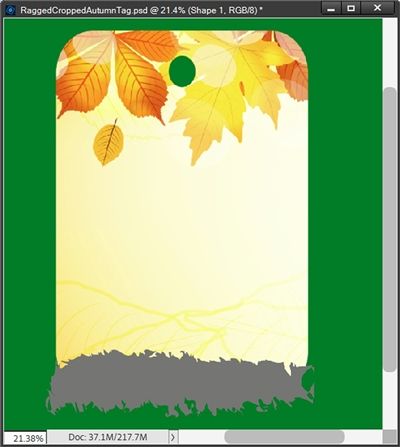
I know this looks like it’s not going to work with all that extraneous “stuff” hanging over the bottom of the tag. I’m going to fix that.
With the duplicate tag layer active I click on the shape layer’s thumbnail in the Layers Panel to make a selection around that shape:
I then hide the shape layer and press the Delete key:
And there’s my ragged edged tag. I could now apply the same shadow I used in the first tag example above.
It might initially feel like a few more steps than using the Waxy Crayon method but in the long run, it may actually be easier.
One last Cookie Cutter option before I let you go.
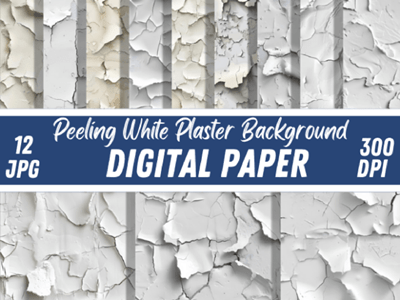
I’m sure you’ve probably seen papers that look cracked or like they are peeling. Something like these papers I found at Creative Fabrica:
Using the Cookie Cutter tool and one of the Crop Shapes it’s fairly easy to create this look.
I’m going to start with a blank 12×12 background (Layer 1). Then I’m going to pull in a nice textured whiteish paper from “Lighthouse” by Manu Scraps:
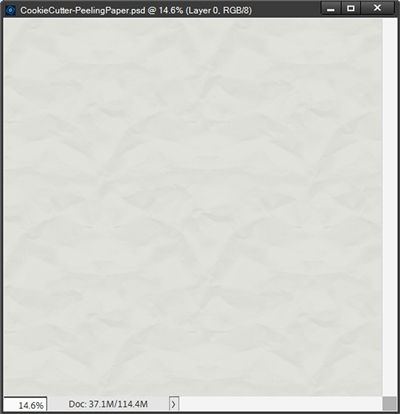
Because that paper isn’t a true white, I’m going to fill my blank background (Layer 1) with a very light grey (#e2e1dd) that coordinates with this paper. This will make sense in a bit.
I need to simplify the textured paper layer since I’m going to be cropping an image out of it. Remember, when we pull most any papers/elements into PSE they come in as a Smart Object. PSE will not let us apply certain edits using filters or most tools directly on a Smart Object.
Now I can grab my Cookie Cutter tool. This time I’ll be using Crop Shape 22 and I just click and drag out a shape to the size I want and rotate it just a bit so it’s not tilted:
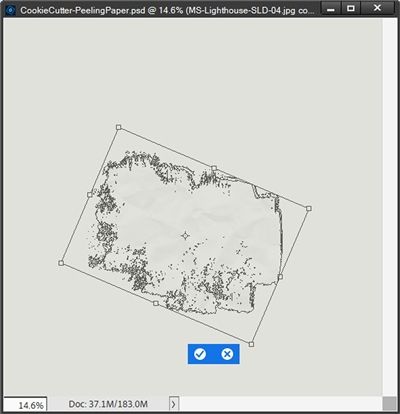
Then I click the check mark to confirm and the textured paper has been cropped to that shape:
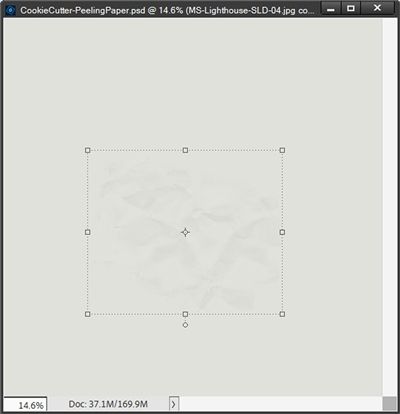
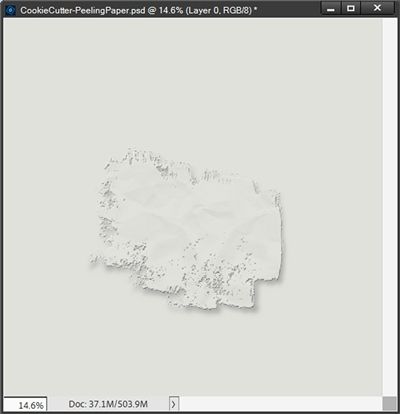
You should be able to see some of the texture within the bounding box in the image above. Now, I know it’s hard to differentiate between the textured paper piece and the grey background I created. But that’s exactly why I used that color of grey for the background.
I’m going to rename that cropped paper piece layer to Ragged Piece. Now, I’m going to add a shadow (on its own layer) to the Ragged Piece layer and warp it so it appears lifted off the paper in spots.
Note: If you need pointers on placing a shadow on its own layer and warping it, please refer back to my “Stitching Realism” post from August of 2024.
To do this I created a drop shadow to approximate a Lighting Angle of 120 degrees. I used a medium grey (#808080) with a Gaussian Blur of 20 pixels and setting the Opacity level of the shadow layer to 40%:

Now you can clearly see that ragged piece of paper! It looks nice but I do want to add a light bevel to the Ragged Piece to make that ragged edge a bit more pronounced.
With the Ragged Piece layer active, I go to the top tool bar and select Layer->Layer Styles->Style Settings. PSE opens the Style Settings box and I click the Bevel box to open the bevel settings. I then set the Lighting Angle to 120 degrees, the Size to 6px and the Direction to Up.
I click OK to confirm and here’s my Ragged Piece with a more pronounced edge:
From here I could do one of several things. I could pull in another copy of that original texture paper and make another piece of cropped paper using the same steps above. Or I could use that additional piece of paper and use a different Crop Shape. Either way I would need to do that for however many additional ragged pieces I want!
But the easiest thing is to just duplicate the current ragged piece (including the shadow) as many times as I want then re-size and/or rotate them in a somewhat haphazard fashion then scatter them around to create the look I like.
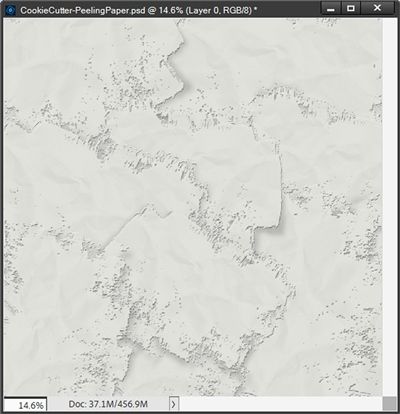
Doing that…I ended up with this:
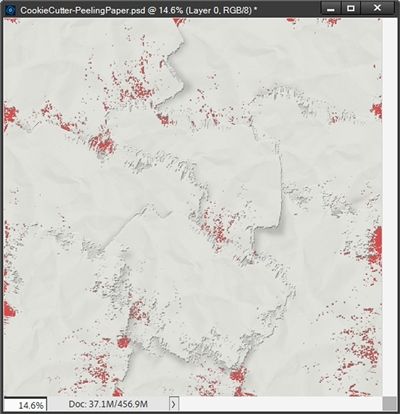
I placed a red layer over the original grey layer so you could more easily see that the scattered shapes do not overlap completely. When I remove that red layer, you’ll see why making that original grey layer the “base” was a good idea:
But it might actually be fun to put a different color, or even a completely different patterned paper beneath for an even more interesting effect!
Note: I did modify the warp on some of the Ragged Pieces’ shadows as I moved, re-sized and rotated them.
I hope you’ve enjoyed learning about creating ragged/tattered edges and will give it a try.
Final Tips

You can do more with a ragged/tattered edge effect than just trimming the bottom of a tag. Don’t be afraid to let your imagination take you on a creative journey and create a layered, tattered edge paper!
If you’re working with a small element such as the tag I used today, don’t be afraid to increase the size significantly when creating the ragged/tattered edge. Having more surface area with which to work makes the clean up process a bit easier.
Using the Waxy Crayon effect can become a bit tedious but trust me it is worth the effort.
While cleaning up any extraneous bits after using the Waxy Crayon, remember that the stroke will not be erased. Use the remaining stroke as a guide while trying to make the “tatter” seem more authentic.
Using the Cookie Cutter tool is a fabulously quick way to crop more than just photos. Experiment with creating unique cropped shapes that can be used as photo mats or simply interesting elements on a layout.
Don’t forget, you can use any standard PSE shape with the Cookie Cutter. You’re not limited to using only the Crop Shapes I showed you today.
If you decide to play around with the ragged paper pieces, be sure to put any shadows on their own separate layer. This will give you the opportunity to warp the shadows adding more lift to the piece in question.
Try creating a ragged/tattered edge on multiple background papers and then stacking them to create a lovely layered “tatter”.
As always…just have fun!
Thanks for reading this week’s Tuesday Tip. Remember, if you have any suggestions or questions please don’t hesitate to “Message Me“. Check back next week for another tip about a grunge overlay. Click “Follow Me” to stay in touch. I hope you have a wonderful week!
