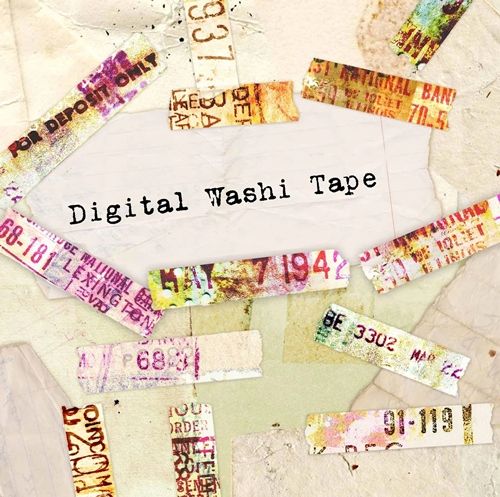
Washi Tape
So, in last week’s post I showed you how to create your own custom tape from a piece of paper. This week I want to talk about washi tape. I’ve run into more than a few scrappers over the years that didn’t really understand (or appreciate) how washi tape differs from other tapes. Once someone boldly asked, “What on earth is washi tape anyway?”

Washi itself is actually a traditional Japanese paper that has been used in the daily lives of Japanese people since ancient times. These Japanese papers are made by hand using the bark of deciduous shrubs: usually the paper mulberry, the Oriental paper bush and the gampi.
Washi is used not only for writing paper but also in things like shoji sliding doors and lanterns due to its durability. Today some Japanese documents still exist that were written on washi 1,000 years ago!
Actual washi tape is a decorative, low-tack, masking-style tape made from that traditional paper. In its non-digital form, it’s easily torn, removable and repositionable (kind of like post-it notes), making it ideal for crafting, journaling, gift wrapping and decorating surfaces without leaving any residue.
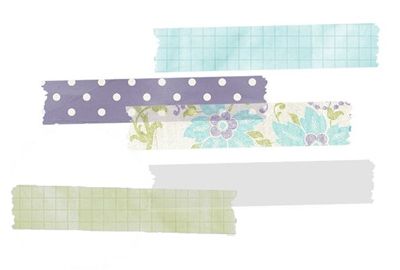
Most often digital washi tape is semitransparent though some designers create washi that is not transparent. The best part about transparent washi is that you can stack layers creating different colors or patterns.
Now let’s create some digital washi tape…
Translucent Paper
Just a quick reminder. I use Photoshop Elements (PSE) 2024. If you use a different version, some of my screen shots may look different from what you see on your screen.
As I mentioned above, “real” washi tape is typically made from washi paper which is most often rather translucent. So, that is the ultimate goal for the washi tape I’ll be creating today.
As with the custom tape I created last week, I can use most any piece of paper I choose. It can be patterned or solid. And I could use any tape shape that I have or create one on the fly. Today I thought it would be fun to show you how I quickly create a simple tape.
Note: Traditional washi tape is not shiny or glittery. Therefore, I highly recommend against using papers in either of those categories. If you think about it, neither glitter or any shiny paper would present well in a translucent form.
I don’t often see wrinkled translucent washi tape in real life. That doesn’t mean it doesn’t happen. It’s just not the norm. More importantly, wrinkled tape shapes like the one I used last week will not work well with the technique I’m about to demonstrate.
Creating translucent wrinkled washi tape is not an easy task unless you have some “clear” wrinkle brushes or overlays.
I’m going to start off a bit differently than normal. Today I’ll open a new 4×4 file with a white base in PSE. Because I’m creating a small element, I really don’t need much more room than this:
Note: I’m using a white background so you can see the shape better. And you can use whatever size background you like.
Because I want my tape shape to be on its own layer, I click the Create a new layer icon in the Layers Panel. PSE places that new layer (Layer 1 for me) above the white background.
Ensuring that Layer 1 is the active layer, I grab the Polygonal Lasso Tool and draw my washi tape shape as a selection:
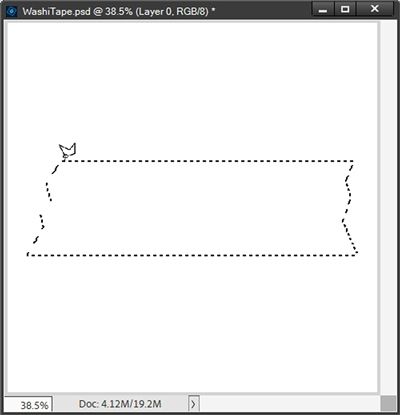
You don’t have to draw the exact same shape. Go big, go small, go skinny, go fat, go long, go short, whatever suits your project. You could actually use just a simple rectangle if you like.
Note: When drawing your selection, press and hold the Shift key to get a straight edge.
I plan to use this tape shape as a clipping mask so I’m going to fill it with black by pressing Alt+Backspace:
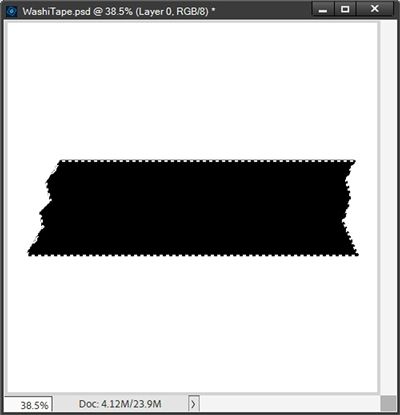
Note: My Foreground/Background color chips were set to the default of B&W. You can fill your shape with any color you choose.
I clear the selection (press Ctrl-D or Esc) and set the Opacity of Layer 1 to 80%. Changing the Opacity is the real key to creating translucent washi tape. You likely won’t notice a huge difference in the color of your tape shape but be patient.
Now I’m going to open the same polka dot pattern I used last week and pull that paper into my file:
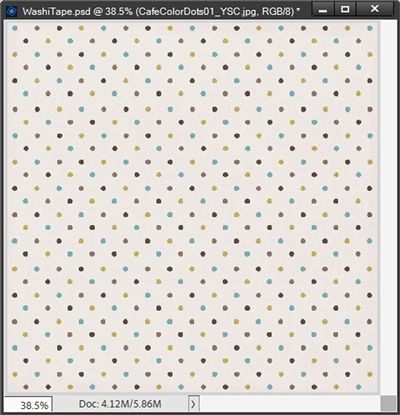
Note: You can use any paper that you like, including solids and even textures. But just as last week, try to avoid papers with large patterns, as they will be hard to see on the small piece of tape.
If you’d like to use this exact paper but didn’t download it last week, just click here and it will be automatically downloaded for you.
The polka dot paper should be directly above the tape (Layer 1) in the Layers Panel. I clip the pattern to the tape layer and hide the white background:
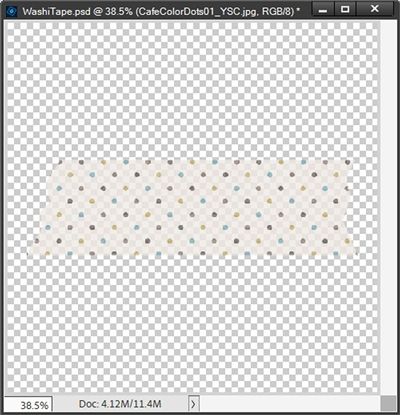
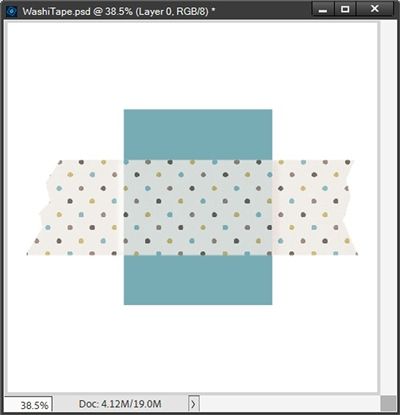
You should be able to notice that after clipping the paper to the tape, not only did the paper lighten, I’ve now achieved some translucency.
To emphasize just how translucent the “tape” is I’m going to create a simple rectangle shape beneath the tape shape (Layer 1):
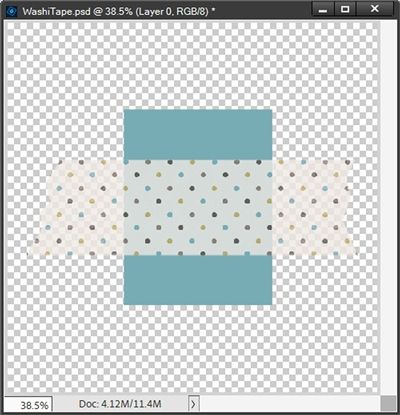
You should now be able to easily see how translucent the tape is. Because I used a clipping mask, I can make this tape as solid or transparent as I like. If I adjust the Opacity of the tape shape (Layer 1) to 60%, this is what happens:
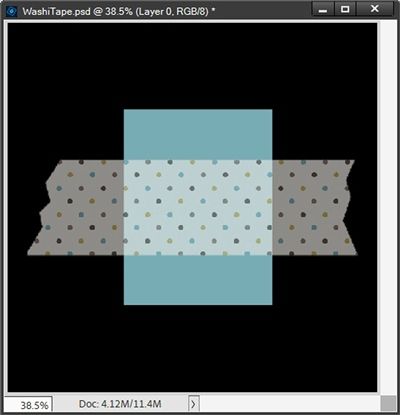
I added the black background so you could more easily see the difference.
Note: You can play around with the Opacity to get the translucency that you desire.
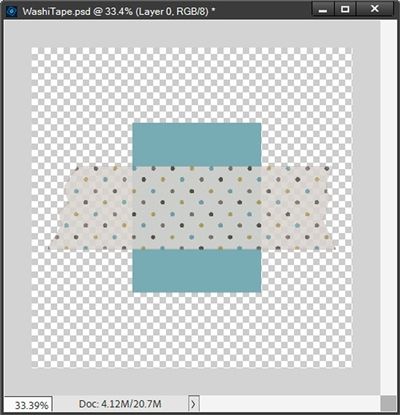
I’m going to hide that black background for now and go back to the original opacity with the blue rectangle behind:
Before I close out for the day, I want to talk about adding realism to translucent washi tape.
First things first, I don’t normally add a shadow to translucent washi tape. In real life, washi tape is typically thinner than a standard piece of printer paper. So, regardless of what I attach it to, it’s not going to be lifted far enough off the paper/object to warrant any shadow.
When I deem a shadow to be necessary, I ALWAYS place it on its own layer and make it very subtle (Size=4, Distance=zero, Opacity=65% and Color=#7b7b7b). If you read my “Tricky Shadows” post back in October of 2025, you already know why.
If I were to place a “normal” shadow (even a tiny one) on the translucent tape, this would happen:
You should be able to see that all the shadow really did was make the tape darker! I certainly don’t want that. So, if you ever believe a shadow is necessary, please refer back to that “Tricky Shadows” post if you don’t already know how to properly shadow transparent items.
Shadow or no shadow; transparent tape or not, I still want that extra touch of realism that I showed you in last week’s “Custom Tape” post.
Contrary to how I feel about a shadow for the tape, I definitely still want to see where the tape “bends” over the blue rectangle. In real life, that rectangle would be considerably thicker than the tape. So, creating that bend adds just the right amount of realism to the tape.
I can use the exact same dodge & burn techniques I used last week to create the bend(s) that occur wherever the tape crosses the item to which it is attached:
Note: I put the white background in so you could more easily see the bends on either side of the blue rectangle.
And just as last week, I won’t apply these realism touches until the tape is actually in place on my project.
I’m going to hide that blue rectangle and go back to the original opacity:
I can now crop the file to size and save this polka dot tape as a PNG file with a unique name. This translucent washi tape will then be ready for use on any project I choose.
I could go on to save the file as a PSD so I can make other tapes of the same shape in the future. But it actually makes more sense to save just the “clipping mask” (tape shape) as a PNG. It will retain the opacity I chose (currently 80%) and I could clip other papers to that shape and retain the translucency. I hope that all makes sense!
And here’s a look at a layout where I used some of my other washi tapes:
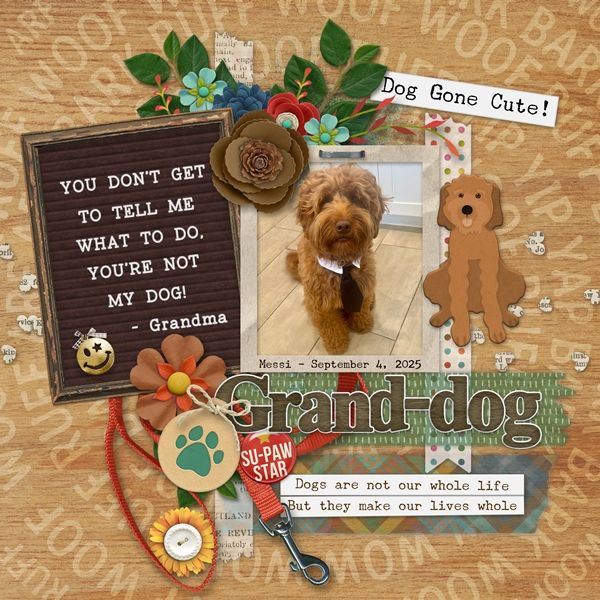
If you’d like to see more details about this layout you can find it in my 2026 Gallery. The title of this layout is “Grand-dog”.
Extra Tips
The beauty of washi tape (translucent or not) is that you can literally use just about any paper that you like. Patterns, solids, textured…almost all of them should work. And you may be wondering why. It’s because real tangible washi tape is made from what? It’s literally made from paper!
Remember, traditional washi tape is not shiny or glittery. It’s a good idea to avoid using either of those papers as they don’t present well in a translucent application.
Play with the opacity level of the tape shape itself to get varying degrees of translucence. Starting out with an 80% opacity is generally the best but you’re not limited to that!
You can use any tape shape you have on hand. Wrinkled tape shapes will not work easily using today’s technique. If you have a wrinkled tape that you really like the shape of, just fill it with a solid color and still use the shape with this technique.
Don’t forget to experiment with layering two pieces of washi tape on top of each other. Especially if at least one of them is translucent. This can lead to a lot of different colors and/or patterns!
If you really want to add a shadow, remember to place it on its own layer and make it very subtle.
Always remember this…Ideas come from everything! – Alfred Hitchcock
Thanks for reading this week’s Tuesday Tip. Remember, if you have any suggestions or questions please don’t hesitate to “Message Me“. Check back next week for tips about creating translucent wrinkled tape. Click “Follow Me” to stay in touch. I hope you have a wonderful week!
