Wrinkled Washi
So, in last week’s post about Washi Tape I mentioned that I almost never see wrinkled washi tape in real life. That doesn’t mean it can’t happen. It’s just not the traditional use. I also said that it isn’t very easy to create translucent wrinkled washi tape. What I didn’t mention is that some designers actually create wrinkled washi tape…even some that are translucent.
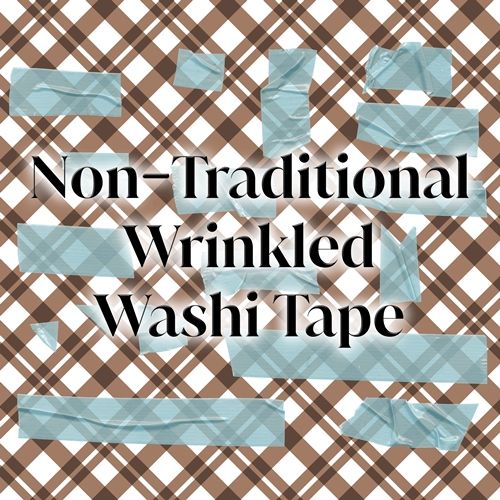
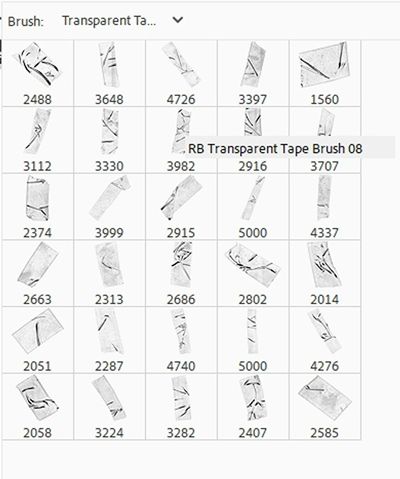
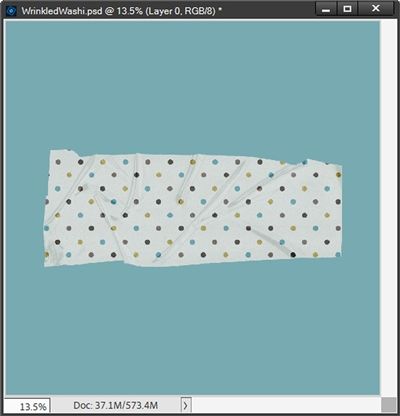
Note: The image directly above is a selection of wrinkled washi tapes (all now retired) that were created by different designers.
You should be able to tell that each of the wrinkled tapes in the image above are somewhat translucent. Each of those tapes were created using a combination of semi complex shadows and shine (or highlights) along with the paper.
I can get on board with wrinkled washi but I’m not a fan of the shine in the examples above. You have to stop and consider that traditional washi tape is made from washi paper. That Japanese washi paper does not have a sheen to it. That’s why last week I recommended against using shiny/glittery paper.
Even though I’m rather a “purist” when it comes to washi tape in general, I will admit I’ve used a piece or two of wrinkled washi from time to time. So, today I’ll show you a few different ways I use to create some wrinkled washi tape.
Brushes & Overlays For Wrinkled Washi
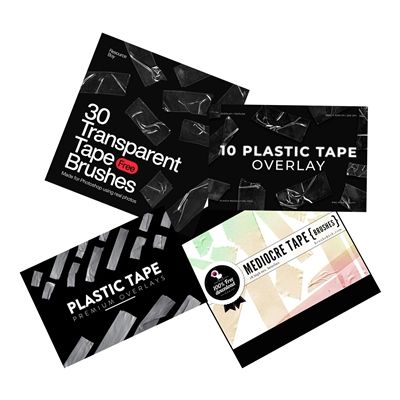
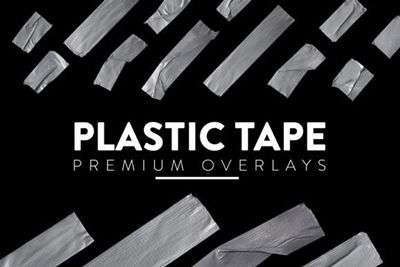
In my experience most “home” scrapbookers don’t want to fool with using a combination of semi complex shadows and highlights to create wrinkles. That’s why we use brushes and overlays. But even with those it’s not a quick task to create wrinkled washi tape.
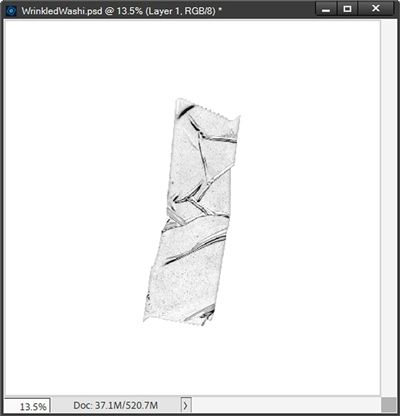
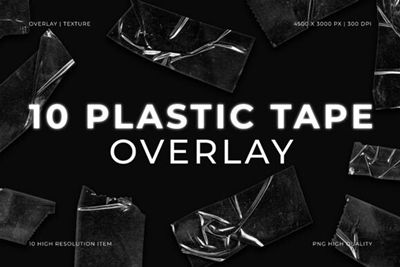
In the image directly above you can see a few of the wrinkle brushes and/or overlays out there that will work well on tape.
I’ll be using a couple of these to show you how to create translucent wrinkled washi tape.
Using Brushes
Just a quick reminder. I use Photoshop Elements (PSE) 2024. If you use a different version, some of my screen shots may look different from what you see on your screen.
I’m going to start off in what is typically my normal way by opening a new 12×12 file with a white base in PSE:

Note: Today I went with a 12×12 background because some of the brushes/overlays I’ll be using are large so I’ll need a bit more room this time.
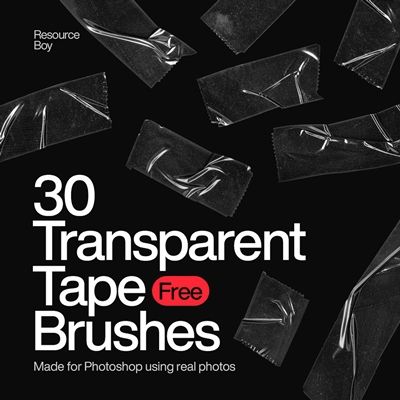
For this first example I’m going to be using a free brush from “30 Transparent Tape Brushes” by Resource Boy. You can find this free brush set at My Photoshop Brushes:
Note: If you already have some other transparent tape brushes, feel free to use whatever brush you like.
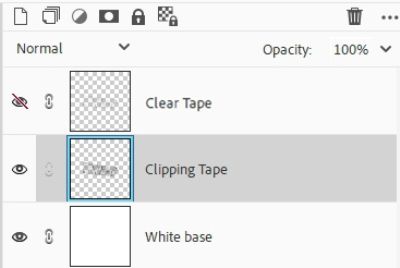
I want to place my tape brush on its own layer so I click on the “Create a new layer” icon in the Layers Panel. PSE creates a new blank layer (named Layer 1 for me) directly above the white base. I rename this layer to Clear Tape. Next, I ensure my Foreground/Background color chips are set to the defaults of B&W (press D).
I already have this brush set installed on my system so I select the brush tool and locate the brush set named “Transparent Tape Photoshop Brushes”:
I select the third brush from the left in the second row “RB Transparent Tape Brush 08” (shows a size of 3982).
Note: Depending on the version of PSE that you’re using and any underlying tool specific limits, this brush may load at a smaller size like 2500px.
At a size of 3982px, this brush will be entirely too large. Even if it shows up in the tool options with a smaller size such as 2500px, it will be larger than what I need. So, in the tool options I’m going to set the size to 2200px:

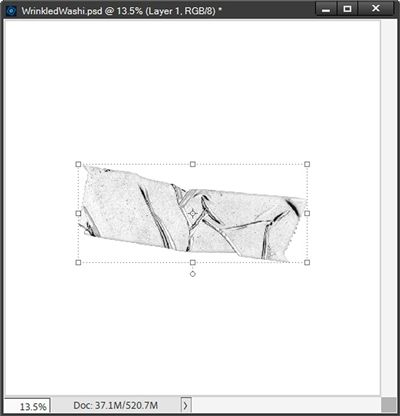
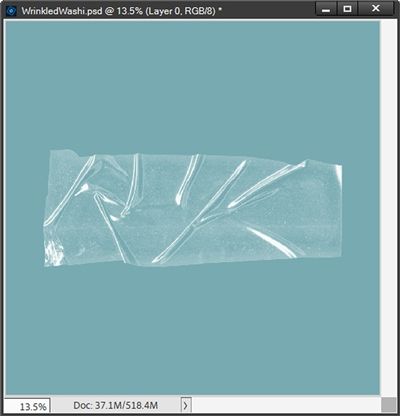
Then I place my cursor near the center of the file and click once and PSE creates the tape shape:
I prefer to work on tape in a horizontal position so with the Move tool selected, I rotate the Clear Tape layer 90 degrees to the right:
Note: You don’t have to rotate the tape. You can use it in whatever orientation works best for your project.
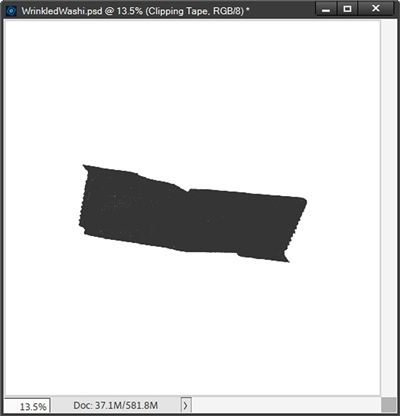
I’m certain that by now you’ve noticed this tape is definitely not clear. This is perfectly fine. I ultimately need to create a solid version of this tape shape to use as a clipping mask just as I did last week.
The next thing I need to do is duplicate this shape and hide the original Clear Tape layer. I rename the duplicate to Clipping Tape. Then I duplicate this new layer three times giving me a total of four Clipping Tape Layers. My Layers Panel currently looks like this:
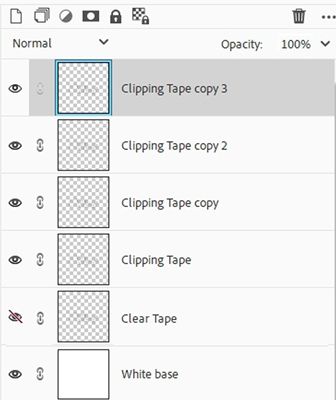
The top Layer (Clipping Tape copy 3) is active and while holding down the Shift key, I click on the Clipping Tape layer making all four layers active.
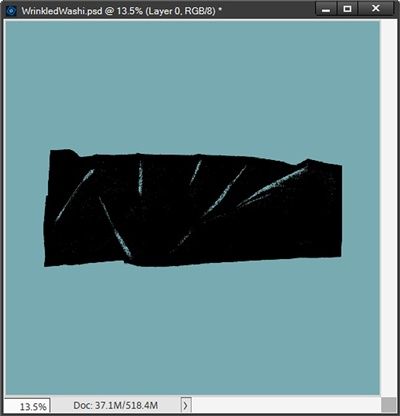
I merge those 4 layers together resulting in a layer named “Clipping Tape copy 3”. I rename the new layer to Clipping Tape and move it below the Clear Tape layer in the Layers Panel:
What I have now is just a darker version of the original tape shape:

I still need to make this solid so it will work properly as a clipping mask. If I were to clip a paper to this as it is right now, I’d end up with something like this:
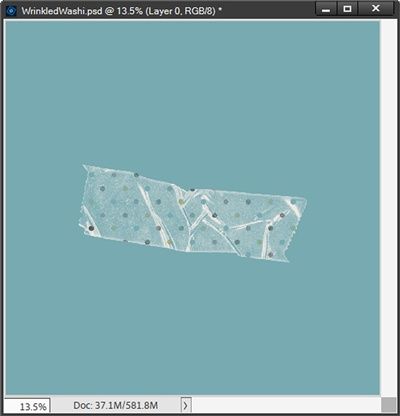
I added the blue background only so you could see the result better. Don’t get me wrong…this is a totally acceptable piece of transparent tape. But for me, this isn’t translucent washi.
Note: If you are happy with the very transparent result you’ve achieved, feel free to hide the background, crop the file to size and save it as a PNG file.
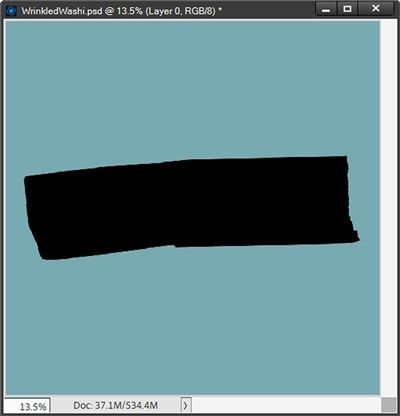
To get a better washi effect I’m going to turn that Clipping Tape layer completely black. I ensure that the Clipping Tape is the active layer and my color chips are at the default (press D). I then select the Paint Bucket tool and click somewhere inside the tape shape:
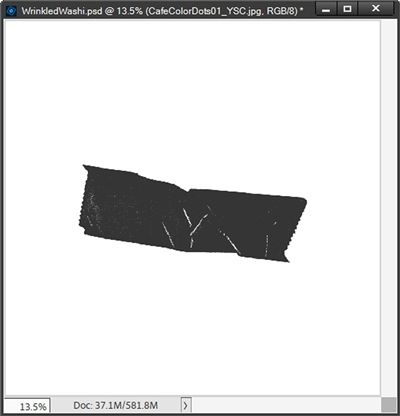
I’m sure you can see the white (empty) “wrinkles” that remain. If I don’t fill all those spots in, this would result in “holes” in the tape when I clip the paper. And I certainly don’t want that.
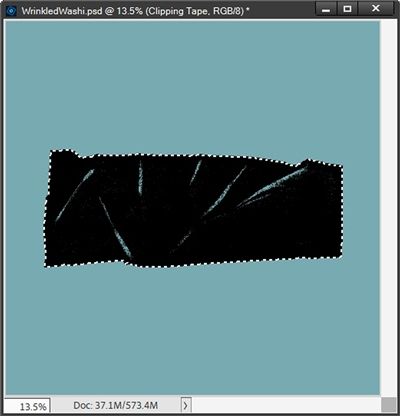
Sadly, it’s not a simple matter of just continuing to use the Paint Bucket to fill those empty spots. Instead, I need to simply Ctrl-Click on the thumbnail of the Clipping Tape layer to create a selection outline:
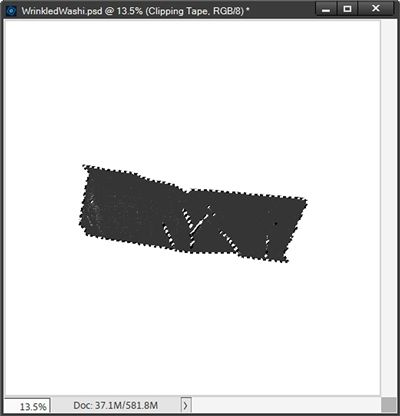
Yes, those empty spots have marching ants around them. And I need to remove the marching ants around those spots so they become part of the selection.
So, I grab the Selection Brush tool and click on the “Add to selection” icon in the tool options. Then I select a hard round brush and set the size to about 125px.
I then just brush over all the marching ants inside the tape so I’m left with only an outline of the tape shape:

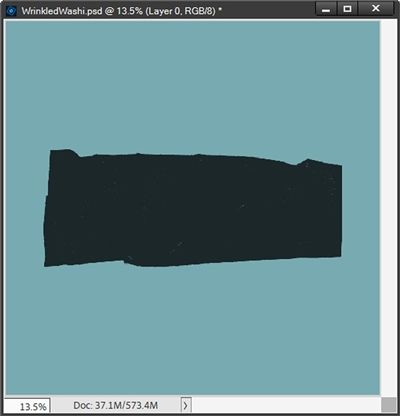
Now I can fill this completely with black by pressing Alt+Backspace and clear the selection (press Ctrl-D or Esc):
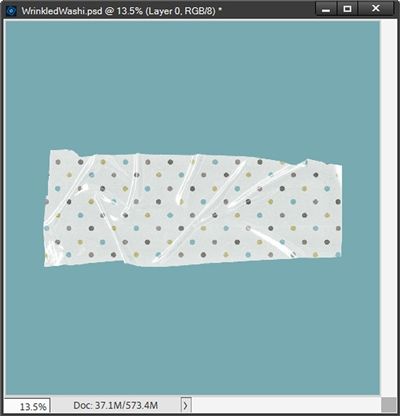
Just as I did last week, I set the Opacity of the Clipping Tape layer to 80%. Now I’m going to open the same polka dot pattern I used last week and pull that paper into my file:
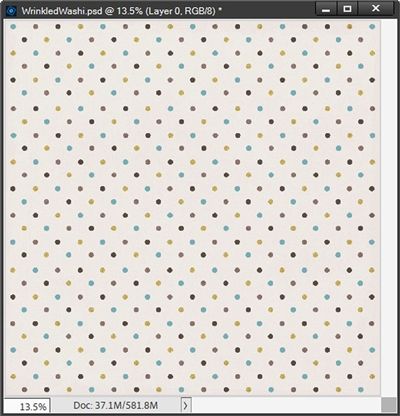
Note: You can use any paper that you like, including solids and even textures. But just as last week, try to avoid shiny/glittery papers or ones with large patterns.
If you’d like to use this exact paper but haven’t downloaded it yet, just click here and it will be automatically downloaded for you.
Since the Clipping Tape layer was the active layer, the polka dot paper should be directly above it in the Layers Panel. I clip the pattern to the layer and add the blue background:
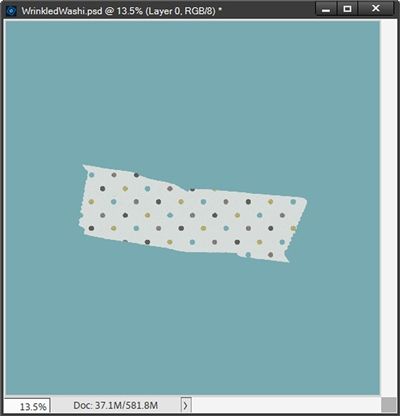
Yes, there are no wrinkles just yet. But that will be the easy part 😊
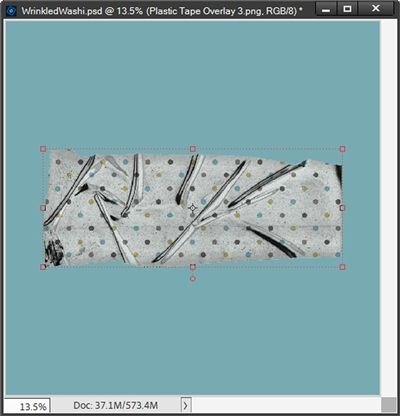
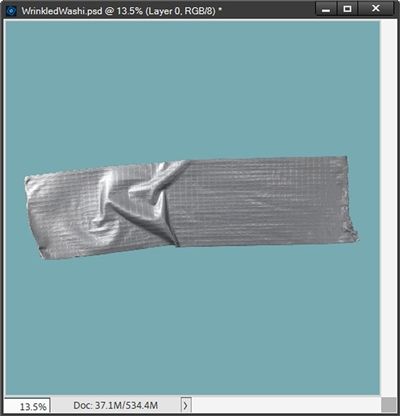
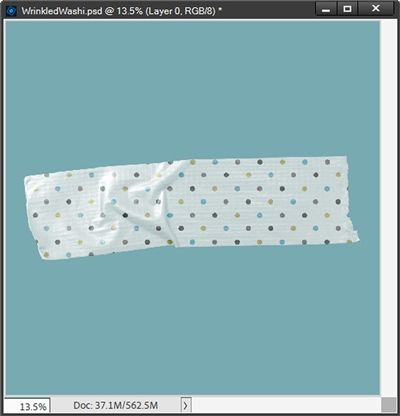
All I have to do now is unhide the Clear Tape layer and set the Blend Mode of that layer to Overlay:
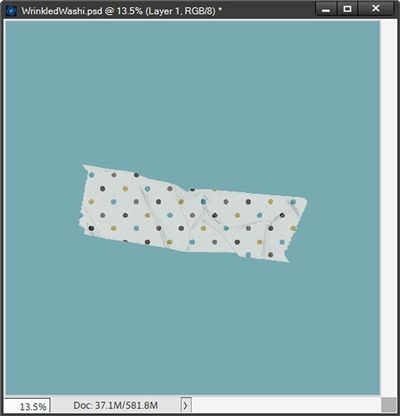
I now have a piece of wrinkled washi tape without the shine I see in some of the designers’ tapes.
Note: You can play around with the Opacity to get the translucency that you desire.
I can now hide the background, crop the file to size and save this wrinkled polka dot tape as a PNG file with a unique name for use on any project I choose.
Since there were so many steps involved using a brush, I am also going to save this as a PSD in case I want to make other tapes of the same shape using different papers.
Using Overlays
I’m going to go back to the 12×12 file with the blue base:
For this next example I’m going to be using a set of transparent plastic tape overlays I found at Creative Fabrica:
Note: If you already have some other transparent tape overlays, feel free to use whatever overlay you like.
I am using the overlay named “Plastic Tape Overlay 3” from the set shown above. I pull that overlay into my file directly above the blue base. As with the brush, this overlay is a bit too large so I immediately re-size it so it’s about 80% the size of the original:
Working with this overlay is going to be more straightforward than using the brush. This won’t be much different than how I created the washi tape last week.
As you can see this tape is definitely clear but it is a bit shiny. This is perfectly fine for now. But once again, I need to create a solid version of this tape shape.
So, I duplicate this shape and hide the original. I rename the duplicate to Clipping Tape, simplify the layer and move it below the original in the Layers Panel.
I ensure my color chips are still set to the defaults of B&W (press D). This time I can immediately grab the Paint Bucket and fill this shape with black:
I’m sure you can see the white (empty) “wrinkles” again. So just as I did with the brush above, I simply Ctrl-Click on the thumbnail of the Clipping Tape layer to create a selection outline.
I then grab the Selection Brush tool, a hard round brush (125px) and just brush over all the marching ants inside the tape so I’m left with only an outline of the tape shape:
Now I can fill this completely with black by pressing Alt+Backspace and clear the selection (press Ctrl-D or Esc):
Just as above, I set the Opacity of the Clipping Tape layer to 80% and clip the same polka dot paper to the layer. I then unhide the original overlay:
Yes, that looks a bit shinier than I like. But this is an easy fix. I simplify the overlay layer and invert the color (Ctrl+I):
Scary looking right? Just watch…I set the Blend Mode to Overlay and the Opacity to 80%:
Once again, I now have another piece of wrinkled washi tape without the bright sheen I see in some of the designers’ tapes.
Note: Again, play around with the Opacity on both the clipping mask and the overlay to get the translucency that you desire.
I can now hide the background, crop the file to size and save this wrinkled polka dot tape as a PNG file with a unique name for use on any project I choose.
Wrinkled Tape Element
Wrinkled tape shapes like the one I used a couple weeks ago in my “Custom Tape” post can actually be used to create translucent wrinkled washi tape. It’s just not quite as straightforward as creating “solid” wrinkled tape.
I’m going to go back to the 12×12 file with the blue base I used above:
Just as with the custom tape two weeks ago, it is important that I use a grey colored piece of wrinkled tape as my “base” for translucent washi tape.
For this example, I’m going to be using a set of plastic tape “overlays” I found at Creative Fabrica:
Note: I’m not 100% certain why the designer specifically called these overlays. I use them as I would any other tape element.
I am using the overlay tape numbered simply “12” from the set shown above. As with the brush and clear overlay, this tape is a bit too large so I immediately re-size it so it’s about 90% the size of the original:
Note: If you’re trying to follow along, you can use any “solid” wrinkled tape you’d like…just be sure that it is grey.
Just as with the overlay method, I need to create a solid version of this tape shape. So, I duplicate this tape overlay layer and hide the original. I rename the duplicate to Clipping Tape, simplify the layer and move it below the original in the Layers Panel.
I again ensure my color chips are set to the defaults of B&W (press D). This time I can simply Ctrl-Click on the thumbnail of the Clipping Tape layer to get a selection outline, press Alt+Backspace to fill the selection with black and clear the selection (press Ctrl-D or Esc):
This time I set the Opacity of the Clipping Tape layer to 70% and clip the same polka dot paper to the layer. I then unhide the original tape overlay layer and set the Blend Mode of that layer to Overlay:
As I said earlier, I’m not a fan of a shine on washi tape. This one isn’t too bad but I am going to lower the Opacity of the original tape overlay layer to 75% to cut down on the sheen before I save this tape as a PNG file.
Before I close out for the day, just a reminder about adding realism to translucent washi tape.
First, I don’t normally add a shadow to translucent washi tape. If I do, it’s ALWAYS on its own layer and very subtle.
Secondly, remember the extra touch of realism that I showed you in my “Custom Tape” post; creating the bend(s) that occur wherever the tape crosses the item to which it is attached.
Final Tips

True traditional washi tape has no shine to it. Remember that when creating wrinkles! You want you’re wrinkled washi to look as realistic as possible!
Avoid shiny or glittery paper as they don’t present well in a translucent application. And Glitter presents even less nicely when wrinkled or folded.
Play with the opacity level of the clipping shape itself to get varying degrees of translucence. Starting out with an 80% opacity is generally the best but you’re not limited to that!
If you created your wrinkled tape with a brush and plan to save the file as a PSD, you might want to include the name of the brush used to create the original tape shape. Just name that “brush” layer using the name of the brush set and the exact brush used.
If you’re using a wrinkled tape that is a color other than grey, change it to a medium shade of grey. Otherwise, it will not work as a “clear” overlay.
If you really want to add a shadow to your wrinkled washi tape, remember to place it on its own layer and make it very subtle.
Don’t forget to add the extra realism of the “bends” when applying your tape to another element on the layout.
The brushes and overlays I used today to create wrinkles aren’t exclusive to creating washi. You can just as easily use them when creating other tapes!
Creative isn’t the way I think; it’s the way I like to live. – Paul Sandip
Thanks for reading this week’s Tuesday Tip. Remember, if you have any suggestions or questions please don’t hesitate to “Message Me“. Check back next week for tips about using offset circles. Click “Follow Me” to stay in touch. I hope you have a wonderful week!
