Photo Tags
I don’t know about you but sometimes I have a lot of photos that I want to include in a single layout. I don’t necessarily need the entirety of each photo, just the primary subject(s). Using photo tags is a fun way to highlight these photos without filling up the entire page.
Grab a few photos and let’s get to work…
Special Download
I don’t normally put together an assortment of supplies for a given post. But I wanted to gift you something special today. I have created an assortment of tag shapes and strings along with one piece of kraft paper for your use.

If you click here, a compressed zip file named “PhotoTagDownload” will automatically download for you. These items should help you follow along fairly easily. If you have any problems with the download please Message Me and I’ll try to get it straightened out for you as soon as I can.
You can still use any of your own supplies if you’d prefer. But either way, the download is yours to keep.
Build The Tag
Before I get started here’s a quick reminder. I use Photoshop Elements (PSE) 2024. If you use a different version, some of my screen shots may look different from what you see on your screen.
I’m going to start by opening a 12×12 file with a white base in PSE. Then I drag one of my tags (BasicBlankTag01_YSC) into the file:
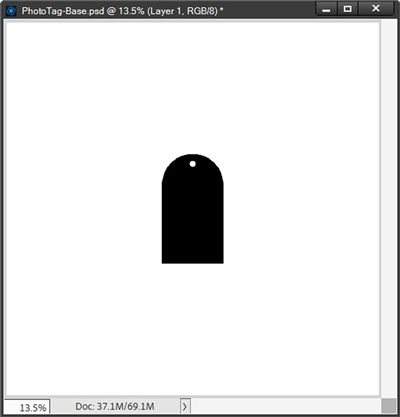
Note: Feel free to use any one of the tags included in the download. If you’re using a tag from your stash vs. one from the provided download, be sure to choose a tag large enough to fit the subject of your photo. Try to stick with a simple, mostly rectangular shape for now.
The tag I’m using is a bit small for demonstration purposes so I’m going to zoom in fairly close. This will give me a lot more room to work with. And, you’ll have a better view of things as I move forward.
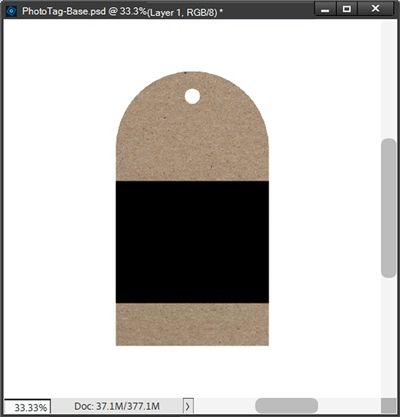
This black tag isn’t very pretty so it’s time to pull in my kraft paper (BasicKraftPaper_YSC) and clip it to my tag in the Layer’s Panel:

Note: If you’re not using the download files, feel free to use whatever paper you like. Just pick something that will look nice with your photo(s).
Before moving on I want to simplify my tag by merging the kraft paper with the black tag:

If you’ve been following me for a while, I know you’re probably shocked that I didn’t duplicate those layers before merging them. I didn’t feel it was necessary in this particular case because I no longer need the black tag as a separate layer.
I’m not going to fill the tag with my photo. I want to leave some space on the tag both above and below the photo. I know I’ll likely want at least some text below the photo. So, I need to add a clipping mask to the tag.
Clipping Mask
I can add the clipping mask in a couple different ways. I can use either the Rectangular Shape tool or the Rectangular Marquee Tool to create the desired size/shape. I’m guessing most people would use the Rectangular Shape tool. So, I’m going to show you how using the Rectangular Marquee Tool can be better.
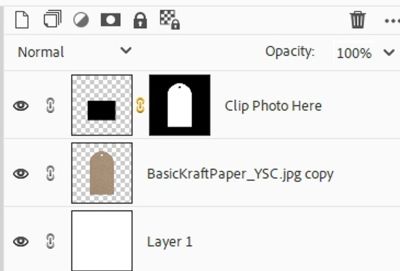
With the tag layer active in the Layers Panel, I click on the Create a New Layer icon. PSE creates a blank layer named Layer 1 (at least for me). I rename this layer to “Clip Photo Here”.
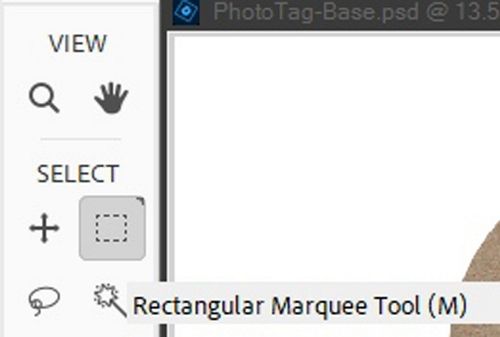
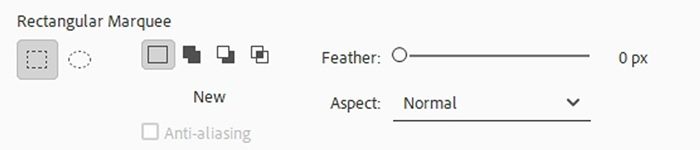
Then I select the Rectangular Marquee Tool (press M):
In the Tool options, I click on the New Selection icon, set the Feather to 0 and the Aspect to Normal (these seem to be the defaults):
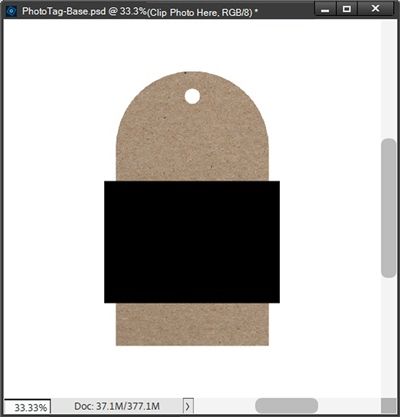
On the file, I position my cursor starting outside the left boundary of the tag at the uppermost desired point on the tag. I then drag a selection as tall as desired and outside the right boundary of the tag:

I ensure the “Clip Photo Here” layer is active in the Layers Panel and that my Foreground/Background color chips are at the defaults. Then I press Alt+Backspace and PSE fills the selection with black. I then cancel the selection (Esc or Ctrl-D):
Clearly, I won’t clip a photo to this clipping mask at that size. That means I now need to re-size it. But I want to easily ensure that it stays at the same height and is precisely the same width as the tag.
And here’s the best way to do this. With the “Clip Photo Here” layer active in the Layers Panel, I Ctrl-Click on the thumbnail of the tag layer to get a selection outline:
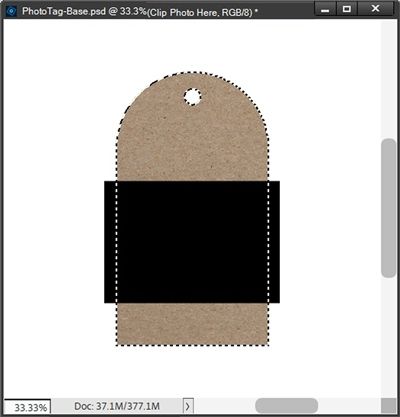
I then click on the Add Layer Mask icon in the Layers Panel. PSE creates a Layer Mask that is black with a white tag shape:
And my clipping mask/tag now looks like this:
At this point I can simplify the “Clip Photo Here” layer since I really won’t need the Layer Mask for anything later.
So, exactly how is this better than using the Rectangle Shape Tool? By creating a Marquee selection larger than the tag I can ensure that the clipping mask will cover the full-width of the tag, no matter the shape of the tag. It’s not always easy to create a precise shape with the Rectangle tool without a lot of zooming in and potentially re-sizing.
And yes, truthfully you could do the exact same thing if you create a rectangular shape that is wider than the tag. I just wanted to show you there’s an alternate method!
Add Photo
Now it’s time to add a photo to the tag. I’m using a photo of a sweet little “valentine” girl that I found on Pixabay:

Note: You can use any photo you like.
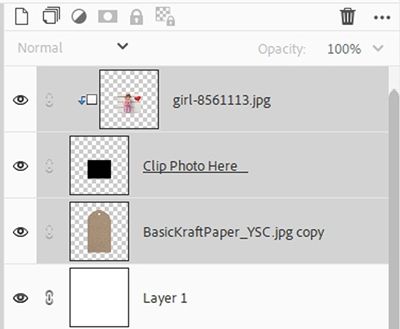
With the “Clip Photo Here” layer still active in the Layers Panel, I pull the photo into my file and clip it to that layer:
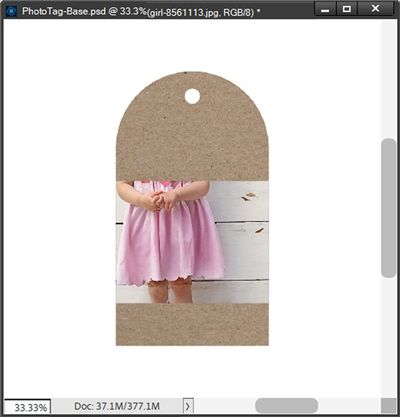
Well, that certainly isn’t pretty. But oh, so easy to fix. All I have to do is reposition and/or re-size the photo until it looks the way I want:
That’s much better. And since I’m certain I won’t be making any changes to the size/position of the photo, I’m going to do the exact same thing I did when I created the clipping mask.
With the photo layer active in the Layers Panel, Ctrl-Click on the thumbnail of the “Clip Photo Here” layer to get a selection outline. I then click on the Add Layer Mask icon in the Layers Panel. PSE creates a Layer Mask that is black with a white rectangle shape:
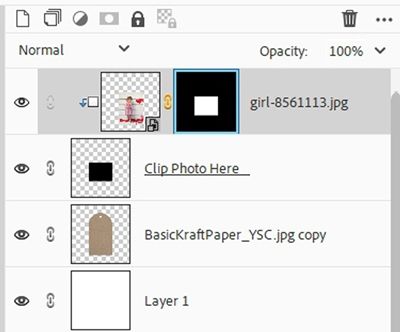
At this point I can simplify the photo layer since I really won’t need the Layer Mask for anything beyond this point. And if you’ve read my July 2023 post about File Sizes you know if you’re planning to save your file as a PSD, keeping larger than necessary images isn’t a good idea.
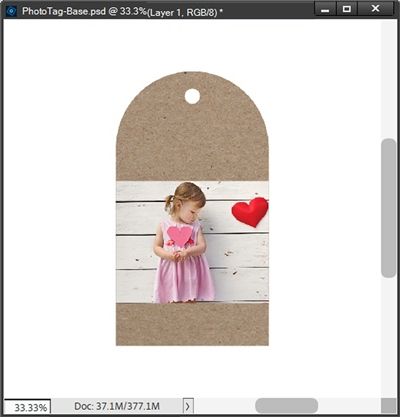
Now I could go on to add any other embellishments to dress this up a bit more. Sometimes it’s best to wait until I move it to a layout. But since this is an “example” tag I will dress it up a bit:
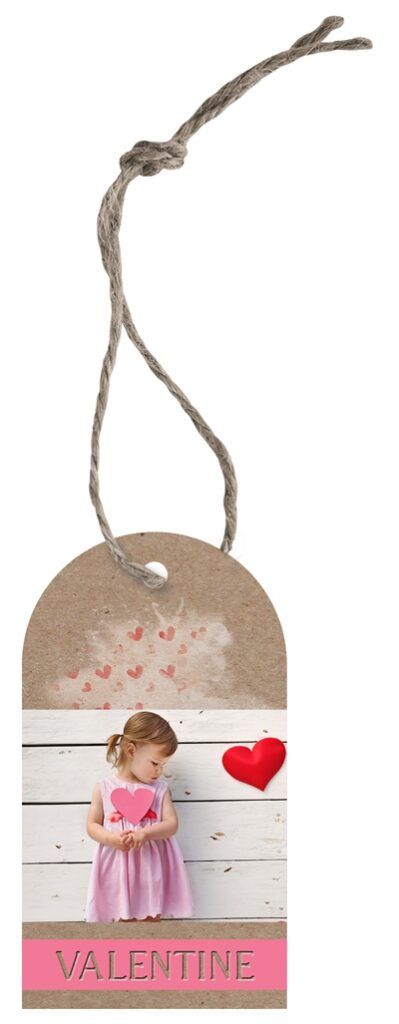
I added a string (from the download provided) along with some word art and a transfer just to give you ideas about how these photo tags can look. I also moved the clipped photo up a bit higher on the tag to leave more room for the word art.
Note: You can add whatever “fastener” and/or embellishments you choose I just wanted you to see a finished version. You may also want to hold off on adding a long string (like the one on the tag above) or any other fastener until you actually put the tag on a layout.
Clean Up
For these last few steps, I am going back to the unembellished tag:
Since this photo tag is destined for use on a layout rather than being saved as a standalone element, I need to do one thing to make the transition simpler.
Note: If you’re happy with your tag “as is” nothing says you can’t save it as a PNG file if that would be easier for you than copying/layers to a new file. It’s really just a matter of personal choice.
Creating a Group that contains all layers that I want to copy (move) simplifies the process of transferring the layers to my layout. Moving is always easier if I can move a Group vs. numerous “independent” layers to a different file/layout. I hope this makes sense!
So, let’s group things together…
At this particular point my file holds only the unembellished tag and the photo layer is active in the Layers Panel.
I press and hold the Shift key and click on the “tag” layer. PSE now has three layers active (highlighted):
Note: If you’ve already added any embellishments, be sure to include those layers in the group.
I then click on the Create a New Group icon in the Layers Panel (it looks like a stack of papers). PSE creates the group (with the layers nested inside the group) and names it Group 1. I’m going to rename the group to “Valentine Photo Tag”:
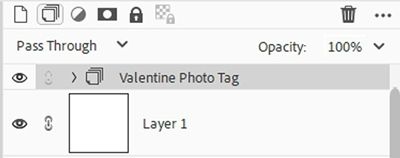
Now I can move just this group to my layout and finish my page as planned. I could also save the file as a PSD if I wanted to preserve the current tag should I need to make adjustments or even use it as a template for future tags. Or I could actually just crop the file to the size of the tag and save it as a PNG.
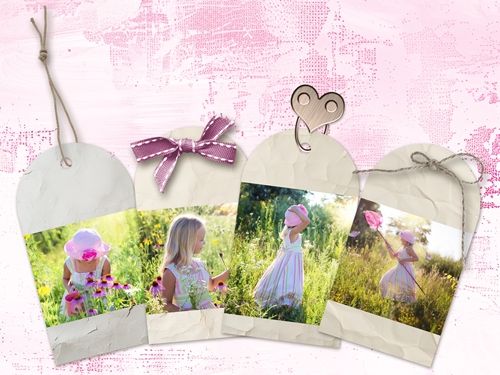
And here’s a layout I created using this technique (with different tags and photos). I love how using multiple tags helped highlight each of the children:

If you’d like to see more details about this layout you can find it in my 2026 Gallery.
Extra Tips

Choosing a good tag is important. Single layer tags with flat edges tend to work the best. The tag can be any shape, color, or pattern. But it is important to avoid skinny tags, tags with raised edges (such as a metal/plastic rim) or tags with layers.
Feel free to experiment with tags that are not mostly rectangular. Most geometric shapes can be used. I’d recommend that you avoid any complex shapes like stars or anything that is “curvy”. That doesn’t mean you can’t try them. They’re just much trickier.
If you end up using a pre-made tag from your stash that has an angled orientation you can do one of two things. You can change the orientation of the tag so that it is positioned vertically (using a “Grid view” will help with this) before applying your photo clipping mask. Or you can just create the clipping mask and tilt it to match the orientation of the tag. Simply rotate the clipping mask so that it’s parallel with the edge of the tag.
You may be wondering about adding a shadow to the photo once it’s on the tag. I prefer not to do this as it makes the photo look lifted off the tag. That doesn’t mean you can’t add a shadow if you’d like. I just don’t recommend it.
You don’t have to “simplify” your clipping mask shape to the size of the base tag as I did in the steps above. As long as you use a Layer Mask to “cut it” to size, you’ll be fine.
You also don’t have to merge your base tag with whatever paper you’re using to create the tag background. Especially if you’re just going to save the tag as a PNG. Suggestion, if you plan to move the tag to a different file it would just be easier not to have a full-sized piece of paper!
And remember…Every creative project is a work of heart!
Thanks for reading this week’s Tuesday Tip. Remember, if you have any suggestions or questions please don’t hesitate to “Message Me“. Check back next week for tips about creating glitter patterns. Click “Follow Me” to stay in touch. I hope you have a wonderful week!
