
Survival Kit
I know, in last week’s post about White Space I said this week would be all about avoiding “trapped” white space. I promise, that will happen next week. I clearly haven’t been paying close enough attention to the calendar. Time has gotten away from me and it’s almost graduation time. I had a College Survival Kit post all planned for next week. Then I realized how far into May we already are. I’m actually already kind of late to discuss that topic now. If I had waited until next week, it would likely be almost pointless. At least for this year ☹
It’s been a minute since I’ve had anyone in my circle with someone graduating from high school. But it’s not going to be long before one of the grandkids hits their senior year. Needless to say, I’ve already begun planning.
Over the years for any graduate “going off” to college I’ve always tried to give gifts that would be practical and helpful. Specifically, since most of the time this will be their first time basically “on their own”. I always think about things that might not be readily available on campus and kids potentially not having a car. It was sometimes tough to come up with a good gift “basket”. I usually concentrated on personal care items they might not think about, laundry bag/basket, laundry soap, rolls of quarters (for laundry), basic first aid kit, cold medicine, shower caddy, shower shoes, reusable plates/bowls and utensils…I think you get the idea.
It’s a whole new world now compared to when my son graduated so gifts are also very different now. We have gift cards for everything you could possibly need…including virtually cash. Putting together a survival kit now is so much easier. And if you’re a scrapper (digital or traditional) it’s a whole lot more fun. That’s what spurred this post.
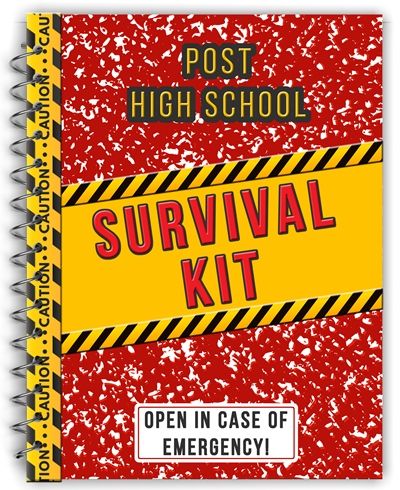
Post High School Survival Kit
I started doing some research on all the different gift cards available today and stumbled across an actual book assembled to hold gift cards. I don’t know how long they’ve been around but you can actually buy premade College Survival kits (gift cards not included). Whoever came up with this idea is a genius. I wish I could take credit.
But how much more fun will it be if you can tailor a survival kit specifically to the graduate’s specific likes/needs and the school/city to which they’ll be going? And what if the graduate isn’t going to college at all but moving into their first apartment? How great would it be to be able to give them an “Official Adulting Survival Kit”? Establishing your first “home” is even more challenging than outfitting a dorm!
College bound or otherwise, being a scrapper, you can create the perfect survival kit for your graduate. I’ll walk you through a few ideas…
Creating A Survival Kit
If you’re going to do-it-yourself (DIY) you’ll need to decide on the size first. My recommendation is to go with either 4×6 (101.6×152.4mm) or 5×7 (127×177.8mm) “pages”. Neither size will take up a whole lot of room in a drawer. Then you need to decide on the print media; cardstock or photo paper. Then you have the question of whether printing on both sides of each “page” is doable. One way or the other, you’ll also need a good quality printer.
Note: If you’re a traditional scrapbooker, printing won’t be as big an issue. But you will likely still need a printer for any of the words/sentiments.
With those big decisions out of the way it’s time to design the “shell” of the book…
Survival Book
Before I go too far, I want to point out that you should start by deciding how you want to assemble your finished book. That will likely drive how your pages will look. In the section above you can see an image of a spiral bound notebook. You may not have access to any spiral binding tools. Not to worry. Services like Color inc. – PhotoLab, Snapfish and Walmart Photo can take care of that for you. Here’s a sample spiral bound photo book from Snapfish:

If you’re a traditional scrapbooker, this may not be a good option for you as you’d need to turn your paper pages into digital media. That can be done if you have a scanner but getting good, flat results can be challenging.
Note: I’m fairly certain all three of the services I mentioned above can bind either 4×6 or 5×7 photos.
It will take a bit more careful planning to use one of these services and it could end up running into a little more money than a full DIY book. But they are viable options.
If you can do without the spiral binding, another option are some nice photo album books available at Amazon. These books are totally customizable (including the cover). They are sturdy poly plastic picture albums with protective pockets, crystal clear, non-cling and acid-free archival quality. They come in a 4×6 size and a 5×7 size; each with 24 bound (non-refillable), top-loading pockets to display a total of 48 photos/pages (includes front/back cover):
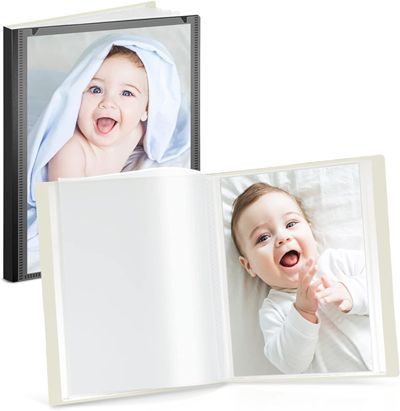
I’ve used albums like these before and loved how they turned out and held up.
Note: I provided links for only one supplier for each size. Different suppliers have them available on Amazon. You can search for other options if you’d like.
One last option I’ll offer is to use Loose Leaf Binder Rings:
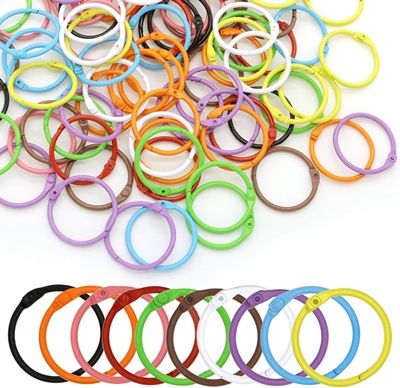
You can find them at most office supply stores, craft stores and Amazon. Generally speaking, you can find them as small as one-half inch (12mm) up to what seems to be the largest at one-inch (25.4mm). You can decide how many you want to use to create a book. You can use as many as you like…even only one if that works best for you.
You’ll also need a single-hole punch. Unless you’re trying to keep the hole small, you should be able to use a standard quarter-inch (6.35mm) hole-punch. You could go smaller but I wouldn’t recommend going any smaller than one-eighth-inch (3.175mm). Try to punch your holes about one-third inch (8.46mm) to one-half inch (12.7mm) from the edge of the paper so they are supported but easy to flip.
If you decide to try this option, I’d recommend always using metal rings. The plastic ones tend to break fairly easy. And it’s a good idea to figure out how thick your book will be before you buy the rings.
And I have a fun surprise…you can actually find 4×6 size and 5×7 size photo sheet protectors at Amazon that hold a single photo/page (front and back). Until very recently I could only find these “protectors” in multi-photo formats:

If you go to the link for the 4×6 sleeves you will see them displayed in a 2-ring clear binder. That binder is not included!
The 4×6 size tends to have only two ring holes while the 5×7 size tends to have three. These are a great way to keep the gift cards on your pages secure. And you won’t have to fool with punching holes in your individual pages.
Note: I provided links for only one supplier for each size. Different suppliers have them available on Amazon. You can search for other options if you’d like.
With the paper, printing and “book” identified, it’s time for the fun…
Survival Pages
It seems kind of funny talking about survival kits for graduates. These days I’d venture to guess we could all use one 😉 Seriously, which one of use couldn’t stand to have a few gift cards handy? That said, the survival kit you create doesn’t have to be all about gift cards. For most of us it could be tough to fill a 24-page book with only gift cards.

Speaking from experience, sometimes an inspirational message or even a photo of loved ones can do so much more to “lighten the load” than anything material. So, think about including those kinds of pages mixed in with the gift cards. Or if money is really tight for you, make the whole book about sage advice, happy memories or cheerful quotes.
Whatever form your survival kit takes, it’s yours to make. You can/should try to tailor it for the recipient; use a more flowery, pastel design for a girl and a more bold, “sporty” design for a guy (not that girls can’t be sporty too 😉). Or you could just stick with a neutral design just to be safe. You can make your pages as simple or as artsy as you like.
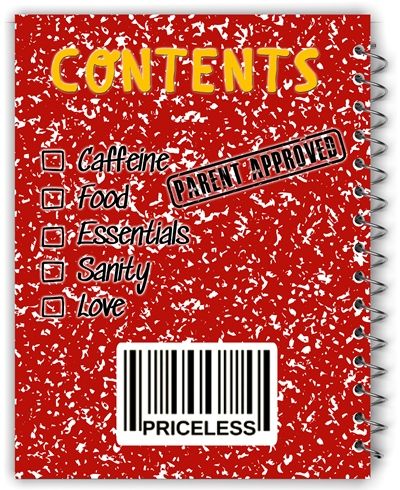
Near the beginning of this post, you saw a sample “cover” page. You can go for a look like that…indicative of surviving life’s emergencies. Or you can keep it less thematic and a bit more subtle. Here are a few examples:
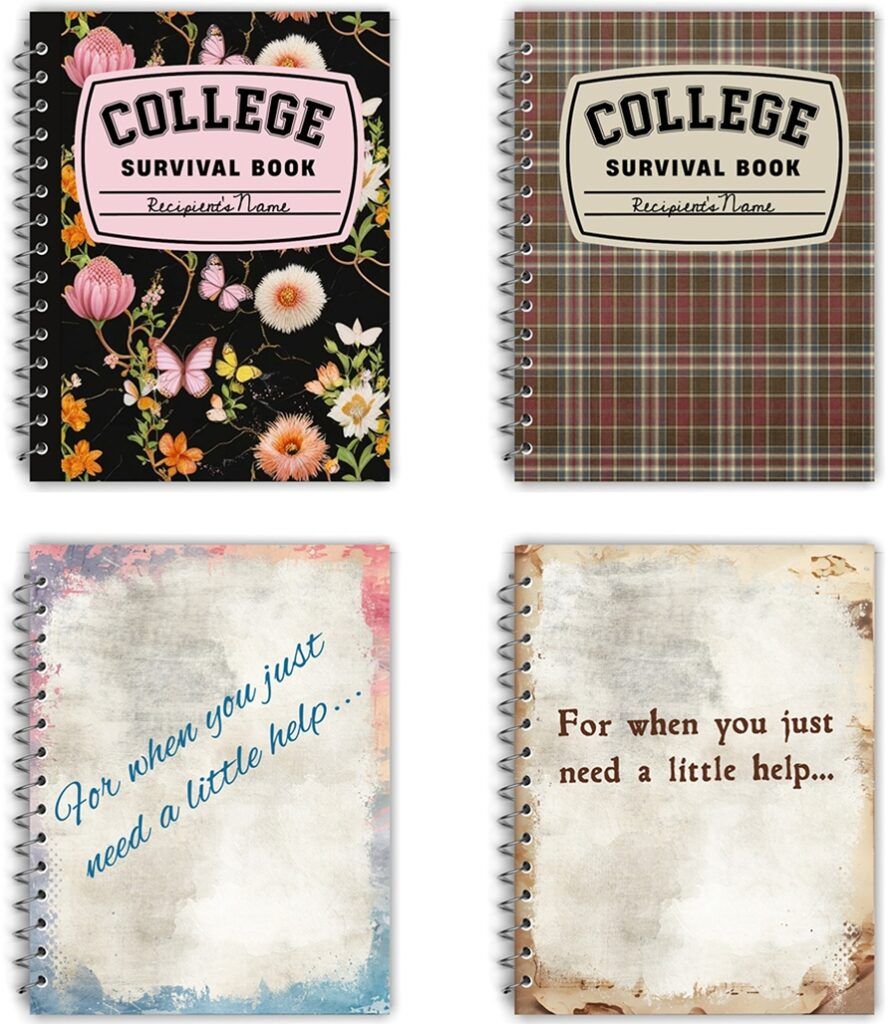
Note: These examples do show a spiral binding. You can ignore that since you will be working with flat pages…no binding.
Get creative. Don’t confine yourself to the examples I’ve provided. Again, try to fit the look of the book to the recipient. If you have a graduate who’s going to be on a college sports team…use that sport for the theme. Or better yet, think about using the school’s colors, logos and mascots on the cover. Think outside the box!
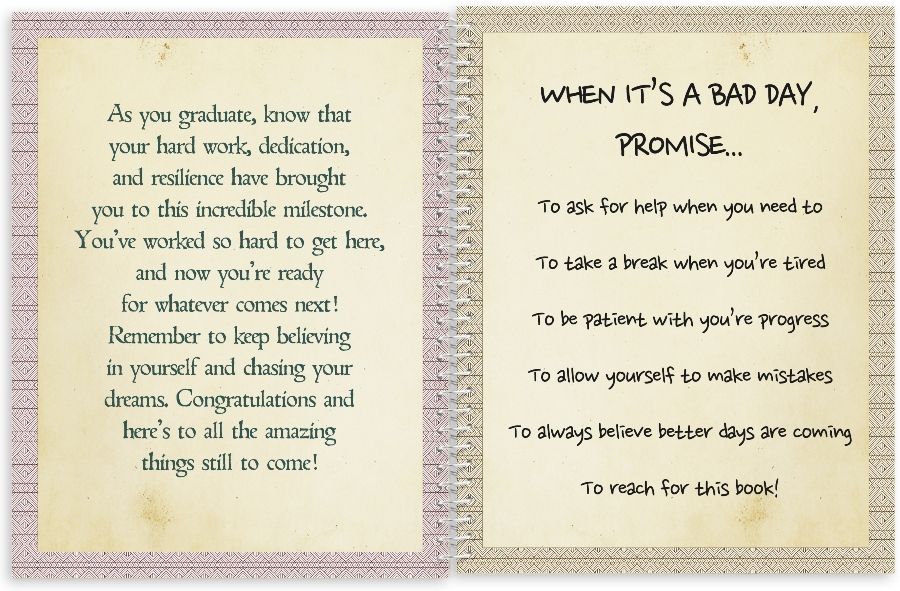
To get the “inside” of the book going, I think it’s a good idea to include a “letter” to the recipient on the first page. This would be on the left side (the backside of the front cover if bound). Then add a motivational quote on the second (right) page.
For the rest of the book, I like the idea of having a blank page precede the “gift” page. This allows a page where other comments, quotes of even pictures could be added.
And here’s an example of a fancy set of opening pages for a girl:

Note: Again, these pages show a spiral binding. Just ignore that.
Clearly there’s no need to get that carried away…I just wanted to give you some ideas. And here’s an example that’s not quite so fancy for a guy:
Clearly not as fancy…and the page borders can be eliminated. Just as with the cover, these inside pages can be as artsy or as plain as you like!
The same applies to the other inside pages. Each page will likely have its own theme (based on the gift card, quote or other element). If you want to stay on the simple side, the format of each page can look mostly the same. But here’s an example of a simple blank set of inside pages:
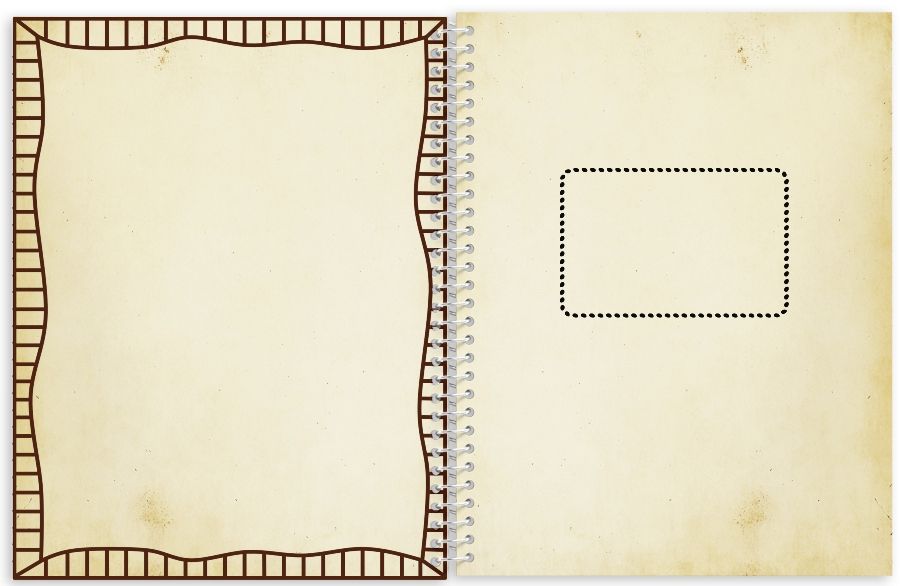
Since these pages are neutral in color (other than the left page’s border) this could work for just about any book. And the left side border could easily be eliminated. The gift card placeholder doesn’t mean you have to put the gift card in that exact spot. It’s just a placeholder where you’ll attach the gift card later. You can put it wherever you like!
And here’s an example of a finished set of pages with a gift card:
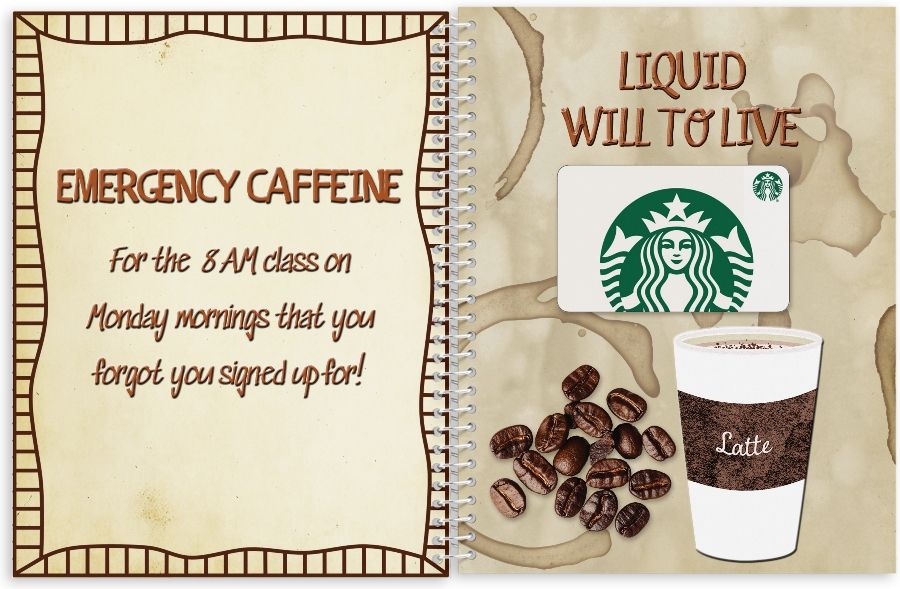
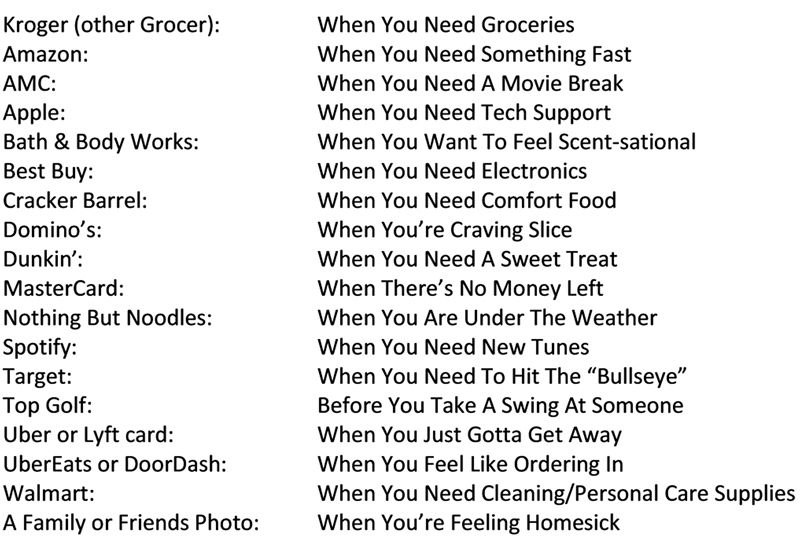
I hope the examples above have your creative mind on overdrive! And here are some other gift card/page themes to help you get started:
To help you out a bit with inspiring quotes, I have some “Motivational/Inspirational Quotes” and some “Having A Bad Day Quotes” that might come in handy! Just click on the document name above and it will automatically be downloaded for you.
More Kit Tips
I didn’t really talk about creating a back cover for the book. Just to give you an idea, here’s an example that would coordinate with the sample “cover” page near the beginning of this post:
Nothing says you have to make a “pretty” back cover. It’s just fine to use a piece of plain cardstock in a coordinating color for the very back.
Don’t forget, you can very easily customize a “survival” kit for any number of occasions; “adulting”, first home, new baby, wedding, new home or other special event!
As I said earlier, these survival kits don’t have to be all about gift cards. Put one together that just has tips, tricks, advice and inspirational quotes. You can always add a single gift card (or envelope with cash) at the end.
If at all possible, try to find out if there are special gift cards (like for a local eatery, a spa, a gaming place or other appropriate establishment) that might be unique to the town your recipient will be in. Sometimes you can get e-cards or gift certificates if a “local” shop doesn’t have physical gift cards.
Logic will take you from A to B. Imagination will take you Everywhere – Albert Einstein
Thanks for reading this week’s Tuesday Tip. Remember, if you have any suggestions or questions please don’t hesitate to “Message Me“. Check back next week for tips on avoiding “trapped” white space. Click “Follow Me” to stay in touch. I hope you have a wonderful week!