
Brushed Design
In last week’s post about “Masking Patterns” I showed you how to add a “custom” texture to a solid paper using an inverted Layer Mask. This week I’ll show you how to create anchor points using that same kind of Layer Mask.
And I promise, this will be super quick. You see, this is likely the last “technique” post for the rest of the year. So, I wanted to keep it simple.

If you’ve been following me for more than a year you likely know that I try to keep things a bit simpler here on the blog for the last several weeks of the year.
I’ll still be posting something each week but it’s going to be more about inspiration, contemplation or hopeful thoughts for 2026.
Now back to the task at hand…
Anchor Point
What is an anchor point? Why do I need one on my scrapbook page or card?
An anchor point draws your eye to the focal points on your project and ties all the elements on your page together. Just as it sounds, it anchors or grounds your page so photos and embellishments don’t appear to be floating on your background.
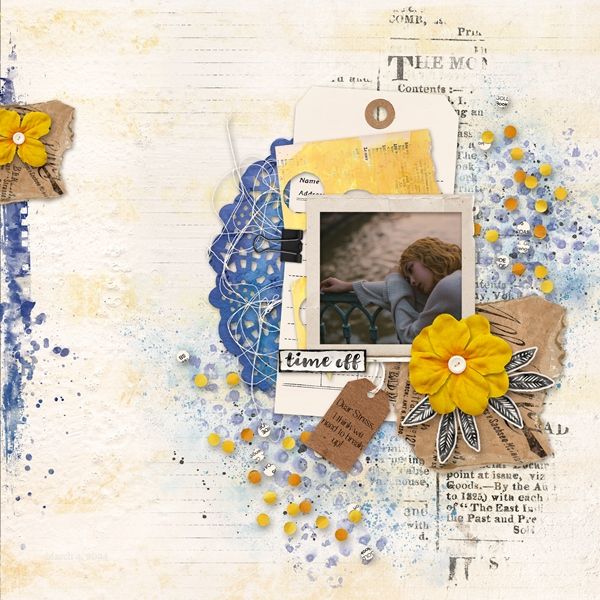
The image directly above is a fairly good example of an anchor point. If you noticed, the blue “doily’ and associated paint should have drawn your eye directly to that photo. Yes, the card/paper stacked beneath the photo could have also drawn your eye. But not quite as easily as the doily.
Note: That image is a layout I created in 2024 while participating in a challenge. If you’d like to see more details about that layout you can find it in my 2024 Gallery. The title of the layout is “Time Off”.
There are many ways to create an anchor; paper strips, mats, paint, transfers, etc. But today, I’m going to show you how to use a patterned paper as an anchor.
Free Template
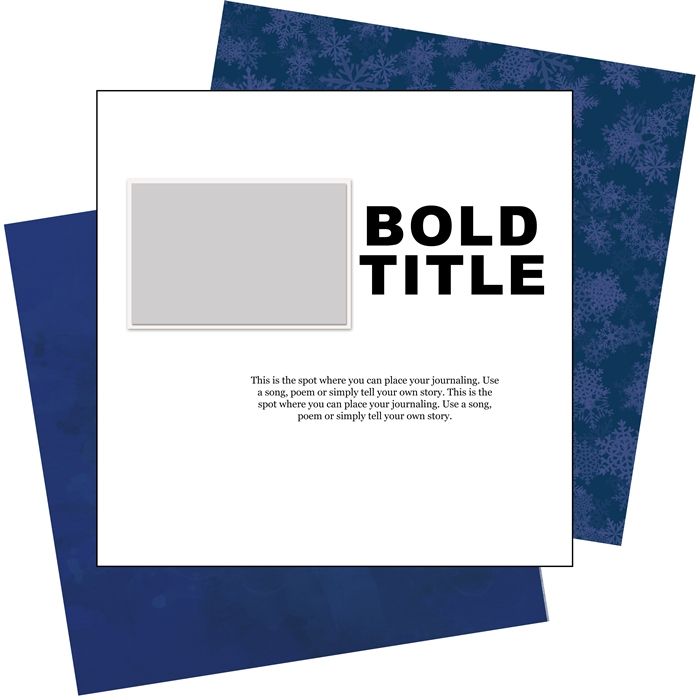
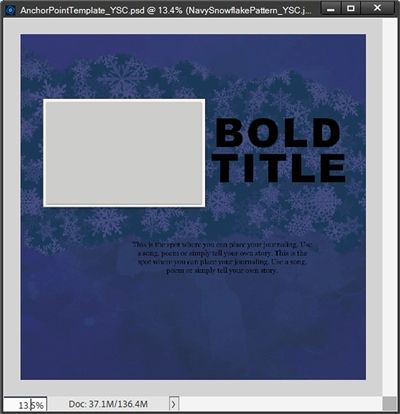
I have a free Anchor Point template for you. Within the template are the two pieces of paper (one solid & one pattern) that I’ll be using during this post. If you’d like to follow along exactly, you can either click here or on the image directly above and the template will immediately download for you.
An important heads up…If you opt to download the template, you may get a warning that reads something like this: “Google Drive can’t scan this file for viruses. AnchorPointTemplate_YSC.psd (174M) is too large for Google to scan for viruses. Would you still like to download this file?”
I promise, I am very careful and run all kinds of virus protection software. There should not be any problem at all with you downloading the template!
Note: If you can’t use a template in a PSD format please message me and I will do the best I can to provide the template in a format that you can use.
Let’s Create…
I’m going to show you how to create an anchor point that looks very similar to the featured image you saw at the very top of this post (just horizontal vs. vertical).
Before I get started here’s a quick reminder, I use PSE 2024. If you use a different version, some of my screen shots may look different from what you see on your screen.
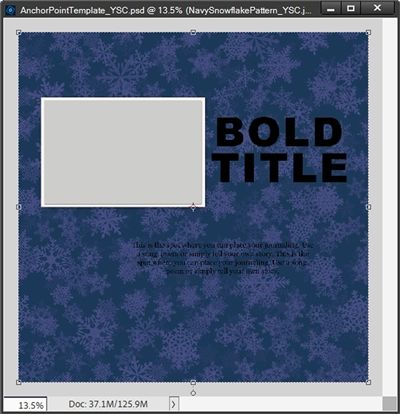
First, I set my Foreground/Background color chips to the defaults (Press D). Then, I open my template:
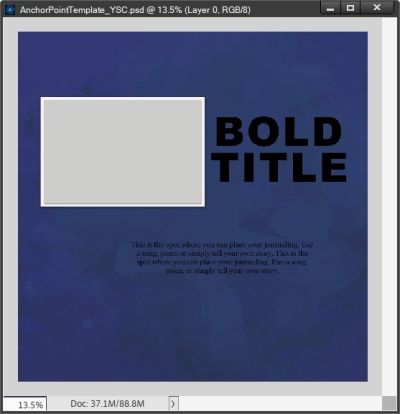
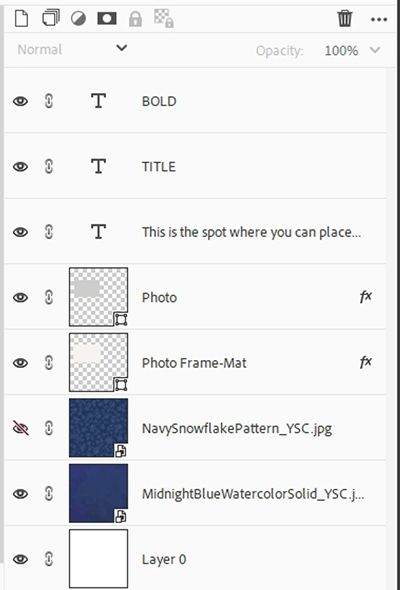
Right now, only the solid watercolor paper is visible. And here’s what the Layers Panel looks like:
Note: The provided template is a 12×12 PSD file. If you’re not using my template, please open a blank 12×12 file and optionally, you can create a white base layer. Then grab a solid paper and a patterned paper of your choosing and pull them into your file with the pattern layered above the solid paper.
I unhide the pattern and make it the active layer:
Inverted Mask
Now, I press and hold the Alt key and click the Add Layer Mask icon in the Layers Panel. PSE than adds a Layer Mask to the pattern layer that is filled with black rather than white:
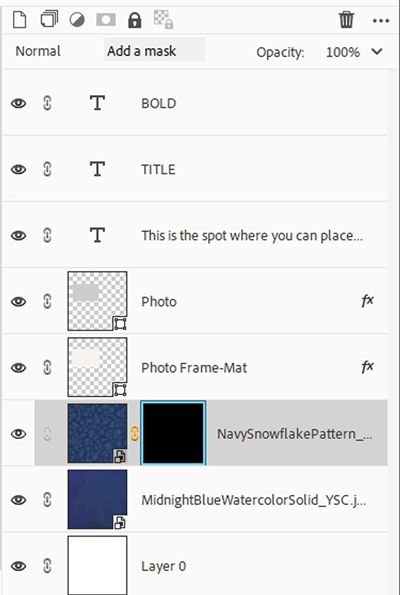
And now you can also see that the pattern has disappeared and only the navy background remains:
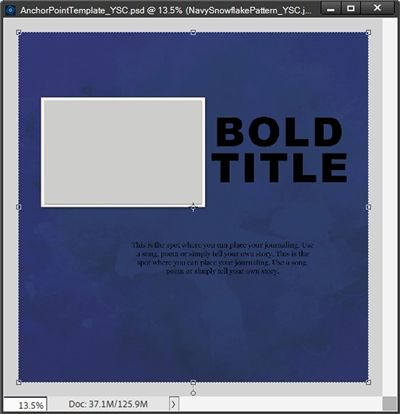
If you read last week’s post this should all seem very familiar to you. If not, don’t panic, this is exactly what was supposed to happen. I don’t want the entire pattern visible.
Now for a little Layer Mask magic…
Add The Pattern
PSE should have switched the color chips so that the Foreground Color chip is now white. If it’s not white, I just press the letter X.
I grab the Brush Tool and in the tool options I click on the down arrow to the right of the current brush and PSE opens the current Brush set:
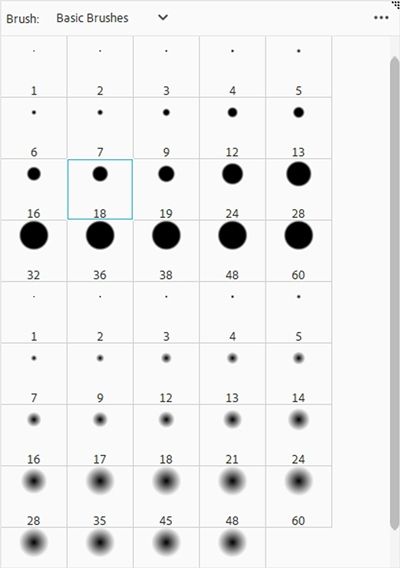
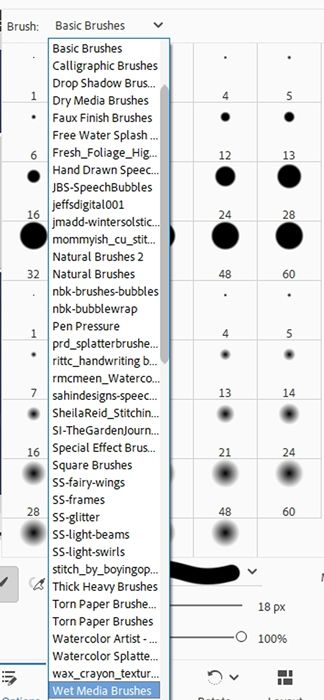
Then I click on the down arrow to the right of the current brush set name (Basic Brushes for me). And PSE opens the drop-down menu displaying all the brushes I currently have loaded. I scroll all the way to the bottom until I see Wet Media Brushes:
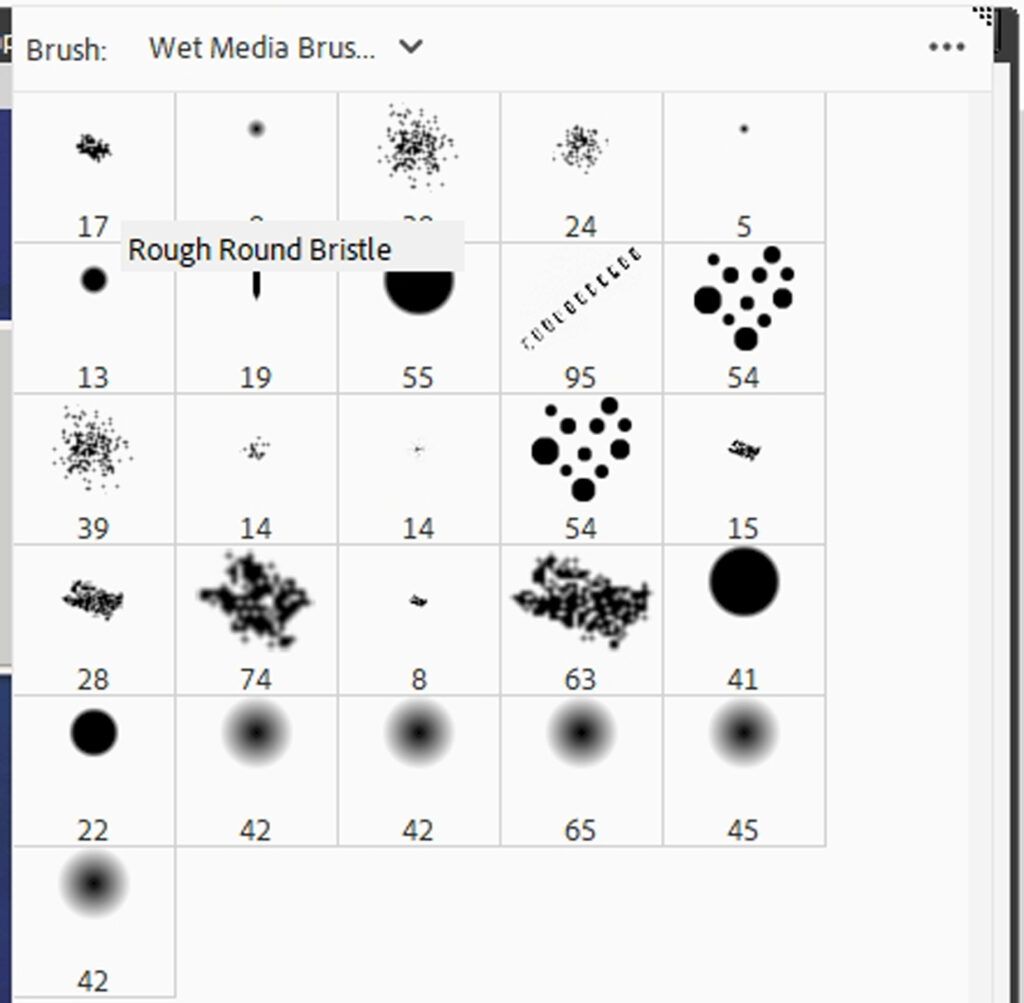
PSE then opens the Wet Media brushes and I choose the Rough Round Bristle brush (left most brush in the top row):
In the tool options I set the Size to 200px, the Opacity to 100% and the Mode to Normal:

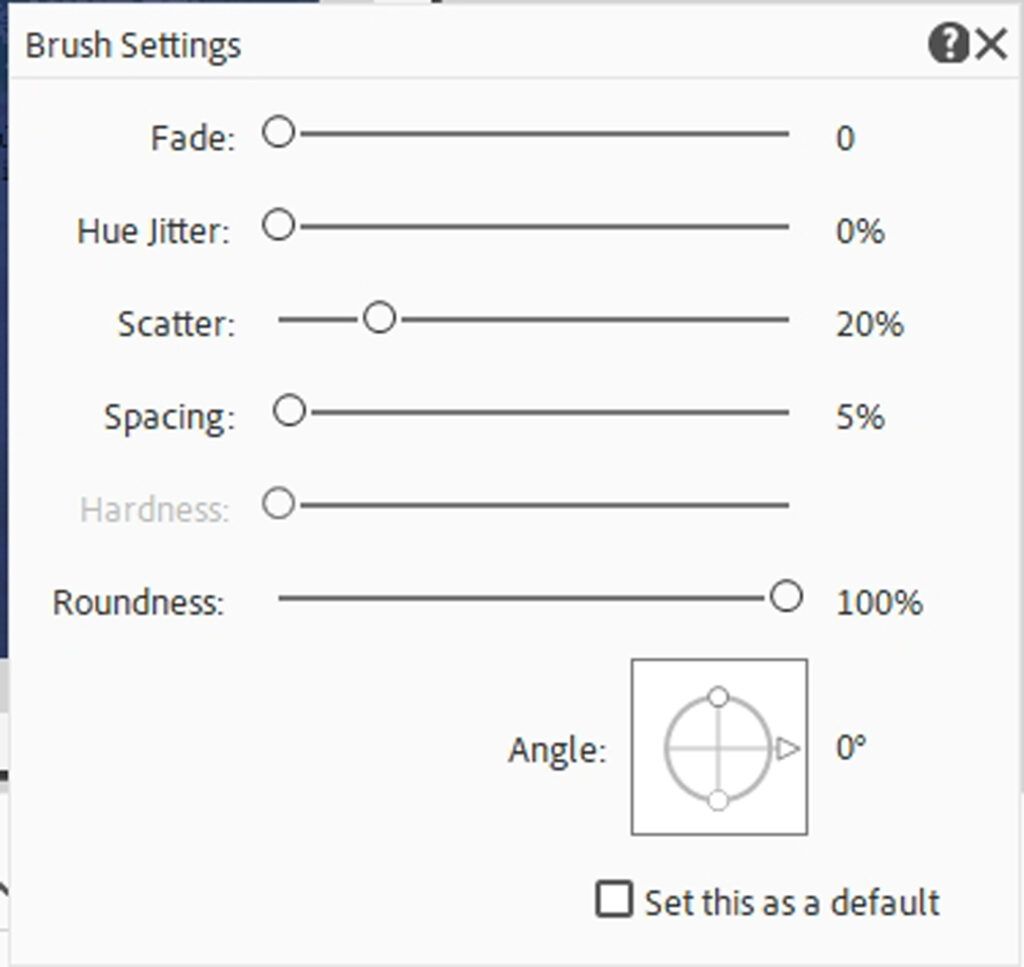
I’m not going to do anything special with the options associated with the Brush Settings button. I generally use the PSE defaults when using a “media” brush.
But just to be safe, I click on Brush Settings and ensure the values read as follows: Fade at zero, Hue Jitter at zero, Scatter at 20%, Spacing at 5%, Hardness no value, and Roundness to 100%:
Now I can begin the process of creating my anchor point.
Note: If you’re following along you can hide the text and photo layers if you want to be sure you have pattern under those spots. And you can brush as much or as little pattern onto the file as you like.
In the Layers Panel, I ensure that the layer mask is still active. Then on the file I just click, and/or click and drag, wherever I want the pattern to appear:
As I brushed around, if I ran into a spot where I thought there was too much pattern revealed, I just swapped the color chips (press X) and brushed around the parts I wanted to hide.
Note: Experiment with different brushes, brush sizes and opacity levels to achieve different looks. Another good brush is the Pastel Medium Tip brush in the Dry Media Brushes set.
I save this file as a PSD with a unique name “WinterAnchorPoint”, so I can go back to this if I need to make changes to the masking later. This will also ensure that I preserve the original template for future use.
With the “WinterAnchorPoint” file open I went on to complete a layout:

Clearly that’s a different look than the original template. But that’s the beauty of using templates, right?!?
If you’d like to see more information about that layout you can find it in my 2025 Gallery. The title of the layout is “Winter’s Coming”.
Closing Tips

I only showed you one type of media brush. Experiment with others to see how it changes the look.
Play with different sizes for the brush. This is one case where bigger is sometimes better!
Experiment with the Opacity of the brush when masking. Try starting at 100% and then switch to a lower opacity to soften/lighten edges or other areas. Or try doing just the reverse of that!
And as I close out tips for this year, try to remember this: “Art washes away from the soul the dust of everyday life.” – Pablo Picasso
Thanks for reading this week’s Tuesday Tip. Remember, if you have any suggestions or questions please don’t hesitate to “Message Me“. Check back next week as I begin my year ending break from normal tips. Click “Follow Me” to stay in touch. I hope you have a wonderful week!
