Circles, Circles
So, today’s post should be a breath of fresh air after being “taped up” for three weeks running 😊 Seriously, this should be a quick fun technique using offset circles. Based on the featured image you may be thinking we’ll be looking at circles, circles and more circles 😉
There really won’t be that many. But I will show you how to create an offset look using the elliptical marquee tool and a stroke outline. If you’ve already read my post about “Stroking Shapes” from April of 2023, some of what you’ll see today will feel familiar.
This technique is such a fun way to scatter multiple photos across a page but still keep them anchored. And if you read my “Brushed Design” post on December 2, 2025, you already know how important anchoring is.
Offset Elements
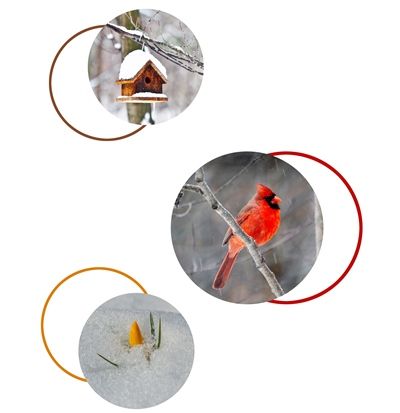
The image directly above is an example of what I’ll be creating today. Just wait until you see how easy this really is.
And here’s my usual reminder; I use Photoshop Elements (PSE) 2024. If you use a different version, some of my screen shots may look different from what you see on your screen.
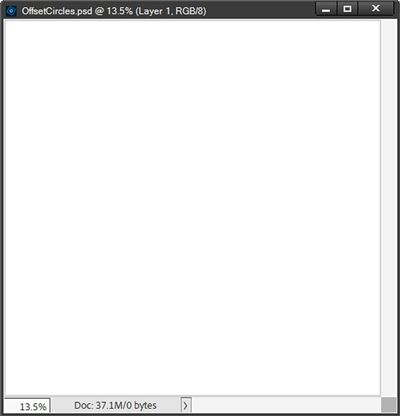
I’m going to start by creating a new 12×12 file with a white base in PSE:
Then I ensure that my Foreground/Background color chips are set to the default of B&W (press D).
In the Layers Panel I click on the “Create a new layer” icon and PSE creates that new blank layer (Layer 2 for me) directly above my white background. I immediately rename Layer 2 to “Photo Mask”. This layer is now the active layer.
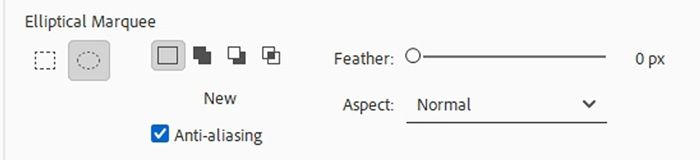
Next, I grab the Elliptical Marquee tool. In the Tool options I click on the New Selection icon, check Anti-aliasing, set the Feather to zero and the Aspect to Normal:
Holding down the Shift key, I click and drag out a circle, about 4 inches in diameter, near the center of the file:
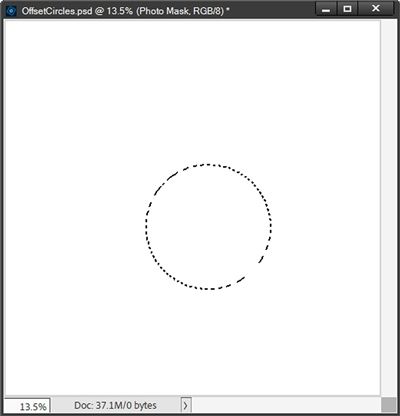
I then press Alt+Backspace to fill the selection with black. Please pay very close attention here… I DO NOT cancel the selection at this point!!!!!
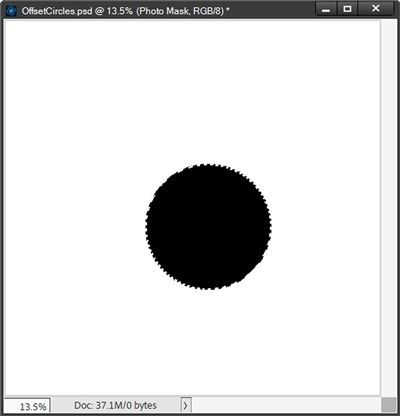
I kept the selection around this circle because I’ll need that to create the stroke in the next step.
Add The Stroke
While holding down the Ctrl key, I click on the “Create a new layer” icon in the Layers Panel. PSE then creates the new blank layer (Layer 2 for me) below the Photo Mask layer. This is exactly where I want that new layer.
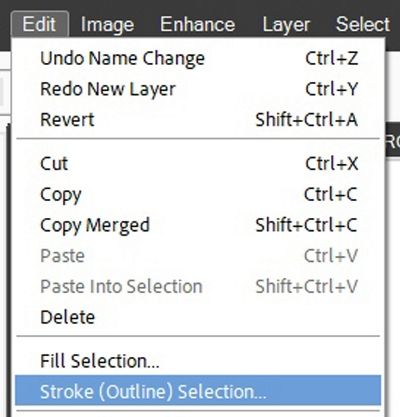
I immediately rename Layer 2 to “Circle Stroke”. Ensuring that the new layer is active, I go to the top tool bar and select Edit->Stroke (Outline) Selection:
PSE then opens the Stoke dialog box and I change the color to a medium grey (#808080), set the Width to 25px, the Location to Inside, the Blending to Normal, the Opacity to 100%, ensure that Preserve Transparency is not checked and click OK to confirm:
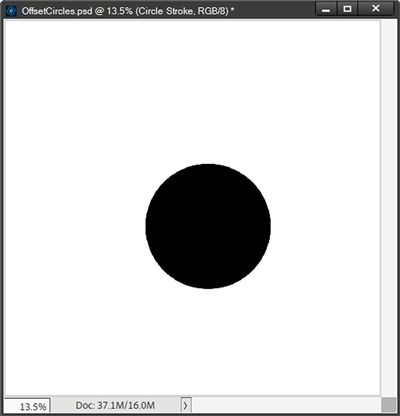
I know, you don’t see the stroke. Don’t panic…everything worked just fine. Because I created the “inside” stroke outline on the layer beneath the Photo Mask layer, the stroke outline is not visible at this point.
Now it’s time to create the offset circle effect…
Create The Offset
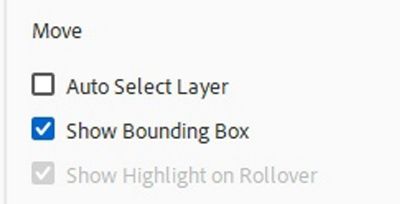
With the “Circle Stroke” layer active I grab the Move tool. In the Tool options I uncheck Auto Select Layer (PSE automatically unchecks Show Highlight on Rollover) and I check Show Bounding Box:
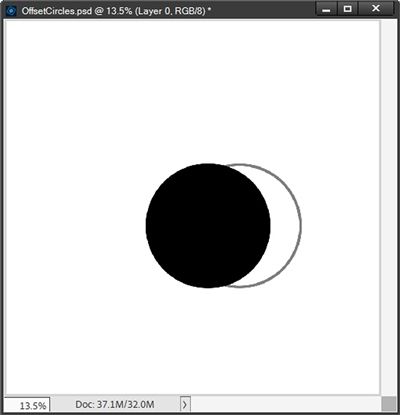
I then click somewhere inside the bounding box and drag the stroke outline away from the photo clipping mask:
By unchecking Auto Select Layer PSE forces me to click on a layer in the Layers Panel rather than clicking on the image in the file when I want to move/transform the image. This is also what makes it easy to click inside the bounding box.
Creating the offset effect really is just that simple. And I just as easily could have nudged the “Circle Stroke” using the arrow keys.
Note: You don’t have to move the stroke outline into the same location as I. You can use whatever direction and distance suits your project/preference.
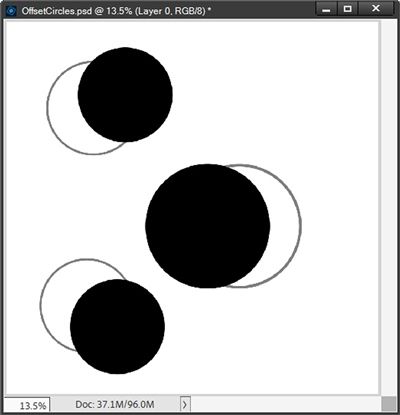
If I want to add more circles/offsets, I can now either create new ones at different sizes or simply duplicate this first set then re-size/reposition it as many times as I like until I end up with something like this:
Note: If you re-size the circle/offset as a set (the two layers linked), the width of the stroke will change as well. If you make the set smaller, the width of the stroke will be thinner. Conversely, if you make the set larger, the stroke width will be thicker. And that’s perfectly alright! If you want the stroke to be consistent for all offsets, you will need to create the different sized circles separately and add the stroke to each one independently using the same stroke settings for all.
All that’s left now is to add photos to the photo masks and clip papers to (or simply recolor) the stokes. This configuration should look fairly familiar. It’s just like the example image I showed you in the beginning. And here it is as a reminder:
Create Variations
I’m not limited to using only the Elliptical Marquee tool. I could use the Rectangular Marquee tool to create squares or rectangles. But truthfully, I can use just about any shape and create the same effect:
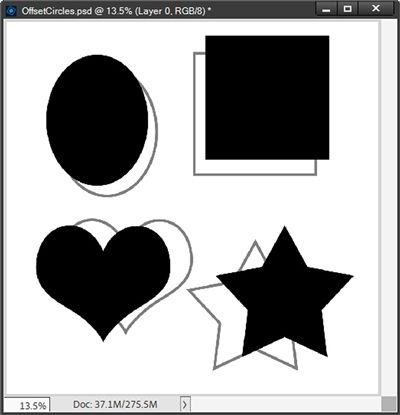
When I use a shape rather than one of the Marquee tools I do need to create the effect in a slightly different way. Whether I use a shape element from my stash or create one using the PSE custom shape, all I need to do is place a new blank layer beneath the shape’s layer. Then with that new layer active I Ctrl-Click on the thumbnail of the shape layer to get a selection outline. Then I can create the stroke outline just as I did when using the Marquee tool.
And here’s a layout I made using this offset technique:

I love how the offset circles add interest to my round photos and enhance the whimsical feel of the page. Nearly everything I used for this layout was from “Wonderland” by Ilonka’s Designs.
If you’d like to see more details about this layout you can find it in my 2026 Gallery. The title of this layout is “Wonderland”.
Simple Tips

You can use this offset technique on just about any shape or even alphas.
Remember to create the stroke outline on a separate (blank) layer beneath the shape you’re using.
Honestly, nothing says your offset must be below your photo mask. Placing an offset above the photo can add an entirely new look to the effect. Don’t be afraid to give it a try!
You’re not restricted to using the specific size (25px) used today for the stroke outline you create. It can be as thick or as thin as you like.
Feel free to position your stroke outline in any position relative to the corresponding shape. I do recommend that it still be touching the shape.
Once your photo circle/offset combination is positioned it’s a good idea to link those two layers together. This will unsure that they move simultaneously if you reposition your photo circle.
As you can see in my example layout, it’s perfectly fine to have some “lone” offsets; ones not associated with a photo mask at all. This can serve to reinforce the offset effect. But it’s a good idea to ensure an offset isn’t left “floating”. Be sure to anchor it to the page somehow. Even if only by having it partially off the page.
You don’t have to uncheck Auto Select Layer when using the move tool. This just makes it easier to click inside the bounding box and drag the stroke around.
If you really want to get a little “wild” experiment with multiple different shapes switch the stroke outlines around so they aren’t with the corresponding shape. This can add a whole new level of interest to a page.
I discourage adding too many embellishments to a layout that has a lot of offset elements. It can make the page look busy and draw focus away from the photos.
Wise words from a fairy tale…Imagination is the only weapon in the war against reality. – The Cheshire Cat
Thanks for reading this week’s Tuesday Tip. Remember, if you have any suggestions or questions please don’t hesitate to “Message Me“. Check back next week for tips about echoes. Click “Follow Me” to stay in touch. I hope you have a wonderful week!
