
Custom Edge
We’re already nearly three full weeks into the new year and it’s time for me to get back to giving you creativity tips. I love fresh starts. However, I certainly don’t want to go cruising headlong into the new year too quickly. So, I thought I’d take a few weeks to ease into tips. I’m going to try keeping things on the simple side until we get our 2026 “sea legs”. I want to start with a tip about custom edges using a Layer Mask without brushes.

Am I kidding…using a Layer Mask without a brush?!? Surely now you’re intrigued.
In 2025’s last tips post about “Masking Patterns” I showed you how to add a “custom” texture to a solid paper using a Layer Mask.
This week I’ll show you a different way to add a beautiful custom edge to a rather plain background paper. This time I’ll use that same kind of Layer Mask and the Lasso Tool.
Getting Started
Before I get started here’s a quick reminder. I use Photoshop Elements (PSE) 2024. If you use a different version, some of my screen shots may look different from what you see on your screen.
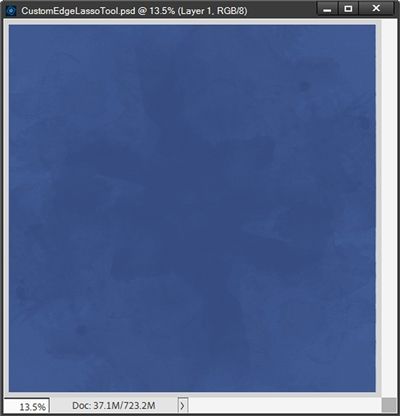
I’m going to start with a blank 12×12 file open in PSE. Then I drag a solid watercolor paper into the file.
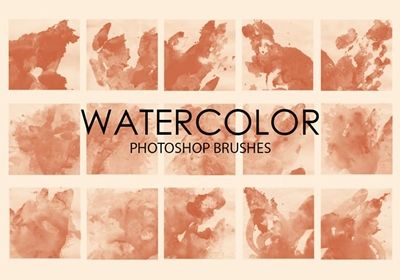
The paper I’m using today is one I created using a solid base in a medium cyan color (#3a64a0) and a Watercolor brush from Brusheezy:
And here’s what the paper looks like in my file:
Note: You are welcome to use any solid background that will fit your project. And if you’d like to try creating your own similar watercolor background using the brush set above, I used Brush 6 (on a new layer) sized to cover the base with a blue color (#2b4f85) slightly darker than the medium cyan. I then duplicated the brush layer, rotated the duplicate layer 90 degrees to the right and changed the opacity to 80%.
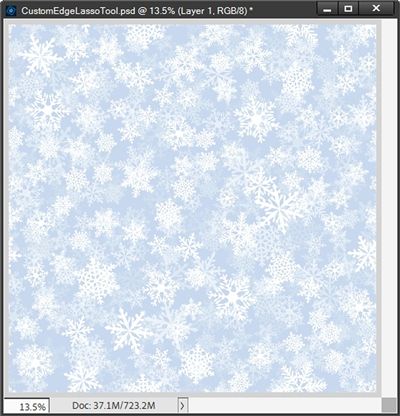
Next, I drag a snowflake patterned paper into the file directly above the watercolor base.
The paper I’m using today is one I created using a solid base in a light greyish blue color (#c8daf0) and several different brushes from a Snowflake Brush set at Brusheezy:

And here’s what the paper looks like in my file:
Note: You’re welcome to use any patterned paper that will fit your project. This snowflake paper might be a bit tedious to try and replicate. So, if you’d like to follow along using that paper just click here and it will be automatically downloaded for you.
Lasso Tool

With the snowflake layer active in the Layers Panel, I select the Lasso Tool. This tool is nested in the same selection group as the Polygonal Lasso and Magnetic Lasso tools:
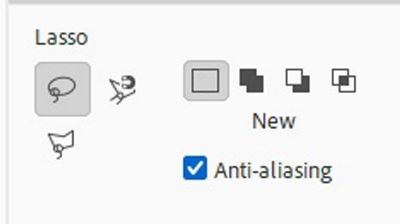
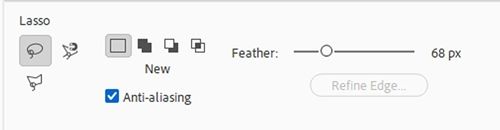
With the Lasso Tool selected, in the Tool Options I select New Selection, set the Feather to 68px, and ensure that Anti-aliasing is checked:
With the Snowflake paper active, I click and drag out a selection starting anywhere except a corner:
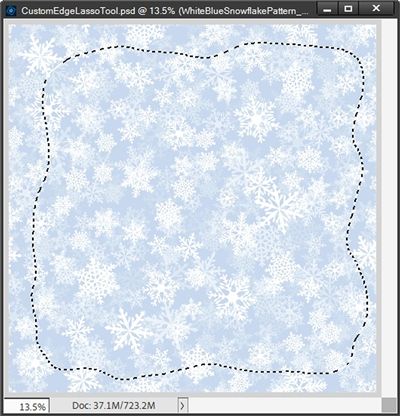
Note: While making your selection try to avoid getting too close to corners. Be sure to vary the distance from the edges of the paper. It’s also a good idea to avoid creating any sharp angles. If you want a more blended edge, increase the Feather before creating the selection. For a sharper edge, decrease the Feather before creating the selection.
Add The Mask
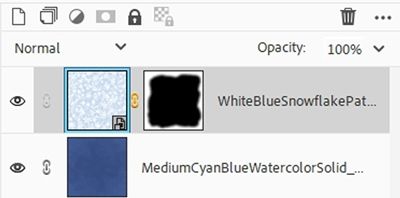
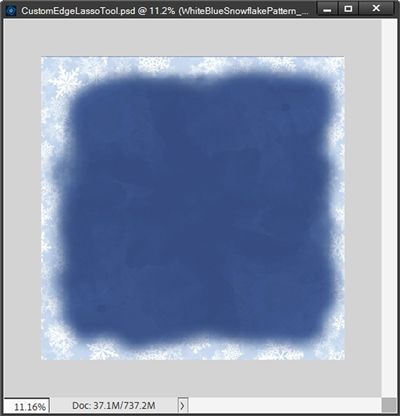
In the Layers Panel, I press and hold the Alt key and click the Add Layer Mask icon. PSE then adds a Layer Mask to the snowflake paper layer that is filled with black in the shape of the selection rather than only white:
And PSE has “hidden” the selected portion of the snowflake paper:
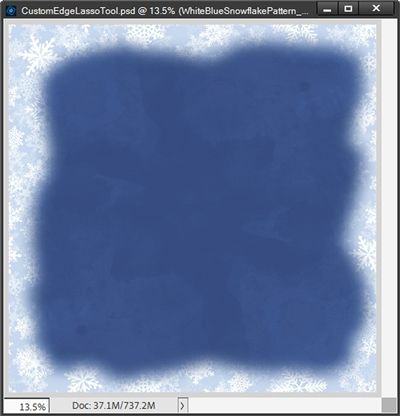
So, how easy was that?!? Such a pretty snowflake edge over that solid background.
If you’re not 100% happy with how your edge turned out, simply select a rather large (500px) soft round brush and set the opacity fairly low (between 25-35%).
Then with the layer mask active and the Foreground color chip set to black, you can increase the size of the solid background.
If you want to subtract from the solid background just swap the color chips so the Foreground color chip is white (press X) and brush away any sections you desire.
Note: When modifying the layer mask, you may need to change the brush size and/or opacity level as you’re working around the edge.
Another option is to just drag the layer mask to the Trash icon in the Layers Panel and create a completely new selection.
And here’s how my slightly modified edge looks after adjusting the layer mask:
Don’t be afraid to experiment with Blend Modes and/or Opacity levels to achieve different effects.
Final Tasks

I save the file first as a JPG with a unique name. I plan to use it as the background paper in my layout. I named my file “WhiteBlueSnowflakeEdgeOverCyan”.
I then saved only the snowflake edge (solid background hidden) as a PNG file for use over other backgrounds. I named my PNG file “WhiteBlueSnowflakeEdge”.
I also saved the file as a PSD with a unique name (CustomEdgeLassoTool). I did this to preserve the layers for later use. With this “template” I can go on to create any number of custom edges and/or backgrounds simply by swapping papers.

I know you’re wondering how that would work. Tune in next week and I’ll show you how easy that really is. Just be sure to save your current file as a PSD so you can continue next week.
And here’s the layout I made using this custom edge technique:

Note: If you’d like to see more details about this layout, you can find it in my 2026 Gallery. The title of the layout is “Winter’s Heart”.
Closing Tips

I know I said a brush wasn’t required to create this custom edge. And strictly speaking that is true. But from time to time a brush can still come in handy 😉
Sometimes using the Lasso tool is a bit tricky. If you have trouble creating a selection that doesn’t look jagged, don’t get frustrated. It’s super easy to smooth the edges of the selection once the mask is created.
Don’t forget to play around with opacities and Blend Modes to see how the look of the edge will change.
And don’t feel like this will only work on 12×12 paper. You can use this same technique to add a custom edge to any size paper or even an element/card. Sometimes it’s all about thinking outside the box!
Remember this…You don’t make mistakes, just happy little accidents – Bob Ross
Thanks for reading this week’s Tuesday Tip. Remember, if you have any suggestions or questions please don’t hesitate to “Message Me“. Check back next week for tips about creating a template for custom edges. Click “Follow Me” to stay in touch. I hope you have a wonderful week!
