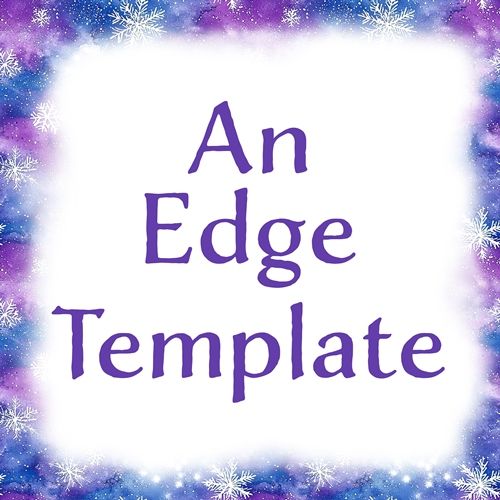
Custom Edge Template
If you read last week’s post about lasso tool edges, I said I could save the layers as a PSD file for future use. And I promised to explain how to use that edge template this week to create other edges/papers.
If you didn’t read last week’s post you may want to go back and read that first or most of this might be a bit hard to follow.
If you have your PSD file from last week, please open it now so you can follow along.
Simplify The Edge
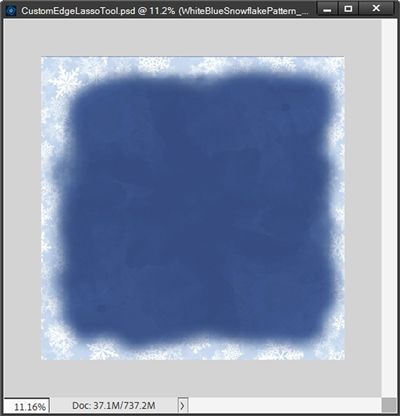
I’ve already opened my “CustomEdgeLassoTool” file in Photoshop Elements (PSE). For now, it looks just as it did when I saved the edge/base as a JPG to use as a “composite” background paper:
Note: I use PSE 2024. If you use a different version, some of my screen shots may look different from what you see on your screen.
And here’s what the Layers Panel looks like right now:
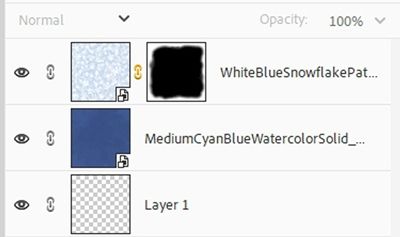
Notice how the snowflake edge layer shows up as a Smart Object? If you’ve been following me for more than a few months you already know that PSE won’t let me apply edits (other than the mask) to a Smart Object without first simplifying it.
If I simplify this layer as it is, the mask and the snowflake edge will be merged (rasterized) into a single, regular pixel layer. That means I will lose the non-destructive benefits of using a Layer Mask (like re-editing the mask).
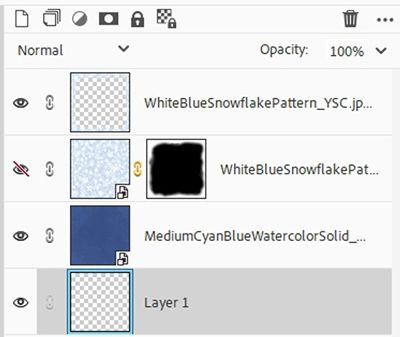
I don’t want to lose the mask so I’m going to duplicate the layer and hide the original. Then I simplify the duplicate layer. My Layers Panel now looks like this:
Note: Oddly enough PSE sometimes requires that I simplify the layer twice. Once to rasterize (flatten) the paper’s internal structure but retain the mask as a separate entity; the second simplification is then needed to merge the remaining Layer Mask into the pixels, making it a standard pixel layer with the mask permanently applied. If you simplify your layer and the mask does not merge, just simplify the layer a second time.
For now, I’m also going to hide the simplified snowflake layer.
Re-Color Base

I do want to use a different color base. To keep things simple, I’m just going to re-color the original watercolor medium cyan base. But you should already have noticed that the base layer is also a Smart Object. That means I need to simplify this layer as well.
Note: There’s no need for me to duplicate the paper before making changes to it. I already have the paper saved. If you don’t have a saved copy of your base paper, you may want to save/duplicate that layer now!
I want to use a shade of purple that will coordinate with the patterned paper I plan to use. So, I change my Foreground color chip to a medium lavender color (#7a33b1).
With the medium cyan base layer active I open the Hue/Saturation dialog box (Ctrl+U) and click Colorize. I leave the Hue set to 274, change the Saturation to 38 and the Lightness to 9:
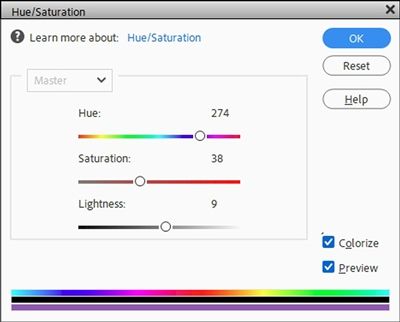
I then click OK to confirm and here’s what my base paper looks like now:

I really like how this turned out so I’m going to rename the layer to “MediumLavenderWatercolorSolid” and save this as a JPG for future use.
Note: You are welcome to use any solid background that will fit your project.
Replicate Edge
Next, I drag a different snowflake patterned paper into the file directly above the solid base. The paper I’m using today is another one I created using a watercolor background and some of the same brushes I used for last week’s snowflake edge:

Note: You’re welcome to use any patterned paper that will fit your project. This snowflake paper definitely won’t be easy to replicate. So, if you’d like to follow along using that paper just click here and it will be automatically downloaded for you.
When I pulled this paper into my file it also came in as a Smart Object. That means I need to simplify this layer as well.
With the new snowflake layer simplified and active in the Layers Panel, I Ctrl-Click on the thumbnail of the duplicate (simplified) snowflake edge in the Layers Panel (it should be the top layer). PSE creates a selection around that simplified edge:

Next, I invert the selection by going to the top tool bar and clicking Select->Inverse:
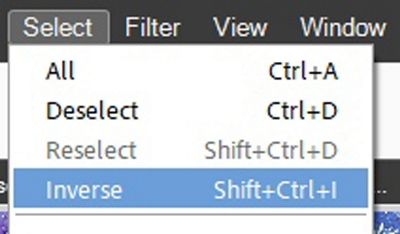
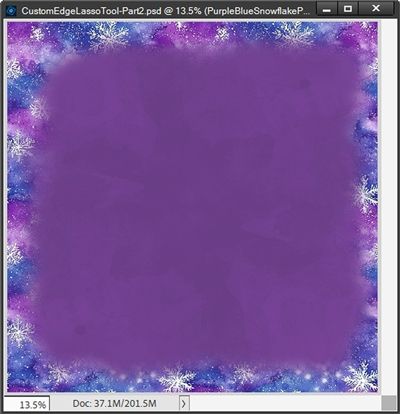
All I have to do now is press the Delete key and I have a new custom edge over a new background:
And the best part is, I still have the original Layer Mask so I could modify the mask multiple times/ways to create different edge “templates”.
Just as last week, I save the file first as a JPG with a unique name to use as a background paper for future projects. I named my file “PurpleBlueSnowflakeEdgeOverLavender”.
I then save only the new snowflake edge (solid background hidden) as a PNG file for use over other backgrounds. I named my PNG file “PurpleBlueSnowflakeEdge”.
I also saved the current PSD file.
Final Tips

If you’re “Colorizing” the base (solid) paper in your template, don’t be afraid to play around with the values for the Hue, Saturation and Lightness settings. Just experiment and have fun trying different tones. That’s why we have the “undo button” 😉
Don’t be afraid to modify the original Layer Mask before creating a new edge. Just remember to duplicate the original masked layer in case you ever want to use it again.
Remember to duplicate any masked layer before simplifying it so you retain the ability to modify the mask again.
Just as last week, don’t forget to play around with opacities and Blend Modes to see how the edge’s look will change over different backgrounds.
Think about this…It is only when we are no longer fearful that we begin to create. – J. M. W. Turner
Thanks for reading this week’s Tuesday Tip. Remember, if you have any suggestions or questions please don’t hesitate to “Message Me“. Check back next week for tips about using photo tags. Click “Follow Me” to stay in touch. I hope you have a wonderful week!
