
Brush Your Art Out
It’s the week of Thanksgiving here in the United States (US). For those of you who don’t know much about this holiday, in brief it’s all about being grateful for everything we have. Thanksgiving has been celebrated in the US on and off since 1789. It originated as a day of thanksgiving and harvest festival, with the theme of the holiday mostly revolving around giving thanks; with the culmination of Thanksgiving celebrations being a big dinner. Honestly, today I believe the holiday is mostly about food and crazy Black Friday sales. But that’s just a cynical comment from me!
Since it’s a week full of travel, family gatherings & ridiculous shopping habits I thought I’d do a quick post about brushes.
Technology is a wonderful thing! Technology makes our digital crafting experience so much easier (most of the time)! But for today’s tip, I want to get back to basics. One of the very basic techniques available in Photoshop and Photoshop Elements is the Brush. I recently learned that more than just a few people are curious and interested in them, but feel mystified by how to use them. So, today I’ll cover some basic tips for you.
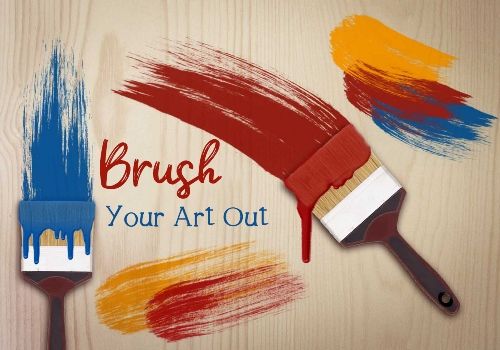
Note: The featured image at the top of this post is actually a set of brushes “Arty Stamps & Brushes 02” by Vickie Robinson.
Digital Brushes

Digital brushes are frequently likened to a traditional paper crafter’s rubber stamp set, but with much more control and variability in their application. A lot of designers’ brush sets include two formats: .ABR Photoshop/Photoshop Elements brushes and .PNG overlays/stamps in black or sometimes even color. And I’m talking about the brushes that go beyond the simple ones we use to spatter paint, “color” or erase.
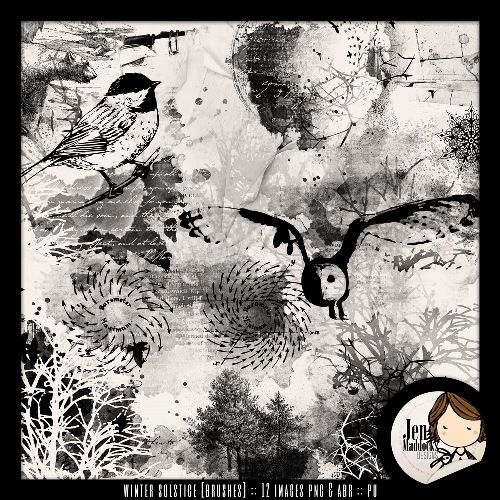
While there are many purposes for a brush, I’ll focus today on only one thing: using an “artsy” brush as a stamp to create a decorative design element for a layout. What do I mean by artsy? I’m talking about brushes that are more than just round, square or paint spatters. Take a look at the “bird stamp” sample above…that’s an artsy brush.
If you either don’t have any artsy brushes or are looking for some new ones, there are a veritable ton of them out there. The choices are vast, ranging from Cloud Sets to Grunge Borders and the selection is only limited by your imagination. Seriously, it’s mind boggling the variety of brushes available today. Many digital scrapbook stores stock brushes and they are usually located in the Tools section. There are also many sites that offer fun and interesting digital brushes as free downloads. Two sites worth checking are Brusheezy and DeviantART.
Now, let’s get started…
Using Brushes
Before I move forward, please remember that I use Photoshop Elements (PSE) so everything that follows is done using that software.
All of the products I’m going to be using today are from several “Winter Solstice” collections by various designers. Including these brushes by Jen Maddocks (retired):
Jen is one of those designers who always includes .PNG files with her brushes. While I could use one of those, today I’m going to use the actual brush.
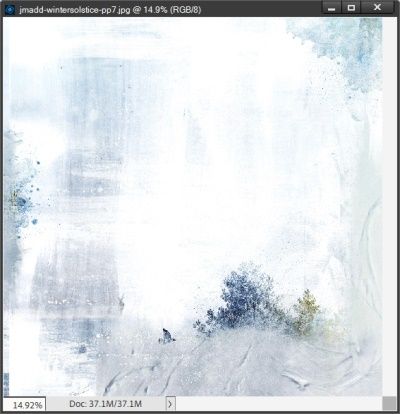
I’m starting with this paper (also from “Winter Solstice” by Jen Maddocks – retired) as a base:
I already have the brushes loaded.

If you aren’t sure how to load new brushes refer back to my post about using torn paper brushes for some pointers.
The first thing I need to do is create a new blank layer on which I’ll create my brushed image. It’s never a good idea to brush directly on the paper. I have a whole lot more flexibility to make changes if the brush is on its own layer. I’m going to start with brush9.png (2452). The 2452 in parentheses signifies the default size of the brush in pixels. A lot of brush designers use this naming standard.

I’ve set my foreground chip color to a blue that matches one of the blues in the paper (#799bb4). I’m going to just tap once on my blank layer so you can see what the brush looks like without making any changes to the settings.
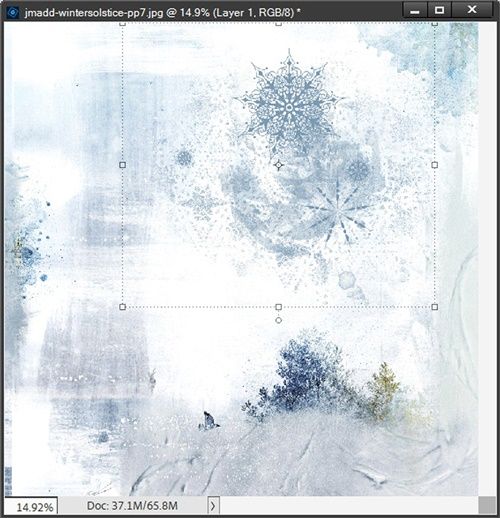
The snowflake “stamp” now appears on the page in the color I chose & the angle at which the designer created it. I now want to add at least one more occurrence of this brush but not so big and perhaps a different color.
First thing I do is create another new blank layer. I always prefer to have each of my brushes on its own layer. Just as with “brushing” directly on the background…it’s just a good idea to keep them separated. So much easier to modify them individually if they’re separate.
I want to use a color that will pick up on the greenish-gold color on the trees near the bottom right of the background paper. I used the color picker to change the foreground color chip to the shade I picked (#beb16b). I also resized the brush to 1200 pixels. I like the size but I really want to have this one at a different angle.
When I first started digital scrapbooking, I wasn’t aware I could change the angle of a brush before I “stamped” it. In all the classes I took back in the beginning, I don’t recall ever hearing anyone talk about that. So, for years I would just “stamp” my brush on a blank layer and rotate that new layer as desired. Or more frequently, if the brush set included PNG files, I just used those. I felt so silly when I finally figured out I didn’t have to do that.
Over the years I’ve run into more than just a few people who also didn’t know about rotating a brush using the Brush Settings panel in the tool options area. So, I didn’t feel too badly about being late to the party. But I’m going to open the Brush Settings panel in the tool options area and show you just in case you too are unaware of this rotation option:

I open the Brush Settings panel in the tool options area:

I’m only going to focus on one setting today…Angle. If you’d like to see a post about all of the other brush settings, just “Message Me” and I’ll write about those in a future post.
Anyway, right there, circled in red is the Angle setting for the brush. Seriously, when I discovered this, I felt stupid having never noticed it sooner than I did. Oh well…lesson learned even if it was “late”.
All I have to do is set the angle to whatever I choose. I can either enter a number in the box or use the arrows on the “dial” to rotate it as I see fit. Sort of like using the corners of an image to free-rotate it on a page. You can watch the angle change while rotating by checking the brush “preview”. All you have to do is move your cursor over the page and you’ll see an “outline” of the brush like this:

As you can see, I ended up with a -90 degree angle. Let’s see what it looks like on my page:
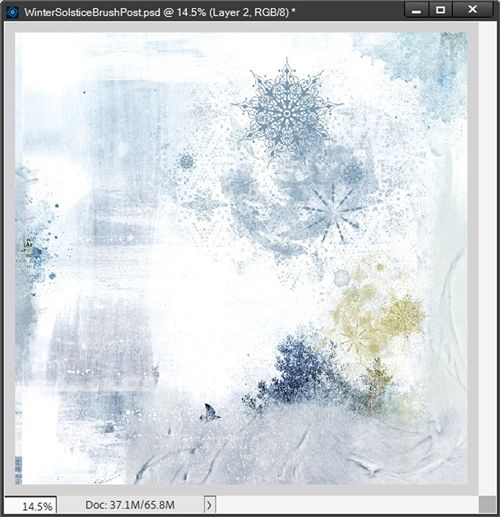
You can now easily see that the predominant snowflake is along the right side of the brush rather than at the top. And I’m so happy with the color as it touches the trees. I could lighten it up some by changing the opacity. But I think I’m fine with it for now. This background is starting to take shape.
I want to add one more brush before I use this as a base for my layout. Again, I create a new blank layer before selecting the next brush – brush1.png (2227). This time I’m setting the foreground color chip to a color that matches one of the darker blues on the paper (#333d82). I then set the brush size to 1500 and the opacity to 58%:
See how easy this was? Seriously, it took me longer to write this post than it did to create this wintery background.
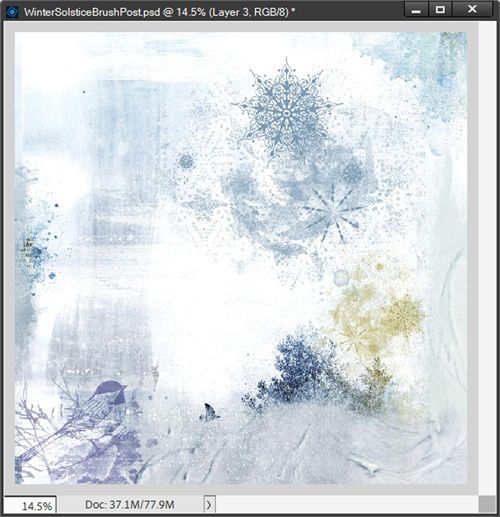
Because each one of those brushes is on its own layer, I will have the flexibility to move, rotate or resize them if I need to while I create my winter layout. I’m going to save this as a paper as it is simply because I like how it turned out.
But for purposes of pulling this into a template, I’m going to link all the layers together, highlight all layers and while holding the Shift key I can just drag the layers right onto the background layer of the template I plan to use. Using the Shift key tells PSE to place the layers in the exact position they were in within the “paper” file. And it keeps the three brushes on their separate layers.
With the background in place, I can go on to create my layout. After a bit of work, this is what I ended up with:

I did make that bird brush a bit smaller and I moved the larger blue snowflake brush just a touch.
Note: Other than the background paper I created above, additional products used (including a template) in creating this layout are from “Winter Solstice” by Heartstrings Scrap Art or “Winter Solstice” by Aimee Harrison. For more details about this layout you can view it in my 2023 Gallery.
Try using digital brushes to add texture, pattern and imagery to your projects. By simply pairing them with digital elements & paper packs already in your stash you can create fantastic layouts. By giving you these basic tips for using brushes, I hope I have demystified them for you. So, please try to give brushes a go on your next layout!
Some Basic Pointers On Brushes

Always create a new layer before adding a new brush image. This will allow you to easily make changes by re-coloring, re-sizing or erasing on each layer.
The .PNG files included with brushes can also be used as overlays on digital layouts. Don’t limit them to black or white, though. The shapes can be selected and filled with other colors.
Play with layer blend modes for a variety of results.
Experiment with rotating a brush before “stamping” it on the page. I know a lot of people who didn’t even know that was an option!
Once you’ve added a brush to your layout, you can clip a paper to it, experiment with Blend Modes and/or Opacity levels, apply a Photoshop Style and/or transform the brush. Let your imagination take the reins
To create an original and interesting background, try stacking and overlaying different brush designs.
Try “stamping” an artsy brush over a photo to add an interesting element or word art to the photo.
I know I sound like a broken record here. Just have fun playing with brushes. Over time you’ll come to view them as a vital tool in your digital arsenal!
As usual, if you have any questions or need a bit of help, please don’t hesitate to “Message Me” for some assistance.
Thanks for reading this week’s tip. If you want to stay informed about next week’s post, just click “Follow Me” to get an update. I hope you have a wonderful week!
