
Ready To Create A Layout?
Once you feel comfortable with whatever software program you’ve chosen it may just be time to go shopping. Though if you’ve been playing with software, you likely already have some papers and elements with which you’ve experimented. But you’ll certainly want to expand your digital supply stash so you can start creating your own personalized scrapbook pages.
Step #4 Choosing Digital Kits
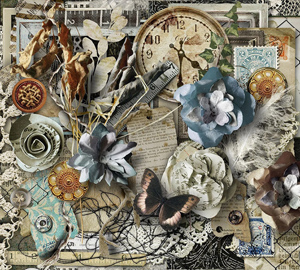
Digi-scrap kits are downloadable files of image graphics, typically .png and .jpg images compressed into a .zip file for easier downloading. This format makes it possible to use the images for papers and embellishments in a variety of programs.
I like to build my stash with colorful, well-designed products in a range of themes. While I have many go-to designers, my never-fail sources for fresh ideas & kits are: Sweet Shoppe Designs, Gingerscraps, Pickleberry Pop, Katie Pertiet Designs (formerly Designer Digitals) and Oscraps. Look for fun collections that stretch your imagination as well as timeless basics you can use again and again! You can read more about a variety of the great shops available on my “Shops” page.
Know What You Need
When I’m choosing a kit to work with, I look for these things:
- Colors: What colors are going to coordinate well with my photos? Or, what colors draw me in?
- Theme: Take some time to look through your photos – would an all-purpose kit work best or would you do better with say a holiday or special occasion themed kit?
Picking a theme is generally pretty easy and driven by the content of your photo. Seasonal, Holiday or Special Occasion photos are the easiest. All you have to do is look for kits that fit the desired theme.
Picking kits by colors can require a bit more thought. And this doesn’t come into play only when shopping. You also need to know how to pick the right layout colors to fit your photos. Generally speaking, if you aren’t going with a specific theme just try to pick a kit that has colors suited to your photos. I know that sounds easy but even I struggle with it from time to time.
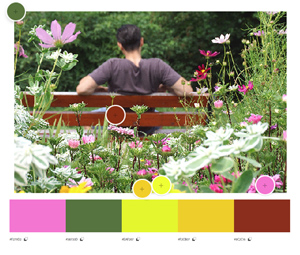
There are a lot of people that use a color wheel (even in traditional scrapbooking) to pick their layout colors. If you’re into that kind of thing…go with that. If that all sounds a bit too complicated for you, just pick 3-4 of the most predominate colors in your photos and start there. One of the most important things to remember is that you need to be happy with whatever colors you pick…no one else’s preference really matters. It’s not like you’re going to be judged or graded on your work. It’s your scrapbook page and you’re the only person you need to please (well at least most of the time). But if you want to approach it in a more “technical” method, you can watch for more tips on “color picking” in a future post.
Get The Most Bang For Your Buck
I know those of you who are just beginning could be overwhelmed by all the shops & products available in the digi-scrap world. And with the current inflation rate (at least in the US) finances might be an issue. And if you’re shopping at sites outside of the country where you live…there’s the added concern about potential “exchange rate” issues. So, you’ll want to be mindful of that.
Almost every digital store that I frequent has weekly (sometimes daily) specials so watch for these kinds of deals to help save a bit. Also, keep an eye out for freebies to help stretch your dollars. While there are lots of free goodies out there…they may not always work out the best from a quality perspective. Try to remember…you get what you pay for. And another thing about freebies…just because it’s free doesn’t mean you HAVE to download it. Look at that freebie carefully, if it doesn’t seem like something you’d ever really use…skip it!
I also want you to know that just a couple of kits can become so versatile. One key thing here is this; unlike traditional scrapbooking, you can use that one kit over and over again. And there are other ways to get creative with your supplies. You can re-color things like flowers, bows & buttons (just to name a few) to match your particular color scheme. You can “clip” paper to just about any “flat” shape. And you will find that countless more ways are out there as you start expanding your knowledge and experimenting on your own. But, watch for more tips on “enhancing your stash” in next week’s post.
Most Important Shopping Tips!

Don’t be drawn in by the latest “shiny object” or great deal. It’s so easy to start grabbing kits simply because they fit your favorite theme/color scheme or come from your favorite designer. I know this all too well as I’ve been guilty of that. You need to carefully look at new things to see how much of it is really new for your “stash”. It’s so easy to end up with duplicate elements. Especially if you tend to gravitate toward a particular theme.
I know this next bit might not seem very important right now but trust me, you’ll thank me later. It’s a really good idea to keep track of the designer’s name (and perhaps store & date of purchase) for each kit that you buy. It’s not always easy to identify the designer simply by looking at file names. Some designers are great at naming their files including their “personal/business name”…others not so much.
So why is this important? For a couple reasons; 1 – Someday in the distant future you may want to find something that coordinates really well with that “old” kit. Sometimes the best way to find similar kits is to go back to the original designer. 2 – After you’ve gained some confidence you might try your hand at participating in challenges offered by the shops you frequent. Any time you publicly post a layout it is common courtesy (or often required) to give credit to the designer(s) & product(s) used in the layout. If you haven’t kept that information somehow…it could be tricky finding it later on. I’ll give you some more tips in a future post about how best to keep track of this information.
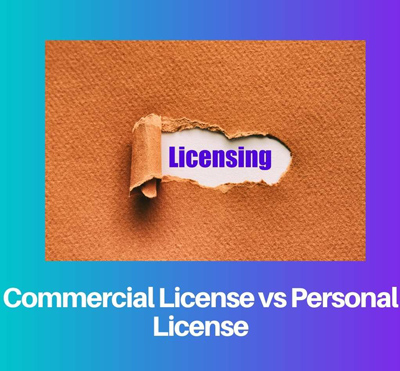
Another important tip that may or may not apply to you; you need to be aware of some rules. Just because you purchase a kit (or any digital supplies) doesn’t mean you get to do whatever you want with them. Most kits available on the web come with limited licenses, which means you can only use them with personal projects. For the average “home” scrapbooker that shouldn’t be an issue. So, unless you’re a kit designer, sell things to others (i.e., vie Etsy, Facebook Marketplace, or other means, etc.) or even scrapbook for others (for a fee – 4Hire), you’ll be fine.
However, if you are looking at (or even thinking about) selling or scrapbooking 4Hire you’ll need to be mindful of this licensing issue. Some, but not all designers offer products with commercial licenses. Just be sure to check the license for each item before using them with your “for profit” projects. If you don’t have a commercial license then you can’t sell anything using that product. Keeping track of these licenses will be important if you plan on selling. I’ll give you some more tips in a future post about how best to keep track of this license information.
Another thing to look out for as a beginner is to be sure your digital supplies are of high resolution. Typically, you want to find items that say they are created at 300 dots per inch (dpi) for best quality. If you use low resolution graphics or the images are blurry, pixelated or have jagged edges your designs will not look as sharp when printed. If you buy from a reputable shop this is easy. Most (if not all) reputable shops will require that their designers follow the standard of 300 dpi images when creating their products.
If you like what you’ve read and haven’t already clicked on the “Follow Me” button please do. This way you’ll easily stay updated for next week’s tip about enhancing your stash…