
Warped Frame
Well, in last week’s “Recoloring – Part 4” post I promised to give you a break from coloring. So today will be a little easier and hopefully more fun. And, if you’ve seen my post about an “Out of Bounds” effect, the featured image at the top may look a little familiar. The image in my original post was angled but not in the same way as the one above. That image is a great example of a warped frame which is exactly what I want to talk about today.
Creating a warped frame can add a different twist (no pun intended 😉) to the theme of your project. You can have a fun title bumping into the frame, causing it to bow. Or you can warp a frame to create dimension if a cluster is tucked under or close to it.
Bend The Frame
Not all frames will work with this technique. Actually, any frame could work. It’s just that not every frame will look good. If I were to warp a wood, metal or any kind of ornate frame, it would look anything but realistic.
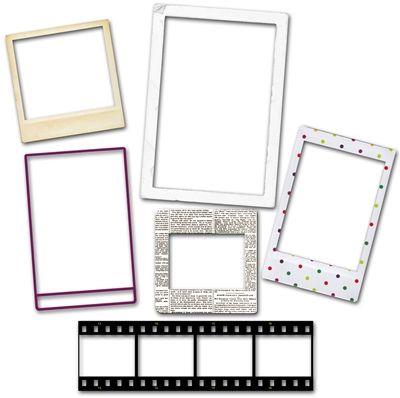
The best types of frames for warping are paper or “stroke outline” frames like the ones you see in the image directly above. Filmstrips work fairly well as long as they are relatively straight. I would discourage you from using frames that aren’t of a rectangular or other simple geometric (non-circular) shape. You really need a definable “side” in order to accomplish a nice warped frame.
Just a quick reminder; I use Photoshop Elements (PSE) 2024. If you use a different version, some of my screen shots may look different from what you see on your screen.
I’m going to be using the Warp tool today to create the warped frame. Before I start this process, I do want to point out that the Warp tool has only been around since PSE 2022 (sometime in 2021).
Note: If you’re using an older version of PSE than that, you should be able to use the Distort or Skew tool instead. These transformation tools have been present since the early days of PSE. So, you should still be able to warp your frame. Just perhaps not quite as easily (or neatly) as with the Warp tool. But I do think with some patience…you can make it work 😉
I’m going to start with a 12×12 file with a grey background (#b7b3b3). And I pull in the frame I want to warp:
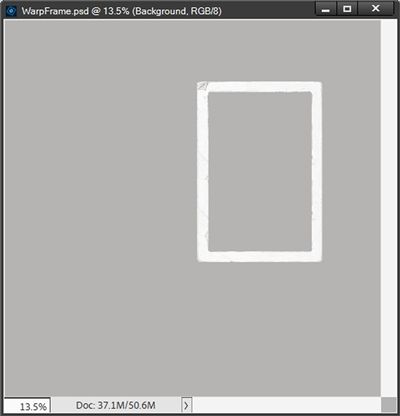
This frame is one I created quite some time ago. If you’d like to follow along exactly, you can click here and this frame will be automatically downloaded for you.
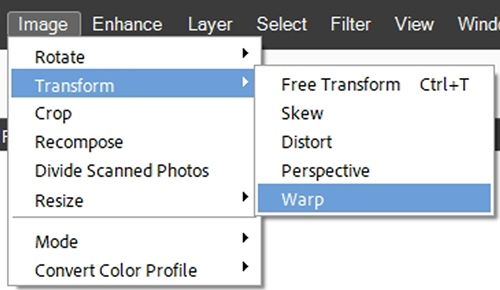
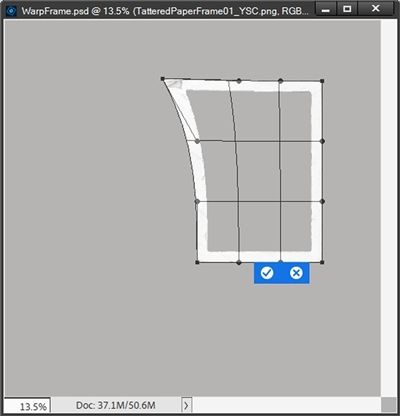
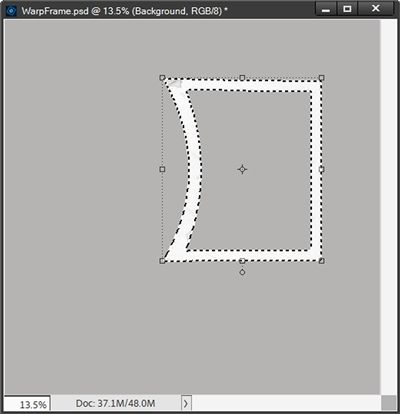
With the frame layer active, I go to the top tool bar and click Image->Transform->Warp:
PSE places a different bounding box around the frame:

That’s a whole lot more anchor points than a normal bounding box. But don’t panic. To keep things simple, I’ll only be using two of these anchor points. And PSE also opens the Warp tool options at the bottom of the workspace:
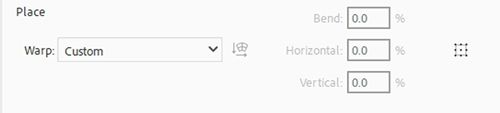
PSE defaults the Warp setting to Custom, which is exactly where I want it to be. And all of the other settings are greyed out. The other options for Warp are identical to those used with the Warp Text tool. I’m not interested in any of those. But you are welcome to play around with them if you like. Just select a different Warp option than the default.
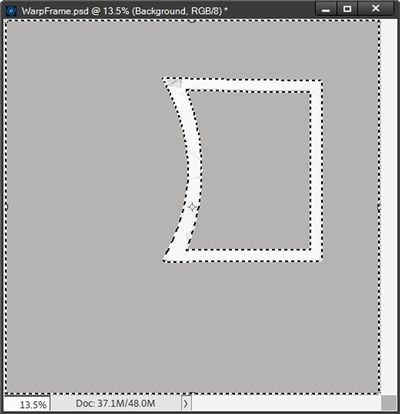
I’ll start with the top left anchor point. I click on that point and start to drag to the left with a slight upward tilt. PSE displays what I’ll call an “axis box” while I drag the anchor. It looks something like this:
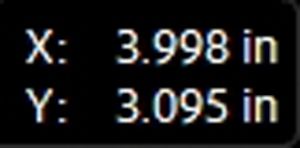
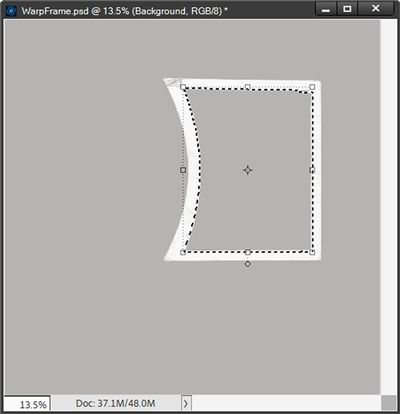
The X value represent the horizontal position change; the Y value represents the vertical position change. I just drag until I have the warp I’m looking for:
This is very important…I do not click the check mark to confirm the warp just yet.
Note: In case you want to know, when I reached the top warp that you see above the X value was 2.890” and the Y value was 3.021”. You don’t have to recreate the same warp values. I just thought I’d let you know what mine were.
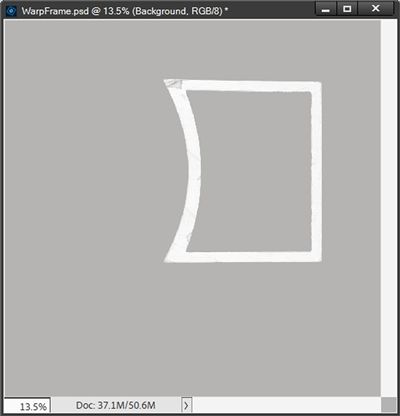
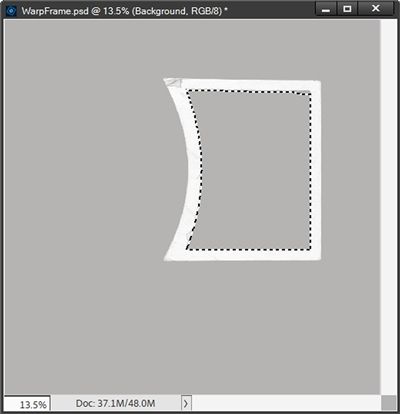
Now it’s time to work on the bottom left corner. I click on that anchor point and start to drag to the left with a slight downward tilt. PSE again displays the axis box. I just drag until I have roughly the same warp value for the horizontal (X) axis (2.890”).
The vertical (Y) value is a little tricker because it won’t be the same as the top corner. But that’s okay. I just drag it down until it looks close to the same vertical (down) change and click the check mark to confirm:
Note: In case you want to know what value I ended up with for the bottom warp’s Y axis, it was 8.910”. Again, you don’t have to recreate the exact same warp.
Now all I need is a nice clipping mask for the photo…
Create Photo Mask
I have found that the best way to create a clipping mask for a photo is to use the warped frame to create a selection that I can fill with a color.
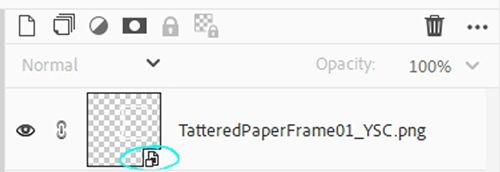
Before I show you how I do this, I have another little PSE teaching moment. You may or may not have noticed something. If you look at your Layers Panel, you should see that the frame layer is still showing up as a Smart Object. You can identify this by the icon in the bottom right corner of the layer’s thumbnail. It looks like a piece of paper with a square over the bottom left corner:
So, you may be asking, “Why did PSE allow the warp without first simplifying the frame?” And that is a fair question to ask at this point.
Even though it feels like I edited the frame, using the Warp tool on a Smart Object retains the ability to re-edit or remove the transformation later, unlike a regular rasterized layer. Therefore, PSE considers warping to be a non-destructive edit. Only destructive edits (any change that directly alters the original pixel data of an image) require simplification first.
With that said, even though I won’t actually be making any changes to the frame itself, as soon as I try to alter any part of a selection made around the frame, PSE will force me to simplify the layer.
Note: If you want more information about Smart Objects, please refer back to my “It’s All About The Size” post from July 11, 2023. In that post I provide a lot of details about Smart Objects and how to work with them.
With the warped frame layer active, I right-click on the layer and select Simplify Layer. I then Ctrl-Click on the layer’s thumbnail to create a selection around the frame:
The frame itself is now selected. But in order to create my clipping mask I actually need the background “inside” the frame to be selected. So, I invert the selection (Shift+Ctrl+I):
I know, now all of the background is selected. Clearly, I don’t want that. So, I grab the Selection Brush tool. I select a fairly large (600px) hard round brush and click the Subtract from selection icon. Then I just brush away all of the marching ants except those around the inside of the frame:
I want to be certain that my clipping mask is slightly bigger than the inside of the frame. So, I go to the top tool bar and click Select->Modify->Expand. PSE opens the Expand Selection dialog box. I set the Expand By value to 20px and press OK to confirm:
You should be able to see that the marching ants now extend over the frame. And this now looks like the size should be perfect.
Next, I click the Create a new layer icon in the Layers Panel. PSE places that layer above my frame (Layer 1 for me) and it is now the active layer. I then simply press Alt+Backspace to fill the selection with my Foreground color:
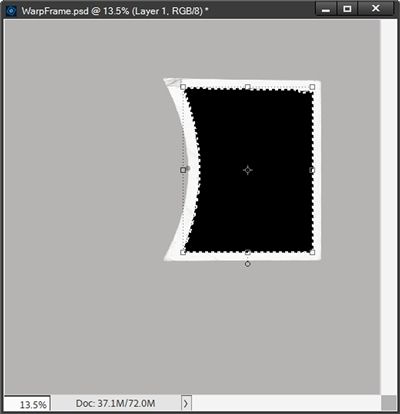
Note: My Foreground color chip was set to black simply because it was the default. It doesn’t matter what color is used for the clipping mask so you can use any color that you like.
I know this seems like a lot of steps as you read through this. But once you get the hang of it, it really does go very quickly! And I end up with a clipping mask the exact same shape as the inside of the warped frame.
I then move the new layer below the frame and it’s ready for a photo.
Now, I also could have created a simple rectangle and warped it to match the frame. I just find it quicker and easier to do it using the “selection” method. You can try both options and decide which one works better for you.
Since this frame is going to be used elsewhere, I copy the frame layer and the clipping mask layer to my layout in progress. I could also have saved this as a PSD file but I didn’t find that necessary. This is a pretty “custom” warp and might never be used more than once.
But I could also remove the background and clipping mask then crop the file to size and save just the warped frame as a PNG file. You can do whichever option best suits your needs.
And here’s the layout I made using this warped frame:
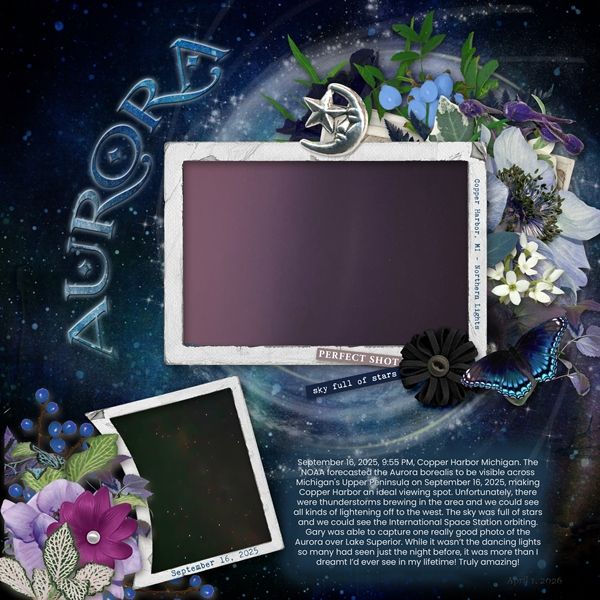
If you’d like to see more information about this layout you can find it in my 2026 Gallery. The title of the layout is “Aurora”. I love how the cluster bumps into the frame and adds a fun effect that mimics the curve of the cosmic starburst under the main photo!
My frame warp was pretty exaggerated because I knew where it was going to be used. You don’t have to make your warp quite as extreme.
Final Tips

The most important tip is that you remember the best frames for this technique are simple, paper or outline frames.
It really is best to try sticking with a rectangular/square frame for this technique. Any frame with more than 4 sides can get a bit tricky when it comes to warping. Even triangles and diamonds can be tough to warp. But don’t be afraid to experiment.
You are not limited to warping only one side of a frame. You can warp all four sides.
When you do warp more than one side of a frame try to keep the warp the same on each side. Otherwise, the dimensions of the frame itself could start to look odd or “off-sized”. This is the same thing that happens if you re-size a frame without using a corner and dragging diagonally.
Be careful when creating an extreme warp. This too can result in extreme changes to the dimensions of the frame itself. Again, this could start to make the frame look odd or “off-sized”.
Creative quote for this week: Every new idea is just a mashup or a remix of one or more previous ideas. – Austin Kleon
Thanks for reading this week’s Tuesday Tip. Remember, if you have any suggestions or questions please don’t hesitate to “Message Me“. Check back next week for tips on dressing up a “white space” layout. Click “Follow Me” to stay in touch. I hope you have a wonderful week!
