It’s All About The Mask
I’m cautiously pleased to report that the software team working on the gallery issues appears to have found the problem. As of today, the galleries are all visible again. However, fixing this caused an issue with another “piece of the pie”. Consequently, another software team is now working on things behind the scenes.
Gosh sometimes I really don’t appreciate how technology has, contrary to popular belief, not made things easier for me. In any event with things still in flux, I’m sticking to making sure another week doesn’t go by without a tip from me. Hopefully all things will be back to normal soon.
We’re getting so close to Halloween. It seemed a good time to talk about Masks! I know…kind of a cheesy lead-in to this week’s Quick Tip.
Creating A Mask
There are virtually tons of masks on the market. If you did a search for digital photo mask on the internet or any given digital shop, you’d likely be shocked at the results.
If you either don’t have any masks or just need/want to create your very own unique mask, all you need are some Photoshop brushes. And once again, there are a veritable ton of them out there. If you’re on a budget you may not want to spend the money. No need to worry, there are oodles of free brushes at Brusheezy (sample above).
But if you use PSE, you have some very lovely “preset” brushes that will work just fine. Let’s get started…
First, I need a blank document. Anytime I’m making a mask I chose to set my blank file at 8×8 with resolution set to 300 and background set to transparent. This is generally good for most any photo mask. If you’re looking to make a “page” mask, I’d recommend that you set your blank file at 12×12.
Note: The blank file will show up in the Layers panel as Layer 1. I generally rename this to Base.
Next, I always create a new layer for my brush work (layer name will default to Layer 1). The reason I create a new layer is so I always have a completely transparent background under my mask. This will make more sense in a minute.
I select the brush tool and use the Brush drop-down menu in the options area to select the Artistic Brushes that come with PSE.
For this example, I am using watercolor brush number 1442 – Painterly Brush. It’s named 1442 because that’s the size of the brush in pixels (px).
When using the brush tool remember that the foreground color chip will dictate what color is brushed onto the layer. I can change the size and opacity of the brush using the slider. I can also change the brush color with the color picker.
I first ensure that I have selected Layer 1 (the new layer). When I’m ready to brush, I just position the cursor over Layer 1 and click. It’s that easy!
Some brushes require only one click and some require a click and drag. It all depends on the type of brush that you are using and the effect that you want to achieve.
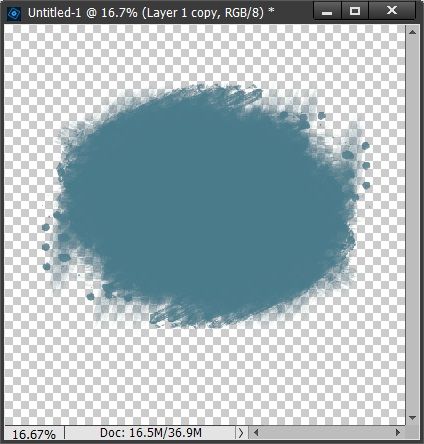
In the image above I kept the size of the brush at 1442, set the Opacity to 96% and had my foreground color chip set to #447c8d. I did drag the brush around until I was happy with the result.
One thing about brushes…you can’t rotate them while you’re brushing. Kind of unfortunate. but easy to work around. And you’re now wondering why on earth I’d want to rotate a brush.
Look at the image above. See those cute little “splotches” off to the left? I’d really love it if those were also on the right side of the mask. So, what to do?
This is why having your “mask” on its own layer comes in handy. All I have to do is duplicate the layer, rotate it horizontally and voila…I also have those splotches on the right now.
Note: I also rotated the duplicate layer vertically!
And there you have it…a simple mask and it took hardly any time at all. And it was so easy.
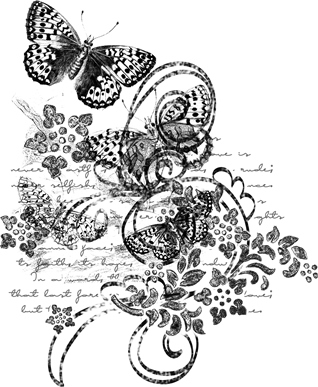
But you needn’t stop there. I’m sure you’ve seen some more complex masks that include text or other images. If you read my post about Digital Stamps you saw a lovely example:
This stamp is from “Metamorphosis” by Karen Schulz Designs (retired). And now I’m going to show you how to incorporate it into the mask I already created. I pull that stamp into the mask file and resize it.

Yes, it’s black and on top of the original mask. That actually wouldn’t make any difference if I created the mask PNG file exactly as is. But again, Type-A personality here. I will move it to behind the mask & recolor it to match.
Before I recolor the stamp, there is one important step. I have to simplify & then “lock” the opacity level of that stamp. Take a look at the very fine detail in the butterfly’s wing:
Watch what happens if I forget to lock the opacity level.
That doesn’t look very nice now does it? So how do you lock the opacity level? There’s a little icon at the top of the Layers panel that you may or may not have ever noticed. Its name is actually “Lock transparent pixels”:
With the stamp layer active (& simplified), I click this icon.
See how the same little icon now shows up on the stamp layer? You always want to be certain that the stamp (or any image that is not completely solid) has this little icon before you recolor.
Using the Paint Bucket Tool and the same color I used for the “brush”, I then recolor the stamp. See what a difference this makes?
And here’s my mask now fancied up a bit:
See how easy this was? Seriously, it took me longer to write this post than it did to create the fancy mask.
So that’s today’s quick lesson on creating your own mask. I hope you give it a try!
Some Extra Pointers On Creating Masks
Never be afraid to start with a mask you may already have in your stash and modify it to come up with a mask that suits the needs of your current project better.
Creating your own unique mask is very simple all you need is a brush or two!
I know I sound like a broken record here but the key is practice, practice, practice. The more you work with brushes the better you’ll get at creating your own masks.
As usual, if you have any questions or need a bit of help, please don’t hesitate to “Message Me” for some assistance.
Thanks for reading this week’s Quick Tip. If you want to stay informed about next week’s post, just click “Follow Me” to get an update. I hope you have a wonderful week!


