Stamp Your Art Out
If you’ve been scrapbooking or at least purchasing digital supplies for very long you’ve likely run across digital stamps. And no, I don’t mean postage stamps.
Even way before I discovered digital scrapbooking, I have always loved the way “stamping” looked on cards & layouts. A very long time ago I tried desperately to be a “stamper”. I had several beautiful, old-fashioned rubber stamp sets. But I always found myself frustrated. I’d either not have enough ink or I would wiggle and get a double image. Worse was not being able to position things properly (there’s that pesky Type A personality again 😉). It was impossible to see what you were doing through those old wood blocks. I believe art should be fun not annoying so I eventually gave up.
Then in the early 2000’s acrylic stamps/blocks hit the market and I was hooked. I soon had oodles of cases full of acrylic stamps just begging to be used on projects. Oh, what a joy to finally master stamping.
Now I “live” in the digital world and I have ever so much more fun with stamps than I ever dreamed. A digital stamp (also referred to as a digi-stamp) is a PNG mage that may or may not be a solid color. Some designers call their stamps graffiti, brushes or even paint. Sometimes you can even mistake a stamp for a mask, especially if its black. But these images, regardless of what they’re called, can be so much more versatile than you would imagine.
Do you have some digital stamps and just haven’t figured out how to use them. Well today I hope to help with that…
Using Digital Stamps

There are many different styles of digital stamps. Some are simple “line drawing” type images that resemble old-fashioned stamps meant for coloring. And some are artsy/intricate stamps meant to be used as an accent or even part of a mask or background.
I’m going to cover both below…
Coloring Simple Digital Stamps

Yes, you can color them digitally just as you would on paper. All you need are some brush tools in your graphics editor. Everything that follows is done using Photoshop Elements (PSE). If you don’t use PSE, I’m fairly confident you can accomplish the same with whatever graphics editor you use. If you need more help just search for tips/techniques associated with your given software.
The flower image above that I’m going to use is from KindPng. They have a lot of free digital stamp images if you’re looking for some.
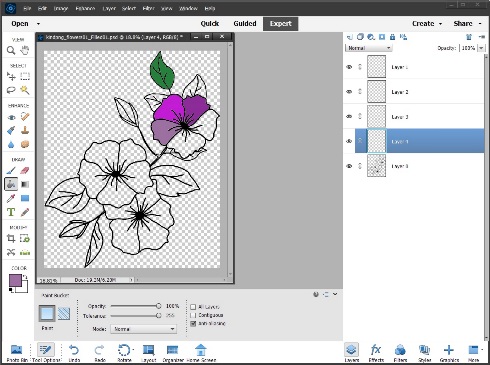
With the stamp open in PSE, I create a new blank layer and place it under the stamp image. Then I select a nice watercolor brush, and change my foreground color chip to the appropriate color and just start coloring away. I used a different layer for the flowers than the one for the leaves as you can see here:
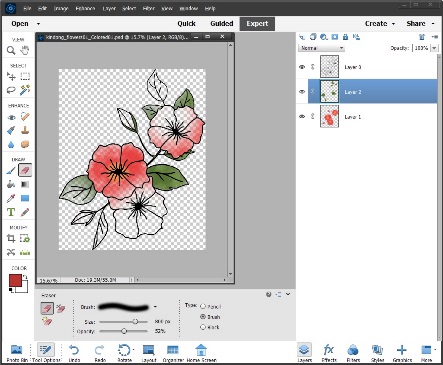
Here’s what I ultimately ended up with:

Yes, it can be tricky if you’re a beginner or just aren’t sure about digital coloring techniques. But I’d encourage you to play around with it a bit. Look for some tutorials about digital coloring. There are so many good ones out there. It just didn’t seem to make much sense for me to “re-invent the wheel” and explain all of that here.
The beauty of digitally coloring is you can erase or “mask away” any mistakes you might make…something I could never do with stamps on paper!
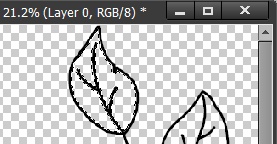
If you just want to fill the image with solid colors rather than using a watercolor effect that’s easy to do as well. I’m going to leave the outline black. Next, I’m going to use the Magic Wand tool to select only the inside portion of the top leaf.
With the Magic Wand tool selected, I ensure that Contiguous & Anti-aliasing are both checked in the tool options. Then I click anywhere inside the top leaf. This results in those little “marching ants” all along the inside lines of that leaf.
Now, I generally like to keep my fill colors on a separate layer just as I did with the painting option above. So, I’ll create a new blank layer. With that new blank layer selected I will fill the inside of that top leaf (marching ants should still be there) using the paint bucket tool and a nice shade of green:
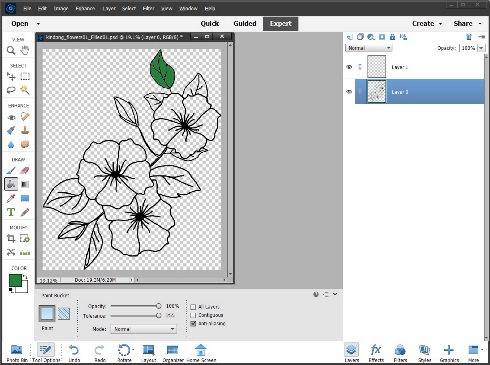
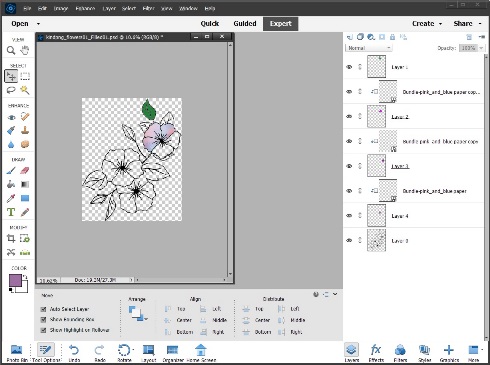
I can then repeat the process until I have all the parts filled with the colors I choose. I’m just going to show you a portion of that filled in:
As you can see each one of the colors is on its own layer. The beauty of that is I could now choose to clip papers to those layers to get an even more interesting look. For now, I’m just going to use a watercolor paper from my stash (origin unknown) to show you what that would look like:
I hope you get the idea of how versatile simple stamp elements can become when colored using this fill technique.
Coloring Artsy/Intricate Digital Stamps
Not all stamps are created equal. Some can be very detailed, intricate & perhaps too complex to “hand color”. But that doesn’t mean you can’t re-color those as well.
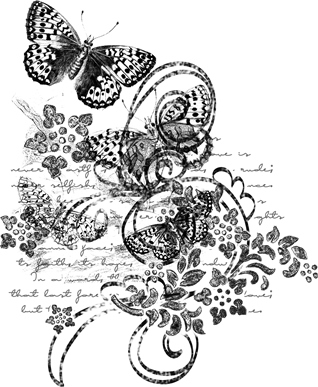
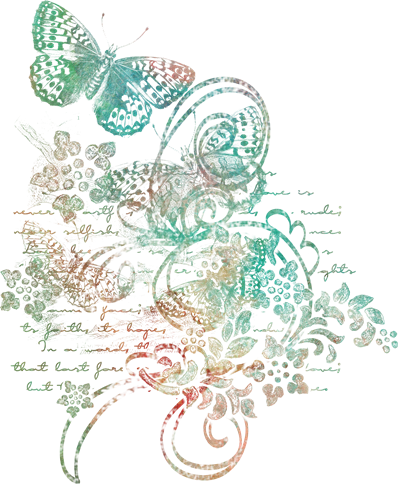
The image above that I’m going to use for this technique is from “Metamorphosis” by Karen Schulz Designs (retired). Notice how complex this stamp is. Imagine trying to color that the way I colored the simple stamp. I don’t have that kind of patience! So, what’s there to do with this black stamp?
Obviously the first option would be to fill it with a color…any color. But then it’s just one color. I’d like a bit more pizazz than just a single color. I’d much rather see a multi-color, luscious blend. To accomplish this, I’m going to use an overlay that I have from “Stratified Overlays” also By Karen Schulz (retired):
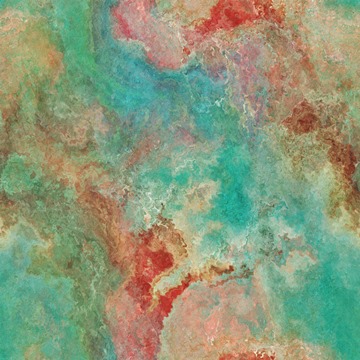
With the stamp open in PSE, I just clip the overlay to the stamp image. And this is the result:
How lovely is that? As pretty as that is I decided to play around with blending modes to see what some other options might be. This is what it looks like with a blend mode of Hard Light:
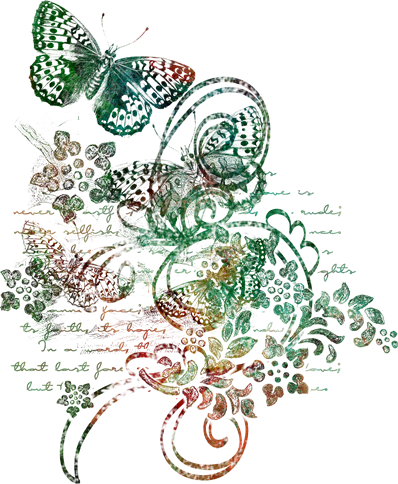
This is very different but also very pretty. Don’t ever be afraid to experiment with blend modes whenever you clip something to an image.
But there’s more…
You can also apply a style to a stamp. I’m going to use a style from “Stratified Styles” also By Karen Schulz (retired) which matches the overlay I used above. It is going to look different from using the overlay due to the other attributes associated with that style:
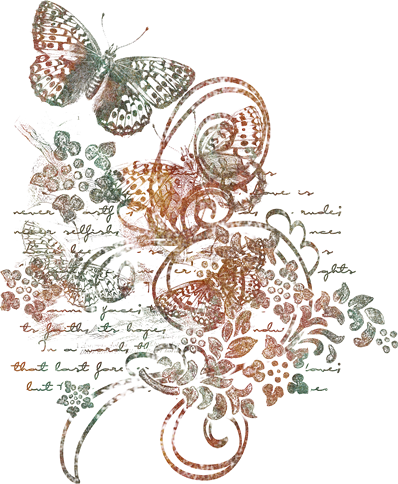
Different but nonetheless lovely. And don’t be afraid to try clipping overlays/papers or applying styles to some of your stamps, graffiti, brush PNGs, or paint. You never know what you’ll discover!
All of this should give you an idea of what you can do to use those stamps you’ve always pondered.
Single Most Important Tip About Coloring Stamps

Don’t be afraid to experiment with one or all of the options above. That’s the best way to learn. And if you get lost, confused or just need a bit of help, please don’t hesitate to “Message Me” for some assistance.
And as I have said with so many other tips…the more you play with re-coloring stamps the better you’ll become at coloring. And you’ll be stretching not only your supplies but also your imagination & creativity. So, have fun with it.
Thanks for reading this week’s Tuesday Tip on using stamps. If you don’t want to miss the next post, just click “Follow Me” to stay in touch. And as always…“Happy Scrapping!”
