Texture Tip
I don’t know about you but sometimes I feel like I can never have too much paper. I can’t tell you the number of times I’ve been working on a layout and just can’t seem to find exactly what I need. So, what do I do? I make my own paper, of course!
Most often this comes down to wanting a textured paper that fits not only my layout but the kit with which I’m working.
I tend to have a few favorite textures that are sort of a “go to” for me. And today I have a quick tip about how to make texturizing paper a little easier…
Texture Template
A quick reminder before I begin…I use the current version of Photoshop Elements (PSE – 2024). So, my screen shots may look different than what you see on your screen.
I realize I said this was going to be a quick tip and it really is. It just takes a bit of explanation and multiple images to help illustrate how to implement this technique. Please just be patient with me as you read through what might still seem like a long post 😉
Quite a while back I realized that I tend to gravitate toward the same kinds of textures on a fairly regular basis. Rather than trying to remember where they are each time I want to use one, I’ve created a template for myself. This might sound silly but I can promise you, it’s a timesaver.
If you don’t often find yourself creating paper…this may not be a helpful post for you. But perhaps once you see how easy it can be, you might just take a turn at making some of your own texture papers. So, let’s take a look.
So, why set up a template? It’s a simple (kind of lazy) reason. This template is designed to “store” my multiple “go to” texture options in one file so I can more easily try all of them out on the solid paper(s) I load or create.
Setting up a template is super easy. The first step is to create a new blank 12×12 file in PSE by going to the top tool bar and selecting File->New->Blank File:
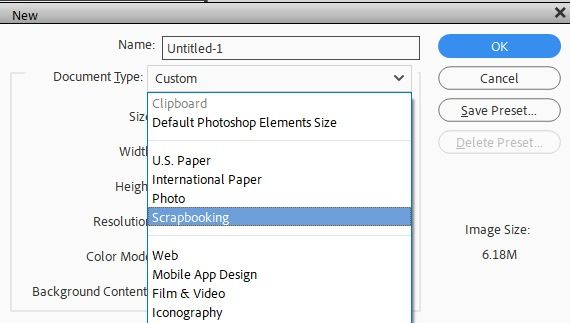
PSE will then open the New file dialog box:
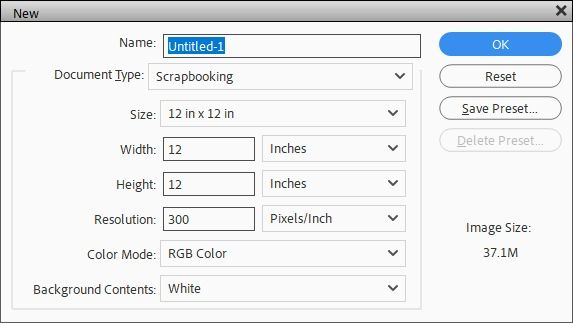
In my version of PSE I have the option to select Scrapbooking from the Document Type drop down which will automatically set the Size to 12×12, the Resolution to 300, the Color Mode to RGB and the Background Contents to White:
The only change I make is to set the Background Contents to Transparent. Then I just click OK and PSE creates that new blank file.
If you don’t have the Scrapbooking Document Type just select Custom and use the same settings I used above.
Now it’s just a simple matter of loading/creating some solid papers and adding the different textures you want to use above all the papers.
Let me show you…
Load Paper
I’m going to start by adding paper to this template. You may find that a bit odd since the template is supposed to be more about storing textures. But having paper(s) pre-loaded will make it easier to assemble the textures “collection”.
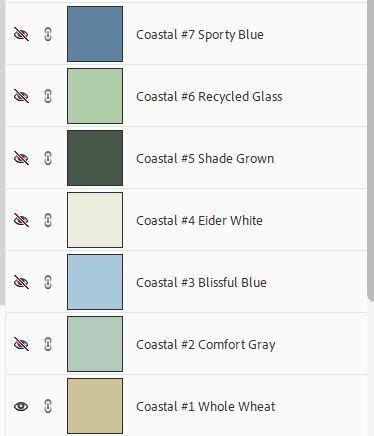
Typically, when I’m creating textured paper it’s because I can’t find one in my “stash” that fits the color scheme for my layout. So, I end up creating my own colors based on the color scheme I have in mind. Sometimes that’s driven by a kit, sometimes by my photos. Today I’m going to be using a set of colors I created for a “Coastal” themed layout. Here are my Coastal colors:
As I created these solid papers, I named them according to the theme and a color name. As you can see, I’ve hidden all but the first color (Coastal #1 Whole Wheat).
You certainly don’t have to create/load this many colors into your template. This just happens to be the color set currently in my template. I would suggest that you start with at least a few different ones that vary in shade from light to dark (even if all the same color – like varying shades of blue). This is important because textures can show up differently depending on the paper color.
Note: You may remember me talking about a coastal color theme once before in my post about saving colors. The colors above are actually an expansion on those other coastal colors.
If you’re working with a specific kit that has a nice selection of solid colors just pull a few of those into your new file. Then hide all but one of those solid papers.
And as I already mentioned, there’s nothing that says you have to create/load more than one color if that’s all you want to “play” with. Besides, it’s always easy to change that single paper to any color you like.
The real reason to set up this template is to “store” multiple texture options that you can try out on the solid paper(s) you load or create.
Load Textures
Now it’s time to start loading the various textures. Again, this is a simple matter of pulling in whatever texture(s) will be used on the paper(s). Just be sure to add the texture(s) above the paper(s).
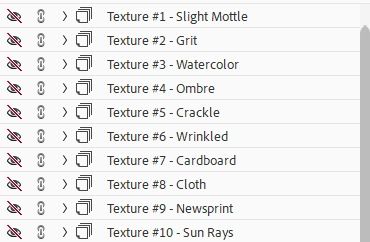
I have ten that I tend to use a lot so they’re already in my template:
You can see that right now, they’re all hidden. As you pull your textures in, I would encourage you to keep them hidden until you’re ready to start “playing”.
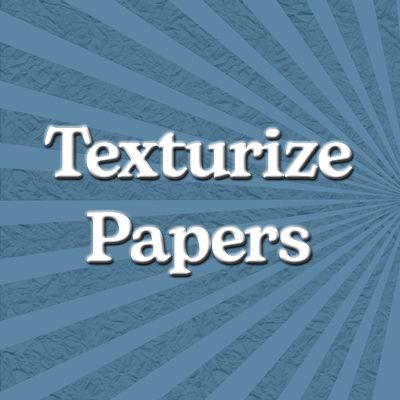
Note: See the texture named Texture #10 -Sun Rays? I used that texture to create the background for the image near the top of this post.
You may also notice that each one of those textures shown above is actually a “group”. You’re probably wondering why. I’ll explain…
Adjusting Textures
Most often when I’m using a given texture, I end up duplicating it, rotating it and using different Blend Modes on each layer depending on a variety of things. Most specifically the base paper’s color.
Here’s how I create those “groups”. I start with one of my solid colors and select a texture:
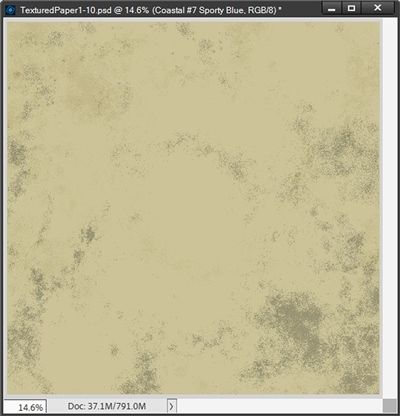
For this example, I used the Coastal #1 Whole Wheat colored paper and what I call a “mottle” texture from my stash. I’ve had it for years and have absolutely no idea from where or by whom.
Because this particular texture overlay is grey, I’m not really happy with the current look so I change the Blend Mode to Soft Light and the Opacity to 25%.
I like the way it looks now but it’s very subtle so I duplicate that texture. Then with the duplicate layer active I rotate the texture once horizontally and then once vertically. I keep the Blend Mode at Soft Light and the Opacity at 25%. Here’s the result:
I’m much happier with this. So, next I select both of these layers and create a group by clicking the “Create a new group” icon at the top of the Layers panel:
I then rename that group to something that reflects the type of texture I used. In this case I just named it “Texture #1 – Slight Mottle”. You can name yours whatever you like.
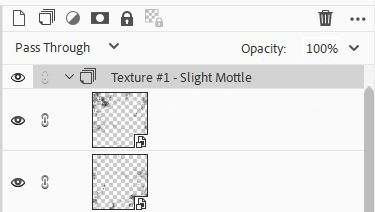
The reason I create these groups is it makes it a whole lot easier later to hide/unhide a given texture or play more with the Blend Mode at the group level. Now you’re probably wondering what I mean by that. Take a look at how the grouped textures look:
Notice that the Blend Mode for the “Group” is set to Pass Through and the Opacity to 100%. In PSE, this is the default blending/opacity for groups. This means that the group has no blending properties of its own. When a group is set to Pass Through, each layer in the group blends with all layers that appear in the group with whatever Blend Mode (and Opacity) was set for the individual layers. I hope that makes sense.
In this example both layers in the group have the same blend/opacity (Soft Light – 25%). In some of my other texture groups, that isn’t the case.
Note: With paper(s) and texture(s) loaded into the file, now would be a good time to save the file as a PSD. I named mine TexturedPaper1-10 (because I loaded 10 different textures). You can name yours however you like.
Now, I could go in and play with the blending/opacity on each layer individually. But I can also simply change the Blend Mode on the group level. When I do that, it affects all layers in the group but without actually changing the original Blend Mode or Opacity for each layer.
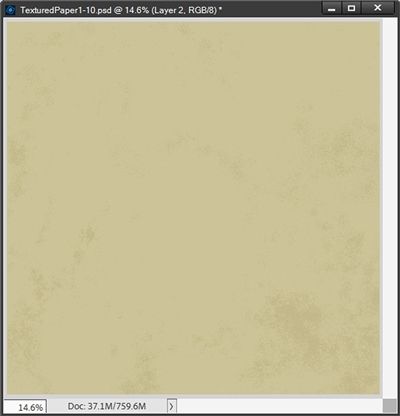
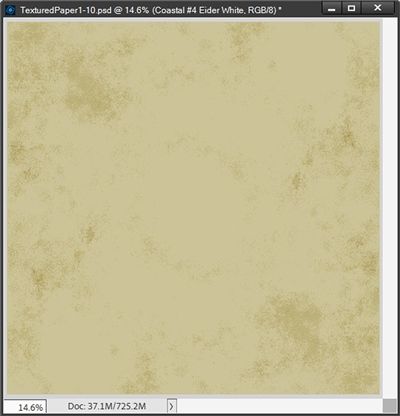
If I change the Blend Mode for the Group to Color Burn here is the result:
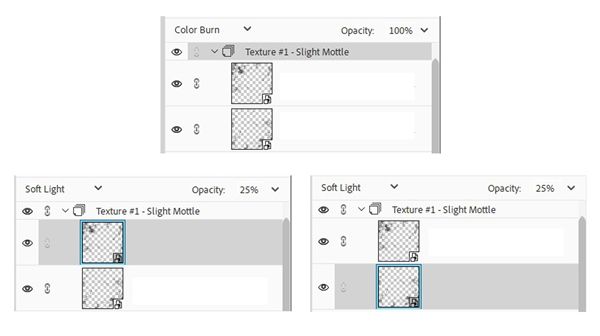
With one click I have a completely different looking paper. And here’s how things look in the layers panel:
You can see that each of the individual texture layers within the group retained their original blend/opacity settings.
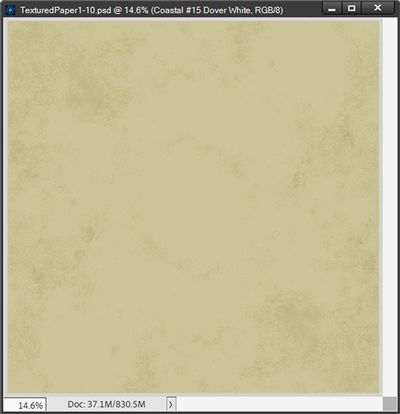
Now, with this texture group established (Group Blend Mode still at Color Burn), I can now “cycle through” all the remaining colors I have in my template to easily apply that same texture to each color:
And I could then continue to “cycle through” all the other textures for each of the colors in this template. In mere minutes I could end up with no less than 70 or as many as 140 different pieces of textured paper.
Okay mere minutes might be a bit of an exaggeration. Clearly it will take time to save each individual paper. But I think you get the idea. And that’s why I created this template. It just makes my life so much easier.
Even if all you do is create a template with your favorite textures, you’ll be saving yourself an enormous amount of time. It’s easy enough to just pull in solid papers any time you want to create some textured paper.
I do hope you’ll give it a try.
Oh, and before I forget, here’s a recent layout of mine using some papers I created with the texture template I showed you today:
If you’d like to see more details about this layout, you can find it in my 2024 gallery.
Paper Texture Resources
If you don’t already have some texture overlays, here’s a list of several nice texture packs that are available.
DigitalScrapbook.com links:
- Paper Templates Kit #260 (wood)
- Transparent Overlays – Random Textures Set 01
- Crumpled Paper Textures Kit
- Transparent Overlays – Distressed Set 02
- Scraps Kit #3 Templates (watercolor)
Creative Fabrica links:
- Grunge Paper Texture Background
- 20 White Crumpled Paper Texture
- Grunge Alcohol Ink Brush Background
- 20 Fabric Texture
More Tips
While creating your texture template it’s a good idea to periodically save your PSD file. It would be awful to have to start completely over in the event PSE (or your computer) “crashes”.
Texture overlays are an amazing resource for texturizing a paper. Not all textures will work on every color.
Play with Blend Modes any time you run into a texture that doesn’t look so good when you first add it to your paper.
You don’t always have to use more than one copy of a given texture to create a stunning look. But don’t be afraid to duplicate the layer just to see what happens when you rotate it or even just change the blending.
Sometimes, it’s as simple as changing the Opacity of the texture layer. You’d be surprised at what a difference that alone can make!
Using this texture template concept, you aren’t limited to applying only one texture to a given paper…the proverbial sky is the limit! The background for the image directly above was made using 7 of the 10 textures I have in my template.
And there’s no reason why you can’t also blend two or more of your papers together to get different colors!
When using multiple textures on a given paper try re-ordering the texture layers for different effects.
Don’t forget, there’s nothing to stop you from playing with Blend Modes on individual texture layers even if they are in a group.
And don’t feel like you have to stick with texturizing only solid colors. All those textures may well work on just about any paper! There’s that “limitless” sky again 😉
As always, if you have any questions or want to make a suggestion about a topic you’d like me to cover, please don’t ever hesitate to “Message Me”.
Thanks for reading this week’s Tuesday Tip. If you want to stay informed about new posts, just click “Follow Me” to stay in touch. I hope you have a wonderful week!
