
Save That Color
Have you ever worked on a project where you’ve created a specific color scheme using your own custom colors? I know I’ve done this more than once. Think for a minute about the color chips you get at the hardware store when you’re looking to paint a room at home.

How handy would it be to create your own custom color palette in Photoshop Elements (PSE) to be used in future projects? Bet you didn’t know you could do that!
But you can save your custom colors whether you’ve sampled color(s) from elements in your layout with the Color Picker tool or have just come up with “new” colors on your own.
They can be saved as swatches in the Color Swatches panel. You can literally create your own color chips for use any time. It takes a bit of time but it’s going to come in handy…at least it has for me!
Custom Color Swatches

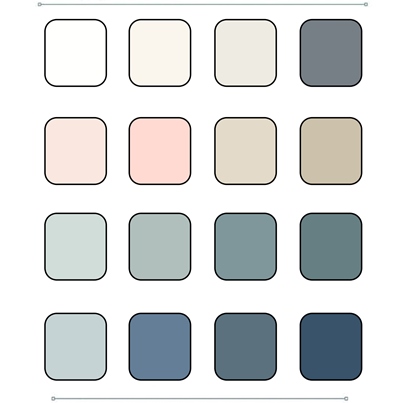
I tend to do a lot of layouts based on an ocean, lake or beach theme. I went back to some of my favorite layouts and picked 16 colors that I seem to use most often and saved them as a JPG file:
Now clearly, I could just keep this image somewhere and pull it up anytime I’m working on a layout with a coastal theme. But it would be so much easier if I had a custom color swatch in PSE. So, I’m going to show you how to do just that.
Before I go further, please remember that I use Windows and the current version of PSE (2024) so all of the steps that follow are accomplished using that software configuration. Some of my screen shots may look different than what you see on your screen depending on the version you are using. Regardless, the same methods should still work in other versions of PSE & some other graphics editing software that features Color Swatch tools. If you find this not to be the case, please search the internet for tips/tutorials specific to the graphics editing software that you use.
Default Color Swatches
Before I do anything else I want to ensure that I save my PSE default color swatches. Why you ask? In order for me to save a new color that I want to place in an independent set of swatches I need to start with a “clean slate” so to speak. I’ll show you what I mean.
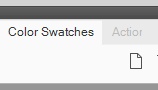
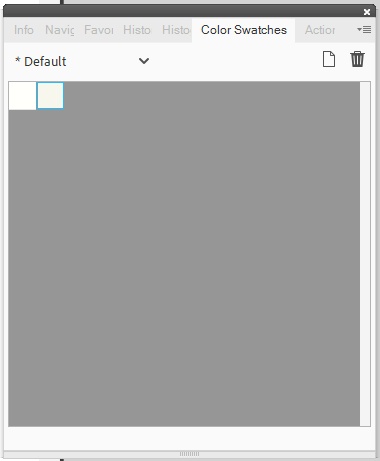
With (or without) my image of those 16 colors open, I go to the top tool bar and select Window->Color Swatches. PSE then opens the current active color swatches. For most of us this will be the PSE default swatches:

You should be able to see the four lines with a down arrow at the very top right corner of that Color Swatch panel. I click the down arrow and select Save Swatches:

PSE then opens a Windows Explorer dialog box where I can name this set of swatches any way I choose. I name it Default2024 and click Save.
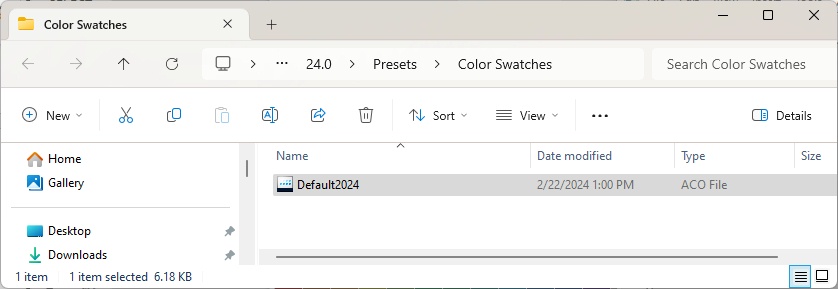
PSE then saves this as an .ACO file in the PSE preset color swatches folder. For me that is in this location: “C:\Users\###\AppData\Roaming\Adobe\Photoshop Elements\24.0\Presets\Color Swatches where ### is the username that I chose when I set up my PC.
Note: If you use Windows, you’ll be able to figure out the location of the PSE preset color swatches folder on your PC when you save this .ACO file. All you have to do is look at the Folder Path at the top of Windows Explorer dialog box that opens when you save a color swatch:

With that “default” .ACO file saved I’m now going to delete all the colors in the current “default” set of swatches. Please don’t panic. If the only colors that are in this current default set are those that are truly the defaults, then they will come back automatically the very next time I open PSE. Even without the file I just saved.
However, if I had created some random swatches working on my recent layout(s)…those too would have been in the “preset”. Without having saved the “current” swatches…those would not come back automatically on a restart.
That said…if you’re sure you have no colors other than the true PSE defaults, you could skip this step of saving them under a different name. But my recommendation is, out of an abundance of caution…it certainly doesn’t hurt anything to save them.
Delete Default Color Swatches
Trust me…this is going to be just fine. With the Color Swatch panel still open I click that down arrow again at the very top right of the panel and select Preset Manager:
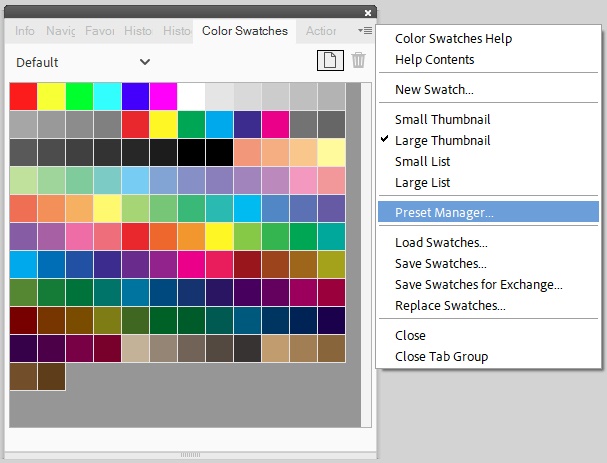
PSE then opens the preset manager for swatches:

I then go in and click on the first color swatch. While pressing Shift I scroll all the way to the bottom and click on the last color swatch:

You should be able to see that all of the color swatches are highlighted with a colored border. In my version of PSE, it’s a light blue border.
I then click Delete…really please trust me:
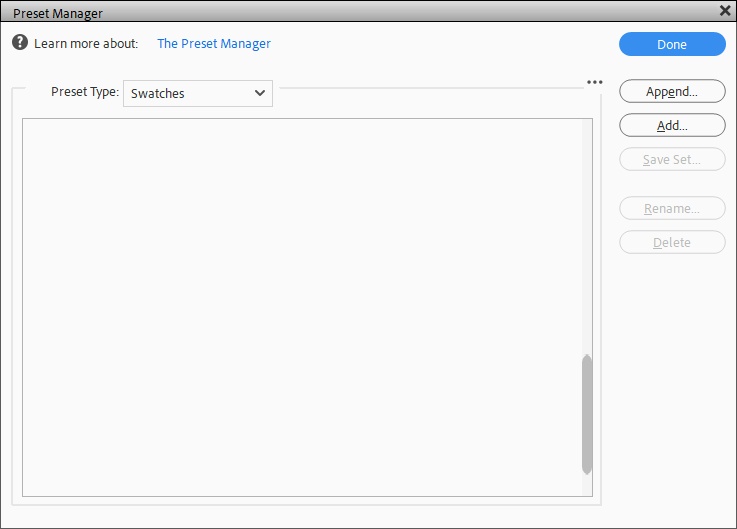
Okay…just breathe. I click Done to close the Preset Manager.
Create Custom Color Swatches
Now I’m going to create my Coastal Color Swatches. With my image file of the 16 coastal colors that I want to save open in PSE, I go to the top tool bar and select Window->Color Swatches. PSE then opens the *Default color swatches (I don’t know how/when/why the asterisk is now there). As you can see there are no color swatches at this point:

I now click on the Foreground color chip which causes PSE to open the Color Picker window:
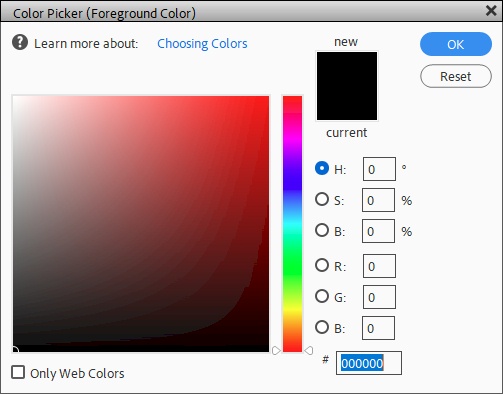
Next, I click on the first color in my image file and the Color Picker window now reflects the value for that color:

You can see that it looks nearly white but if you look at the Hex value, you can see that it’s not an absolute white.
I click OK and my Foreground chip is displaying the color I want to add to the Color Swatches panel:

Now I can add this new color to the Color Swatches panel one of three ways…
Add Color Swatch Option #1
I can place my cursor over any empty space in the Color Swatch panel. This will cause my cursor to turn into the Paint Bucket tool icon. I can then just click on the empty space to add my color. PSE then opens a Color Swatch Name dialog box so I can name that custom color swatch as I desire. I name this color swatch Coastal White 1:
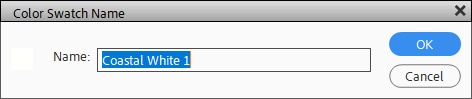
I click OK and the Color Swatch panel now includes my new color:

Add Color Swatch Option #2
With the Foreground color chip set to my next color, I can add this new color to the Color Swatches panel by clicking on the “Create new color swatch of foreground color” icon (the button that looks like a blank sheet of paper with a corner turned up):
When I click that icon PSE will again open the Color Swatch Name dialog box. I name this second color swatch Coastal White 2. I click OK and the Color Swatch panel now includes my second new color:
Add Color Swatch Option #3
With the Foreground color chip set to my next color, I can add this third color to the Color Swatches panel by clicking on the down arrow at very top right corner of that Color Swatch panel and selecting New Swatch from the menu:

Note: In some earlier versions of Elements, you may need to click on the More button.
When I click New Swatch PSE once more opens the Color Swatch Name dialog box. I name this third color swatch Coastal White 3. I click OK and the Color Swatch panel now includes my third new color:

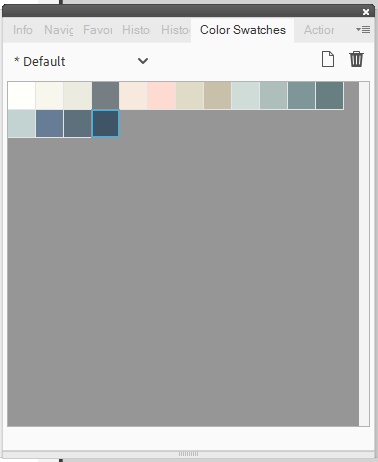
I’m not going to bore you as I load all the rest of my colors. But this is what the Color Swatch panel looks like with all 16 of my custom colors added:
Saving Custom Color Swatches
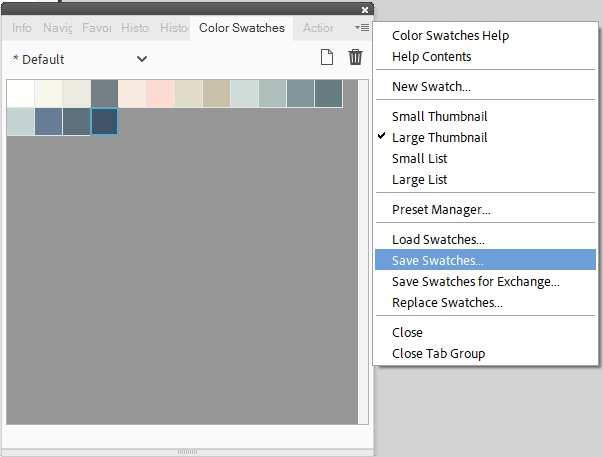
I’m now ready to save this custom color swatch. So just as I did at the beginning when I saved the default swatches, I again click the down arrow at very top right corner of that Color Swatch panel and this time select Save Swatches:
PSE will again open a Windows Explorer dialog box where I can name this set of swatches. I name it Coastal Color Swatches and click Save.
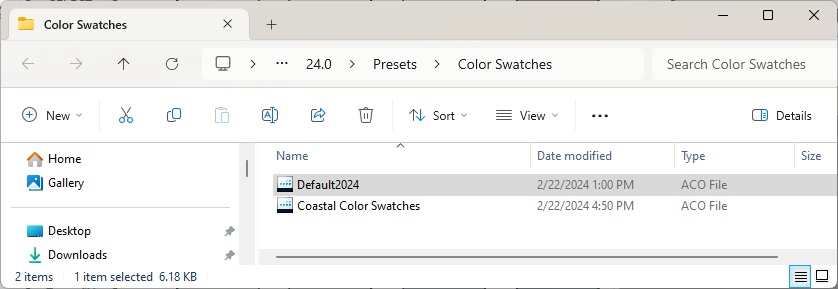
PSE then saves this as an .ACO file in the same PSE preset color swatches folder as when I saved the default swatches:
Now back to the Color Swatches panel. If I click on the down arrow by where it says *Default I can see both of the .ACO files I created during this process:

I’m going to close PSE at this point and restart it. With or without opening a file, if I go to the top tool bar and select Window->Color Swatches, PSE opens the last active color swatches which for me is the Coastal Color Swatches. But I specifically wanted to show you that the asterisk is now gone from the “Default” selection:

My only guess on this asterisk thing is that while working in the “empty” color swatches panel PSE somehow flags this so we know it’s not the “official” default?!?
And when I select that Default Color Swatch, I see the exact same colors I saw at the very beginning:
See…there was no need to panic about deleting these!
I hope you have found this to be a useful or at least an interesting post today. You never know when saving a set of specific colors will come in handy.
Additional Thoughts On Custom Swatches

If you were born before 1960 you probably remember as a kid wishing for that box of 64 Crayola™ crayons. That was the ultimate dream for any young artist. Did you know that today scientists estimate that there are about 10 million colors in the world? That’s a whole lot more than 64 😊 We’ve probably all got a lot of catching up to do…go create some new color swatches.
Color swatches are a great way to experiment with color combinations. The good thing is that they can be used in many different ways. If you’re an artist looking for inspiration or just want to see what colors go together well, try browsing through some examples of color swatches on the internet.
While you can add many colors to the Default Color Swatch, you should try to manage its size and organization to improve performance. Creating custom color swatches can help you group related or special swatches and manage panel sizes better.
If you are one to make scrapbook albums following a specific color scheme, creating color swatches will help you ensure that all of the layouts in that album use the exact same colors.
If you don’t routinely backup your entire computer system, please be sure to keep a backup of your PSE Presets…especially the color swatches if you create new ones.
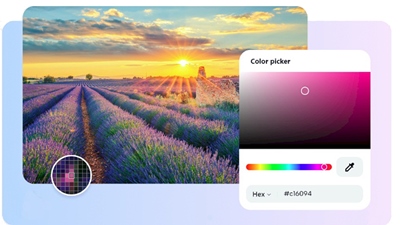
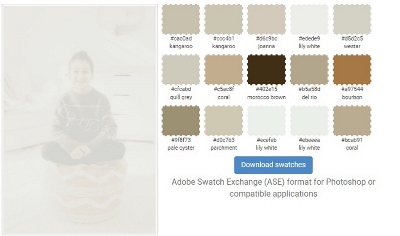
Now here’s one last fun tip that can be great for both digital & traditional scrapbookers. There is a handy little online tool that will let you create a Color Swatch Set based on a photo. Color Palette Generator will automagically create a color palette from any photo. Just choose (upload) a photo and a color palette based on the colors in the photo will be generated automatically. Use it to help with art projects, website design, or even with decorating your home. It’s not the most user-friendly tool but it will sample your photo and generate an .ASE (Adobe Swatch Exchange) file that you can download and load into Photoshop Elements. This .ASE file can be loaded into the same folder with all of your .ACO files. Color Palette Generator will also give you a graphic representation including the Hex value of all the colors it identifies:
Those 10 million colors I mentioned at the start of this section is only an estimate. Everyone perceives the world differently, so who’s to say how many colors there are exactly — the answer could vary depending on who you ask!

Believe it or not, there may be a whole world of color that humans cannot see. Our brains can only comprehend the colors we know (the core colors of the rainbow and their varieties). So, there may actually be an infinite number of colors out there we’ve yet to discover.
As always, if you have any questions or want to make a suggestion about a topic you’d like me to cover, please don’t ever hesitate to “Message Me”.
Thanks for reading this week’s Tuesday Tip. If you want to stay informed about new posts, just click “Follow Me” to stay in touch. I hope you have a wonderful week!
