Text On Shapes
I’m sure you’ve seen text written around a shape. It’s a very regular occurrence on things such as logos. All you have to do is search for “Circle Logos With Text” to see how many are out there.
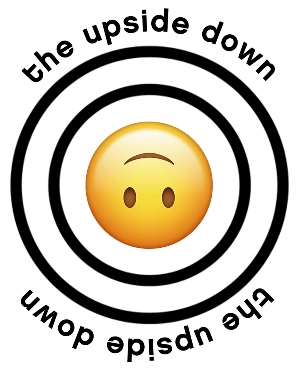
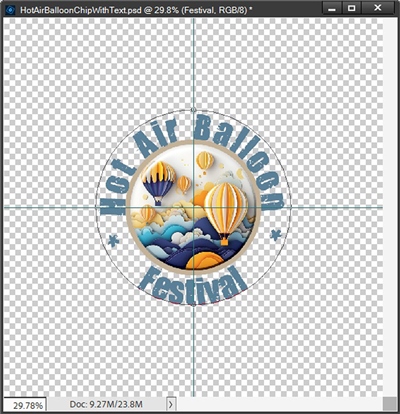
Have you ever tried writing text around a shape in a layout only to find it’s not working out great? A lot of people struggle with getting the orientation of the text to mimic what you often see in those logos I mentioned; similar to this one:

See how the text at both the top and bottom is “right way facing” or rather upward facing? Achieving this look can be trickier than a lot of people think. Especially when trying to write text “on a shape” in Photoshop Elements (PSE).
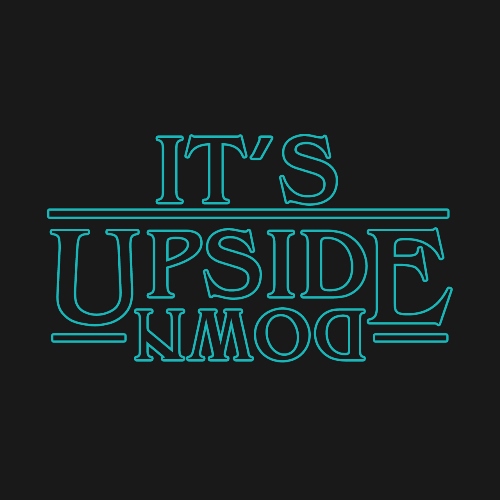
Upside Down Text
It took me longer than it should have to discover how to replicate the orientation of both the top & bottom text when typing on a shape. Not to be confused with typing in a shape…that’s so much easier. Sometimes having the text upside down isn’t a problem. But sometimes it just looks better if all the text is upward facing.
Today I’m going to walk you through the steps to get that upside down text flipped right-side up!
Writing On A Shape

First things first. If you’re joining me for the first time, I need to let you know that I do use PSE for all my digital scrapbooking. So, everything that follows is done using that software. I’m fairly certain you can accomplish all of this in most any graphics editing software. Just look for tutorials specific to your chosen software. Also, I am using the latest version (PSE 2024). If you have an older version, some of my screen shots may look different than what you see on your screen. Now, on to the work.
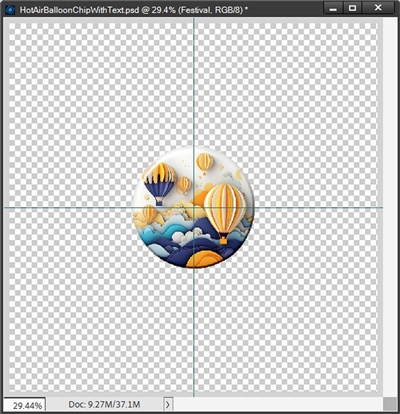
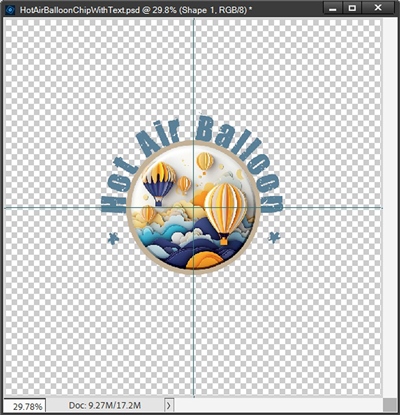
I’m going to show you how I created the above hot air balloon image (“flair” from my stash) with the text around it.
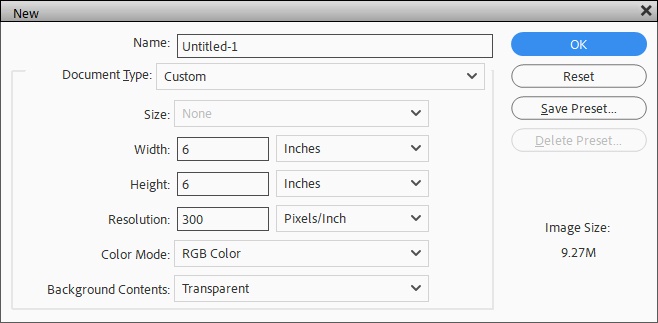
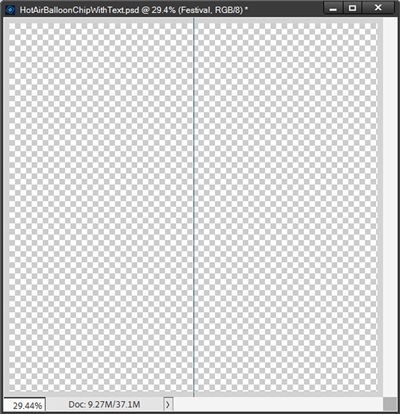
I generally prefer not to do all this work directly on my layout. So, I’ll start with a blank file (transparent) roughly twice the size of my finished design. The hot air balloon flair was about 3” around so I set the size of my document to 6” x 6”. That should give me more than enough room in which to work.
Establish The Center

When dealing with placement of text around an image, it’s always a good idea to ensure you know exactly where the center of the work space is. The way to do this is to use the Guides feature in PSE.
Select View in the top tool bar then select “New Guide”. This will open the New Guide options dialog box:

PSE defaults to the Vertical guide (at least on my computer). I leave that selected and set the Position equal to half the width of my document – 3” and click okay.
I have previously set the color of my Guide lines (using Edit->Preferences->General->Guides & Grid) to a deep teal (hex value: #1c7676) so it shows up nicely. Your guide line color may be set to something different and that’s fine. Here’s how mine shows up:
Now I’m going to do the same for the Horizontal guide so I end up with this:
I already have the hot air balloon flair in my Photo Bin so I just grab it using the Shift key and drag it into my document. By using the Shift key, PSE will automatically center it in my document:
Create Shape
If you’ve read many of my other posts you know I like to keep things on their own layer so I create a new blank layer by clicking the Create a new layer icon in the layers panel. I move that new layer below my flair layer.
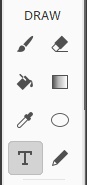
Now, I select the Shape tool (under Draw) in the tools panel to the left of the work area:
In the tool panel for me it shows up as the Shape – Custom icon because that’s the last shape tool I used. Yours may look different but when you hover over it, PSE will still let you know which tool you’re about to select.
When the Shape tool options show up at the bottom of the work area, I select the Ellipse shape so I can create a circle.
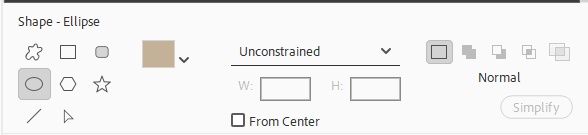
I know…the ellipse shape looks like an oval but this is the tool I need to draw a circle shape. You’ll notice that on my version of PSE there is an option to draw my circle From Center so I’m going to check that box. If your version of PSE doesn’t give you that option…not to worry. I’ll explain how to do that in a minute.
My color chip within the shape tool is set to a beige color but you can choose any color you like. You should also be able to see that on my version of PSE just right of the color chip is the word “Unconstrained” with a down arrow. Again, if your version of PSE does not give you this option, I’ll explain how to work around that.
I change Unconstrained to Circle by selecting that down arrow. With the From Center & Circle options selected I can now just draw a perfect circle by placing my cursor (which should look like a plus sign at this point) right over the center of the work area. I then just click and drag it out until the shape is sized the way I want.
If you don’t have the Circle & From Center options in your version of PSE you can do the same thing by selecting Proportional or Defined Proportions rather than Unconstrained. Then place your cursor in the center of the document, click & hold using Shift+Alt and drag your circle to the desired size.
The key here is to make the new shape bigger than the flair so the text doesn’t end up touching it. How big a circle you make is totally up to you. You can decide how far away you want the text to be from your image. One thing to keep in mind when deciding on size is if you’re using a Serif or script font, the lowercase letters may have “tails” (specifically the g, j, p & y) that could hang over your image. So, size your circle according to your preference.
And here’s my circle under the flair:

Note: Even though I created a new blank layer (default name was Layer 1) PSE renamed this layer to Shape 1 (at least in my version). I generally encourage people to name the layers they create according to what is on the layer. So, Shape 1 worked out perfectly for me. You can name your layer however you choose.
I chose a “rustic” Sans Serif font 321 Impact Regular (no tails) which is why I kept my circle pretty close to the flair.
Adding The Text
Now the fun part. I’m finally ready to start adding my text. I click on the Shape 1 layer thumbnail to ensure it is the active layer. I then select the Text tool (under Draw) in the tools panel to the left of the work area:
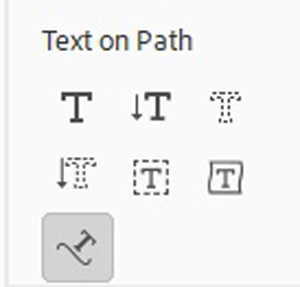
When the Text tool options show up at the bottom of the work area, I select Text on Shape so I can type my text around the circle shape.

You can see I already have my font and color set. I did change the font size to 36 pt from the 28 pt that shows in the image above. And I also ensured that the text alignment is set to Center. This will help later when I’m trying to center the text around the circle.
Next, I’m going to position the cursor at the top of the circle shape right on that Vertical guide. I hover over the circle shape until the cursor icon changes to depict text mode. It should look like a capital I with a curvy line running through it. When you try this, if you don’t see that text mode cursor, go back & double-click on the Shape 1 layer thumbnail & try again.
Then I type my text and confirm by clicking the check mark. This is what it looks like:

Clearly this isn’t centered around the circle the way I’d hoped and you can already see that some of this text is going to be upside down. But I’m going to fix that. First, I’m going to delete the text that I know will be upside down. I’ll put that on its own layer shortly.
Reposition Text On Shape

Now, depending on your version of PSE and the selections you made when typing your initial text, your text could already be centered over the top of the circle as desired. If that’s the case you could skip this section. But I’d encourage you to read it anyway. It’s a good thing to know for future use.
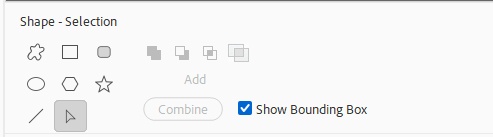
Here’s how I repositioned the text as shown in the image above. With the text layer still active I select the Shape tool (under Draw) in the tools panel to the left of the work area. In the tool panel for me it shows up as the Shape – Ellispe icon because that’s the last shape tool I used. Yours may look different but when you hover over it, PSE will still let you know which tool you’re about to select.
When the Shape tool options show up at the bottom of the work area, I select the Selection icon (arrow) so I can be pointing to the shape.
Do Not click on the shape. I know that will be your first instinct. We need to keep the text layer active. Just be patient you’ll see how this works.
I then move my cursor over the outer edge of the text. I just hover over the text until the cursor icon changes to depict text align mode. It should look like a capital I with an arrow (triangle) on either side of it. When you try this, if you don’t see that text align cursor, go back & ensure that the text layer is active & try again.
With my cursor positioned at the outside edge of the text I can just click and drag the text into the center as desired. Here’s what it looks like now:
This is why it was so important to have selected the align center option before typing the text. If I hadn’t done that it would be nearly impossible to move the text around this easily.
If you find that your text won’t move by dragging, double check the alignment setting on your text to ensure that it is centered and try again.
Adding Bottom Text
Now that the top text is set it’s time to add the bottom text back in. To do this, above the text layer I’ll create a new circle shape on its own layer (Shape 2) just like I did for the original circle shape. Only this time I’m going to make it bigger and a different color. When I draw the circle shape, I want to make this circle large enough to cover just to the edge of the existing text:

Then just as I did with the original text, I select the Text on Shape tool so I can type my text around the bottom of the circle shape.
This time I position the cursor at the bottom of the circle shape right on that Vertical guide. Then I type my text and confirm by clicking the check mark. This is what it looks like:
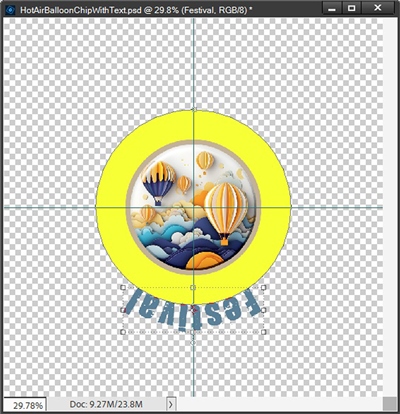
This time it did center perfectly. Not surprising since it’s only one word.
Yes, it’s still upside down but I’m going to show you how to fix that.
Flipping Bottom Text
As before, I’m going to ensure that this new text layer is still active. I then select the Shape – Selection icon (arrow) in the Shape tool area. It should also still be visible in the primary tool area off to the left of the work area. Again, this is so I can be pointing to the shape.
And just like before, I just hover over the text until the cursor icon changes to depict text align mode. This time, with my cursor positioned at the outside edge of the text I can just click and drag upward until the text flips upright. Here’s what it looks like now:
It looks great except now the text appears to be squished together more than the top text. But this is an easy fix.
Spacing Bottom Text
Next, I’m going to double-click on the new text layer which opens the Text tool options and the entire word is highlighted. I can do one of two things at this point. I can just add a space between each letter of the word or I can change the tracking value.
I first tried adding an additional space between each letter. I thought it looked like too much space as compared to the top text. So, I adjusted the Tracking for the whole word a bit at a time. I ultimately ended up with a tracking value of 200 and I think it looks just right:
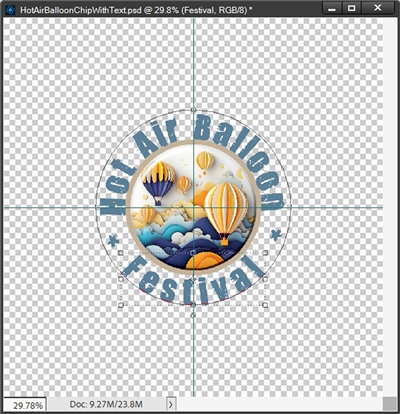
And there you have it. A lovely circle image with text around, all of which is right side up!
Text On Other Shapes
This process will work well on most simple shapes such as squares, rectangles ovals & maybe even diamonds. To use a different shape all you have to do is select the Custom shape tool and pick a pre-loaded shape. You can also create your own custom shape if you need something unique.
I wouldn’t recommend trying to use this process on more complicated shapes such as stars, hearts or arrows. But you can certainly play around and see what shapes work best for you.
Here’s an example of text around a photo (from Pixabay) that I created using the process described above.
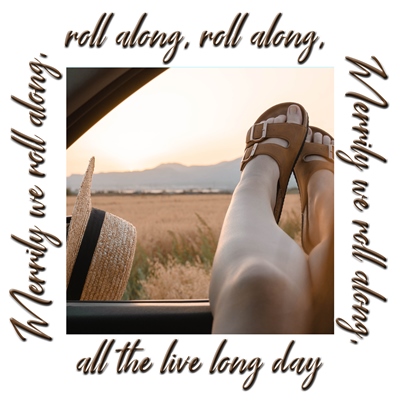
Notice this time there’s a bevel added to the text. Once you have your text all situated you can add whatever styles you’d like.
I hope you have some fun playing with putting text on a shape.
Additional Tips For Text On Shapes
In general, when you type text on a circle shape the text alignment should be set to centered. For some other shapes you may find that left justified works out better.
Some shapes just don’t lend themselves to the application of text on a shape. Try to use simple geometric shapes when using this technique.
Be careful what font you use. Fancy fonts (especially some scripts) can make things a bit more challenging. It’s best to work with simple fonts (some scripts work) basic Sans Serif fonts tend to work the best. But feel free to experiment with other fonts to see how they work on your image.

You can also experiment with the Text on Selection tool. This allows you to select a shape in a given image and add your text around that shape. This can become complicated very quickly depending on the shape you’re trying to select. Take your time and remember you can always add to or subtract from your selection to get the shape you want.
Text on a custom path is another option. But it can be very tricky if your path is very jagged.
For these other text tools, it is usually best to set the text alignment to left justified.
As always, if you have any questions or want to make a suggestion about a topic you’d like me to cover, please don’t ever hesitate to “Message Me”.
Thanks for reading this week’s Tuesday Tip. If you want to stay informed about new posts, just click “Follow Me” to stay in touch. I hope you have a wonderful week!
