Waning Crescent
In just a couple of days we’ll be experiencing a Waning Crescent Moon phase. Hence the gorgeous featured image above. So, what exactly does that have to do with anything in scrapbooking? Well let me tell you a little secret. There’s a keyboard shortcut that makes it easy to create our own crescent shape.
But before I get into that, here’s a little history about typewriter keys vs. keyboards…
Back in the dark ages before we had computers most girls had to take typing classes on a typewriter! And keys weren’t called a keyboard at that time…it was just a typewriter. Back then it was just assumed most of us girls would become secretaries (a sexist would say!) and typing class was almost mandatory. A lot of young people today have probably never seen one of those old typewriters.
As part of those typing classes, we had to know the “name” and function of any special character represented on the keys. And we didn’t have anywhere near the number of “special keys” as what we have on a standard keyboard today.
Try to imagine a keyboard without the following: an exclamation point, the number 1 or the number zero. Can you even imagine what that was like? It wasn’t until 1970 that the exclamation point consistently had its own key on most typewriters!
My first typewriter (similar to the one pictured above) didn’t have one. The work around was to type a period, then go back and type an apostrophe above it! Mine also didn’t have the number 1. We just used a lowercase L. Yet oddly enough we did have keys for fractions and a “cent sign”. Keys you won’t see on a modern keyboard today! Another interesting tidbit for you…the key we all call the “at” key today used to be called the “Ligature” key.
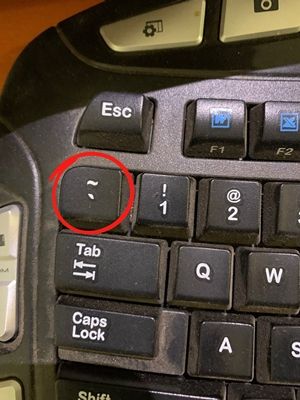
There is one other key that we didn’t have back then; the “Approximate” key, more formally called the Tilde. I first became familiar with that key when I started my career in the IT field.
So, why did I bring up that particular key? Well, here’s one more “feature” that full Photoshop users have that we Photoshop Elements (PSE) users don’t…
The Approximate Key
A quick reminder before I begin…I use the current version of Photoshop Elements (PSE – 2024). So, my screen shots may look different than what you see on your screen.
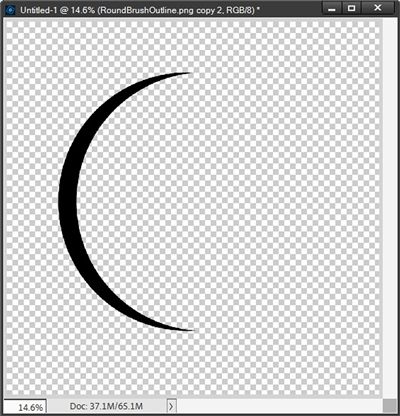
In full Photoshop, it’s possible to create a crescent moon shape very quickly by selecting a Hard Round brush and stamping once in the middle of the document (best on its own layer). Then hold down the Tilde key (~), offset the brush directly over the stamped circle and click once. Part of that circle shape is then erased looking something like this:
How does this work? Well, in full Photoshop the Tilde key is a shortcut key that toggles between painting and erasing when using a brush. Sadly, in PSE holding down the Tilde key doesn’t make that switch. Thanks Adobe ☹
But there’s also another shortcut key combination in full Photoshop (Shift+Alt+R) that will do something similar. Using that shortcut key combination will change the Brush Blend Mode to Clear. This basically accomplishes the same thing as the Tilde key…just in a different way. This “old” shortcut has sort of been replaced by the Tilde key as of Photoshop CC 2020.
Did you know that as of PSE 15 we have Blend Modes for the brush tool which includes a Clear mode?
While holding down the Tilde key in PSE won’t switch the Brush between painting and erasing, there is another option.
The Workaround
I’m going to follow the same steps a Photoshop user would right up until it would be time to use the Tilde key.
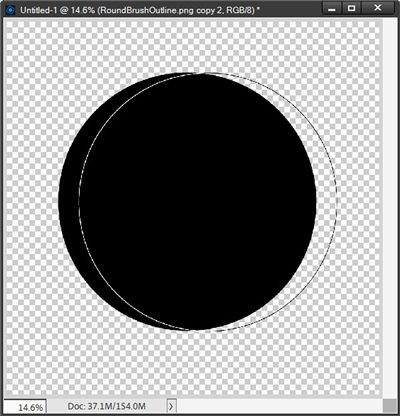
With a blank document and a new layer I select a PSE basic hard round brush. I set my Foreground color chip to black and the brush Size to 2500 (the max). I then click once roughly in the center of the layer:
Note: It’s very important to “stamp” your circle on a layer of its own…not on the background layer. If you don’t have it on its own layer, the next step will erase part of your background!
Now, I’ll offset my brush over the circle:
Now, instead of holding down the Tilde key I will press and hold Shift+Alt+R while I click over the original circle. And here’s my crescent shape:
I actually find it a bit funny how that the “old” Shift+Alt+R shortcut key combination to change the Blend Mode to Clear in full Photoshop will actually work in PSE!!!!
So how (or why) does this work for PSE? Good question. I’m not really sure as I’ve never even found anything about it in PSE tutorials. There are lots of tutorials about using Blend Modes on layers but I seriously cannot find one about Brush Blend Modes. At least not one that talks about this shortcut key combination.
So now you’re probably wondering how I figured it out. This may sound silly but I began to wonder…
So, I just tried it to see if it would work. Low and behold, that “old” Shift+Alt+R shortcut actually works in PSE to switch the Brush Blend Mode from “Normal” to “Clear”. This then allows me to “erase” without having to switch to the Eraser tool. How cool is that?
VERY IMPORTANT NOTE: This shortcut does NOT toggle between those Brush Blend Modes of Normal and Clear. If you use this shortcut to switch the Blend Mode to Clear, you can use a different shortcut key combination (Shift+Alt+N) to restore the Brush Blend Mode to Normal. And you could also use the Mode drop down to switch the Blend Mode. And please be aware that if you switch the Brush Blend Mode to Clear (or any other mode) it will stay that way, even if you close PSE. So, always check your Brush Blend Mode to be certain it’s the one you want to be using!
Now if I want that crescent shape that I made above to actually look more like a moon, all I have to do is grab either a paper with a moon or a moon element like this one from the PNGTree:
All I had to do was pull that moon into my document, clip it to the crescent shape, add a very tiny bevel just so it didn’t look too flat and a nice night sky background:
Note: The background paper is from “Sweet Dreams Galaxy” by Connection Keeping. And I did set the Blend Mode on the crescent shape to Hard Light giving it the effect that the moon is “behind” some of the clouds.
Can I create a crescent (or other semi-circular) shape without this little-known shortcut? Of course. But why would I do it the long way when there’s a one-click solution?
And clearly that little trick can come in handy for more things than creating a crescent moon, right?!?
Now go have fun playing with this simple little tip. And you’re welcome!
Additional Thoughts On Crescents
Remember to “stamp” your initial circle on a layer of its own…not on the background layer. If you don’t you will end up erasing part of your background!
Once you’ve created a waning crescent moon shape…don’t stop there. You can create crescent shapes to represent all the phases of the moon!
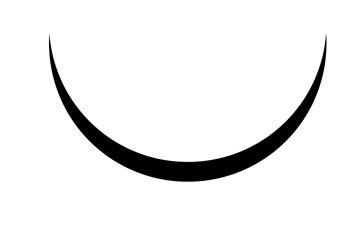
Think about this…if you use this tip to create a crescent shape, that shape can also be turned into a smile, a frown, a closed eye or even an ear.
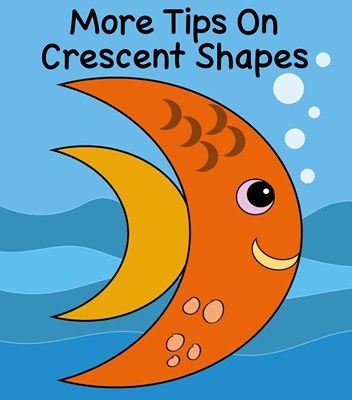
Just take a look at the image above for more ideas about how to use a crescent shape. Can you see how many crescent shapes are in that little fish? Would you be surprised to hear that there are nine? There’s a lot we can do with crescents…have fun with them!
And this special shortcut combination will work with just about any brush. Take a look at the “before & after” image below. To create the “after” paint, all I had to do was re-size the brush before using the shortcut to click in the center of the original paint:
Remember that the Shift+Alt+R shortcut to switch the Brush Blend Mode does NOT toggle. You can use Shift+Alt+N to restore the Brush Blend Mode to Normal.
As always, if you have any questions or want to make a suggestion about a topic you’d like me to cover, please don’t ever hesitate to “Message Me”.
Thanks for reading this week’s Tuesday Tip. If you want to stay informed about new posts, just click “Follow Me” to stay in touch. I hope you have a wonderful week!

