
Freeze Text
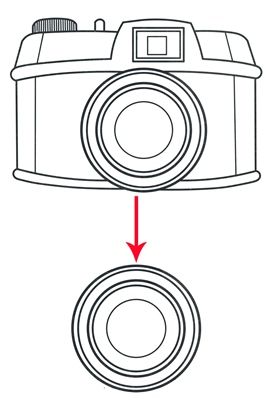
So, have you ever been working on a layout and you finally found the perfect cluster only to find you really need to rotate it horizontally? The problem is, there’s text in the cluster that will be backwards after the rotation. I know the frustration associated with that scenario.
After years of digital scrapbooking, I’ve learned a thing or two about overcoming these kinds of challenges.
It’s not always easy but it can be done. Today I’ll give a few quick tips to help you rotate clusters or other elements that include text.
Flipping Images – With Text

The first tip I have for you is something a lot of people don’t ever think to do. Just re-create the cluster.
I know, I know…that sounds like a lot of work. But sometimes that’s the only way to go. And now, you might be thinking, “How can I recreate that cluster?” Well, a lot of times a designer will have all of the cluster’s components as individual PNG files in the element folder for the kit.

Fortunately, this cluster was just such a case…sort of. One of the elements in that cluster (the concentric circles under the lens off to the right) was not a standalone element. However, it was easily extracted from an existing kit element:
Before I go any further, just a quick reminder…I use the current version of Photoshop Elements (PSE – 2024). So, my screen shots may look different than what you see on your screen.
Once I extracted those circles it was just a matter of pulling the original cluster into a 12×12 blank file and layering the other cluster elements over the original cluster starting with the bottom most and ending with the top most. This is the same “technique” I talked about in my post back on February 6, 2024, referencing scraplifting a layout.
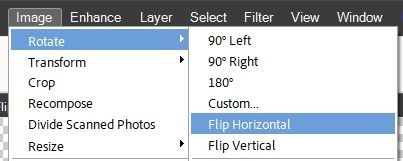
Once I had the cluster replicated all I had to do was flip/rotate the entire canvas (file) horizontally by going to the top tool bar and selecting Image->Rotate->Flip Horizontal:
After that it was simple enough to flip the words/word art back to read left to right and some repositioning. And here is my flipped cluster with correct facing words:

It did take some time to do this but as I said, sometimes it’s ultimately the best way to flip a cluster. I should mention that you will need to replicate any shadows that are part of the cluster but most often that too is easy enough.
Now, that’s not to say I couldn’t have flipped the cluster and just extracted the words and flipped them back to read left to right. But honestly, that would have been a bit more challenging (at least for some). And any shadows within the cluster may no longer be consistent with the lighting angle intended.
Flipping the word CAPTURE in the one element would have been easy enough by simply selecting just the word itself, creating a new layer via cut and rotating it horizontally. The single word PHOTO and the “Moment” word art would have presented a different issue requiring copying those parts of the cluster and a whole lot of very careful & precise masking or erasing. For some, that could easily be more time consuming than recreating the cluster.
But I’ll try to give you some more pointers about flipping without having to recreate the entire cluster or element.
Note: The cluster I used in the above example is from “Smile Please” by ET Designs. Also, the “CAPTURE” element is included in the cluster with part of the “arrow” line erased.
Sometimes it’s even possible to use this technique with transfers or overlays such as this one from “Memories Live Forever” by Palvinka Designs:
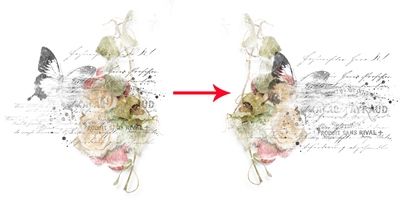
Again, this is typically only possible when the designer includes the transfer’s individual components as separate elements within the kit.
Rotate – Flip Text

You might be looking at this and thinking this isn’t going to be easy since part of one word is under some string. That means you can’t copy the entire word. Well, using a more PETA friendly saying, there’s more than one way to peel an orange (no cats were harmed by using that phrase 😉).
The key to “fixing” text in a flipped cluster is sometimes all about knowing what font you need to use. Back in May 2023 I wrote a post about how to identify fonts. This will come in real handy working on this cluster.
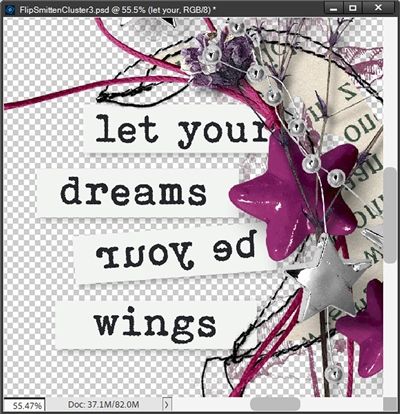
Most of the words can be easily “isolated”, and flipped. But the word “Let” in the first word strip will be problematic. So, what are the options in this situation? I’ll break this down for you in 2 separate steps.
Identify The Font
If you don’t already know the detailed steps required to identify a font, you can go back to that May 2023 post to learn more. But the process is fairly simple.
I simply draw a selection box around a word, copy the selected word to the clipboard (Ctrl+C) then create a new file from the clipboard contents:

I then save the file as a JPG somewhere on my hard drive. I can upload that file to a font identifying site like “WhatFontIs”.
I used the word “dreams” and was able to identify the font as Bohemian Typewriter Regular. And if you have trouble identifying the exact font used by the designer, there’s nothing that says you can’t use a font of your own choosing. Though that only works if you’re going to change all the text in a given set of word strips!
Note: When selecting words for font identification it’s best to select text that is not written on an angle. If necessary, you can slightly rotate your cluster/image to line the text up so it is straight across before making your selection. Once that’s done just undo the rotation.
Flip The Script
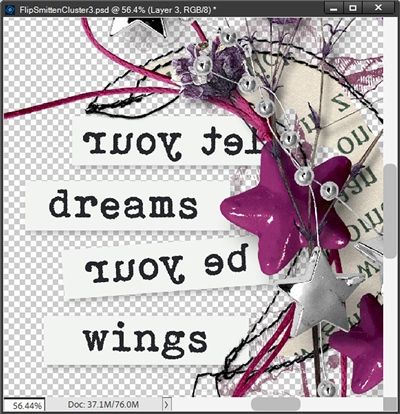
I am ready to flip the cluster and fix the word strips. Before I do that though, I duplicate the original cluster and rename the new layer “Flipped Cluster”, flip the new layer horizontally and hide the original cluster layer. This is just a precautionary measure in case I mess things up royally and need to start over.
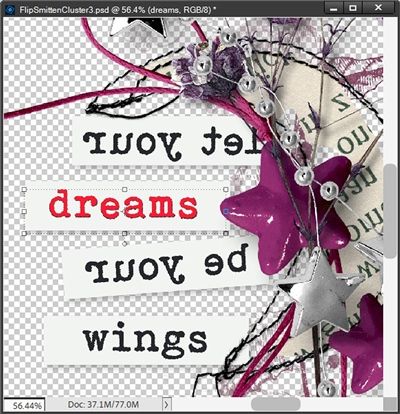
From now on I’ll be working with the Flipped Cluster. Looking at all the word strips, the second and fourth word strips in this cluster will be super easy to fix. Because these word strips are positioned “perfectly” horizontal (no tilt), all I have to do is draw a selection box very carefully only around the individual word (trying not to get any of the white space). I started with the “dreams” word strip:

Then I create a new layer via cut (Shift+Ctrl+J):

Note: When trying to create a new layer via cut you must simplify the Flipped Cluster layer. PSE won’t let you “cut” something out of the cluster if it is not simplified.
PSE creates the new layer (Layer 2 for me) and all I have to do is flip that layer horizontally. I repeat the process for the “wings” word strip (creating another new layer – Layer 3 for me) and here’s how those strips look now:
Now for the trickier part. I’m going to show you how I deal with text which is partially covered by other elements in the cluster. Honestly, the easiest way to do this is to make the word strip “blank” then type the word(s) using the font previously identified. The hardest part about this is ensuring that I use the same color, tracking and justification from the original. I know this sounds like it’s going to be hard. But trust me, it’s easier than it sounds.
Size The Text
Since the first word strip is still “backwards”, the best thing for me to do is to create a new text box over top of the word “dreams” and replicate that word as closely as possible preferably in an alternate color:
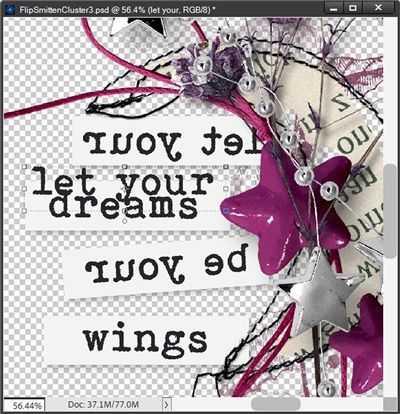
That looks perfect. Now I can change the color back to match what the designer used (in this case it was actually a very, very, very dark blue (#222228)) and type the correct phrase:
Blank The Strip
Here’s the really tricky part…creating the blank word strip. This can be done multiple ways but I’ve found one way that seems to be easier than some.
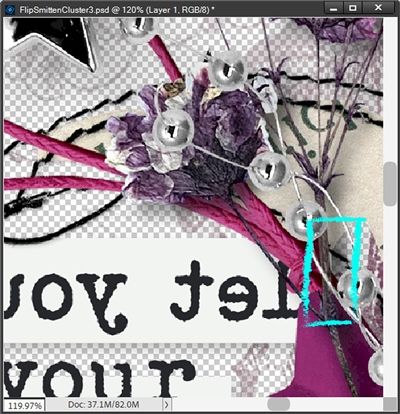
I start by zooming in fairly close and drawing a selection box around the element(s) that cover part of the text:

Next with the Flipped Cluster layer active, I create a new layer via copy (Ctrl-J) using only the selected portion of the cluster (Layer 4 for me). Then I hide the Flipped Cluster layer and zoom in very close on that new layer (now the active layer):
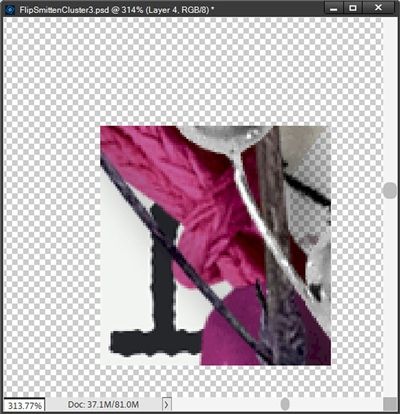
Now all I have to do is carefully erase any of the word strip and text that is beneath that section of the cluster:

Note: I recommend that you create a layer mask to do this rather than using the eraser tool. Using a layer mask is non-destructive and allows you to more easily correct any mistakes.
I then unhide the Flipped Cluster layer so I can see the parts that clearly didn’t need to be replicated. Specifically, the area off to the right where the shadow is too dark:
Still using the same layer mask, I can now mask away those parts so it looks like the original:

That looks great. Now I’m going to hide that layer with the element section I just created so I can work on the Flipped Cluster layer and make that word strip “blank” (all white).
Before I start that I want to line up my newly typed text with that on the Flipped Cluster:

I know this looks like a jumbled mess right now. But it’s the best way to ensure the text is in line with the “original”. I can now hide that new text layer and work on the word strip in the Flipped Cluster.
Once again, I’m going to zoom in fairly close. This time I want to paint over the text that is part of the Flipped Cluster. Thankfully, these word strips have a solid near-white (#f2f3f2) background. And I set my foreground color chip to that color.
Using a basic PSE Hard Round brush, I simply paint over the “backwards” text. Because I have the portion of the element(s) that overlays the text on its own separate layer now, I don’t have to be too careful painting around those. As soon as I’m done creating the blank word strip I can unhide the layer with the element parts (Layer 4 for me).
Then I need to ensure that the “let your” text layer is positioned beneath the element parts (Layer 4). I unhide that text layer and here’s what I have now:
Looks pretty good so far if I must say so myself.
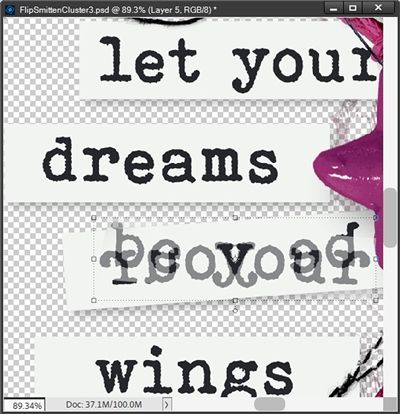
We’re in the home stretch now. The third word strip isn’t perfectly horizontal so I can’t quite do the same thing I did with the second and fourth word strips. But I also don’t need to go to the same lengths I did with the top word strip.
This time I just need to use a different selection method. I’m going to use the Polygonal Lasso tool to draw my selection area on this word strip:

Just as with the words “dreams” and “wings”, I’m going to draw my selection as close as possible to the text trying not to get too much of the white space:

I imagine you’re thinking I’m going to create a new layer via cut again. Actually, this time I really can’t do that. Why? If I cut this selection out of the word strip then rotate it horizontally, it’s not going to line up properly in the empty space left from cutting. I hope that makes sense.
To avoid that I’m going to create a new layer via copy (Ctrl+J), rotate the new layer (Layer 5 for me) horizontally and change the opacity to 50%:
Now not only do I not have any blank space, I can also properly align the new layer to correspond with the angle of the text on the Flipped Cluster layer:

I change the opacity of this new layer back to 100%. Now I see a couple spots that need to be cleaned up on that new layer:

You should be able to see that on the left side of that phrase there’s some shadow that doesn’t belong. And on the right side, there’s some white covering up some of the shadow. All I have to do is use a layer mask and “erase” those areas so I end up with this:
As you can see, now there’s a bit of cleanup required on the Flipped Cluster layer as well. I just need to paint over the parts of the “old text” that are now showing:

Because of the shadow on the right side of that word strip, I did have to use a combination of both paint and the Clone Stamp tool to get rid of those pieces of “old text”. But it wasn’t too hard to clean that up.
Note: If you’re not familiar with that tool please refer back to my “Clone Wars” post for tips on that tool.
You might be thinking that it would have been easier to do what I did with the top word strip…typing new text and “blanking” out the word strip. Not exactly. I still would have needed to deal with that shadow on the right side. So, it’s kind of a personal choice on this one. Either option will work.
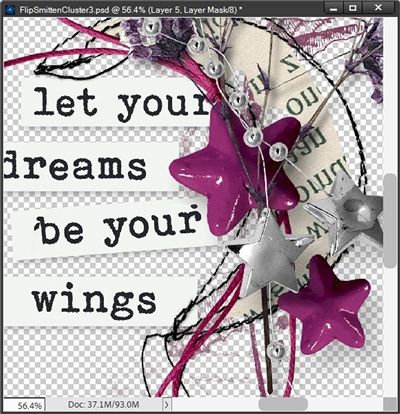
And here’s the finished flipped cluster:

Note: The cluster I used in the above example is from “Smitten With The Stars” by ET Designs.
Free-Standing Word Strips
So, what do I mean by free-standing word strips? Some clusters can contain word strips such as the ones in the cluster above. In that particular cluster the word strips fall under other elements within the cluster. Other clusters can have word strips that are not encumbered by other cluster elements. Such as in this particular cluster:

This is what I call a free-standing word strip. I know this is a pretty simplistic cluster but I wanted to make a point. You remember how in the above example I had to us the Clone Stamp tool to “blank out” a word strip? If any of those word strips had been free-standing as in this cluster, it would have been so much easier to not only change the “fill” for the strip but also the text.
Let me show you what I mean. I like this cluster well enough but I’d prefer it to be rotated horizontally. And I want the text to read differently. Cleary it would be simple enough to just create (or find) a new word strip and just lay it over the original. But this may not work in all clusters.
An alternative is to make a copy of or extract the word strip from the existing cluster and make changes to the copy.
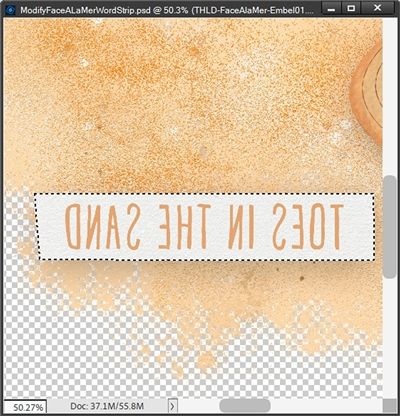
The first thing I did was to identify the font as what appears to be PorceleinaDEMO. I could have used a different one but I liked this one just fine. I then made a duplicate copy of the original cluster, hid the original and flipped the duplicate horizontally.
Next, I’m going to zoom in fairly close and draw a selection around that word strip using the Polygonal Tool:
I had to use the polygonal tool because one end of that word strip was not straight. With the selection made I can either create a new layer via cut (Shift+Ctrl+J) or via copy (Shift+J). I almost always choose to make a copy because it is a non-destructive technique. This way, if I make a mistake, I haven’t lost the original word strip.
After creating a new layer via copy (Layer 2 for me) I create a duplicate of this layer (now Layer 2 copy) and hide the original Layer 2. Again, I do this mostly as a safeguard in case I make a mistake. I can now flip that duplicate layer horizontally giving me this:

Do you notice anything “off” with that flipped word strip? If you look very closely, you’ll notice that it appears I’ve lost the not so straight edge on what is now the right side of that word strip. And you might be wondering why. That’s because the word strip on the underlying “original” cluster still exists and it has a straight edge on the right side:
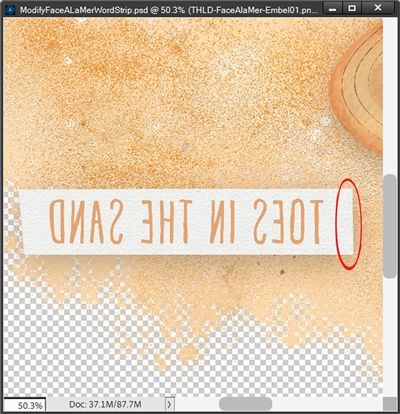
That straight edge on the copy of the word strip is now on the left side, covering up the not so straight edge on the “original” cluster. Is this a problem? Maybe, maybe not. It really depends on what’s going to happen with the background of that word strip. And changing the background (and text) of the word strip was the whole point of this section. So…let’s get to that.
For right now I’m not going to worry about that not so straight edge. I know I said I want to get on with changing the background of the word strip. But before I do that, I want to replicate the existing text for the word strip. This is just me being my typical Type-A personality. I just want to be sure I at least keep the size & tracking consistent with the original.
I already know the font (PorceleinaDEMO) so all I need to do is draw a text box around the flipped word strip, select the font, set the justification to center and change the font color to black (for now) and make a guess at the size. I started with 50 pt. Then I type the exact same verbiage as the original:
Clearly some adjustments are required to exactly match the original. Is that 100% necessary? Not really. I could leave it as is. But you know me…I’m going to try getting it as close as possible. After adjusting the size of the font to 45 pt, a bit of repositioning and setting the Tracking to 42, it was nearly perfect:

I can now hide this text for the moment. Now on to the background for the new flipped word strip.
You may or may not be able to see that there’s a slight texture to the paper that was used to create the word strip in the original cluster. If I was trying to keep that background and only change the text, I could do one of two things. I could just use the Clone Stamp tool to “paint” over the text or I could see if there is a paper in the kit that I’m using that matches the original word strip and just clip that to the flipped word strip.
But remember, I want to change the background. Again, I can do this one of two ways. I could very easily just set my foreground color chip to the desired color and fill that flipped word strip with that color. Or just as I mentioned above, I can look for a paper in the kit that might work. I think I’ll do that because I would like for there to still be some texture.
I really want this word strip to “pop” a bit more than the original. I really like the greenish aqua color in the hat’s bow and the foliage behind the hat. There is a paper in the kit that seems to match that color so I choose that and clipped it to the flipped word strip:
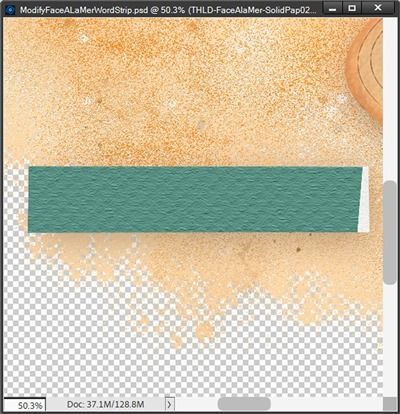
And now you can see the issue with the straight edge on the original word strip. Before I start worrying about that I want you to notice the texture of this new paper. It’s a bit more prominent than what the original looked like. That’s because the paper was clipped at full-size. I could leave it as is but I do want that texture to be a bit more subtle.
That’s very easy to fix. I just need to re-size the paper until I feel more comfortable with the prominence of the texture. With the paper layer active I just “grab” one of the corners and scale the paper down until I ended up with this:

The scaled down paper was basically 70% smaller than the original size. This means that during the re-sizing the W(idth) and H(eight) settings were both 30%:

Now you’re likely going to be surprised at how I’m going to get rid of that pesky white edge. Hold onto your hat…
All I have to do at this point is link the clipped paper layer and the flipped word strip layer together, select both layers and flip them horizontally:

Voilà…no more white edge!!!!
Note: I did need to nudge the layers until the new word strip was even with the one in the “original” cluster. This may or may not always be the case.
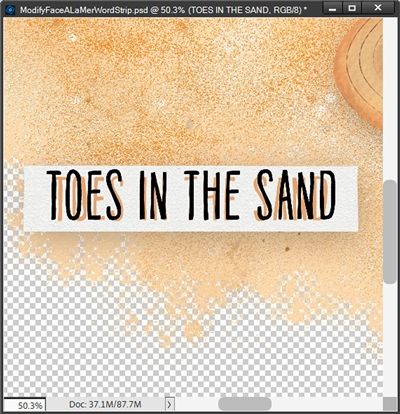
We’re almost done. Now all I have to do is unhide my text layer, use my new wording and adjust the color. I want the text color to be white but not pure white. I actually chose a shade from the white dots in the hat and lightened it until I was happy. I ended up with a nearly white shade with the hex value of #eef64f. And here’s my completed word strip and flipped cluster:

Note: The cluster and paper I used in the above example is from “Face A La Mer” by Thaliris Designs.
Rotate Word Art
One last quick example. You can also flip some word art using some of the same steps used in the above examples. Here’s a word art stamp from “Wishing Well” by Synergy Ink (no longer available) that I flipped horizontally:

After flipping it all I had to do was cut out each line of text individually and rotate them horizontally…easy peasy.
That’s not to say that all word art is going to be that easy but you might be surprised by how many you have that you could rotate this way!
More Rotating Tips

Some clusters/images will be easy to flip and then “un-flip” the text. Others will be difficult of nearly impossible unless you have the element(s) required to re-create the cluster.
If you merely flip a cluster without replicating it first, any existing shadows may be contrary to the lighting angle you’re using for your layout. Please keep this in mind any time you flip a cluster/element that has built in shadows.
If you flip a cluster/image and need to type new text, don’t feel obligated to use the exact same font, or even the exact same words. You can customize the cluster’s text to fit your layout’s theme.
If you encounter a word strip that will need to be “blanked out” and it’s not a solid color, try using the Clone Stamp tool to remove the “old text”.
You don’t have to be working with a cluster to use some of the above techniques on any set of word strips. Anytime you want to customize a word strip to more closely fit your layout’s theme just follow the steps for copying (extracting) and then “painting” the background or clipping paper to the word strip. This can be done regardless of whether you want to keep the same word strip text.
When clipping a textured paper to a word strip, be sure to check the “prominence” (size) of the texture. Most often you may need to re-size the paper much smaller to keep the texture from being too large.
As always, if you have any questions or want to make a suggestion about a topic you’d like me to cover, please don’t ever hesitate to “Message Me”.
Thanks for reading this week’s Tuesday Tip. If you want to stay informed about new posts, just click “Follow Me” to stay in touch. I hope you have a wonderful week!
