Need Different Paper?
As a self-professed, recovering paper-aholic (sort of) I have to admit I never seem to have enough paper. And if you could see all the “real” paper I have from my pre-digital phase you’d gasp…and loudly. I use the excuse that so much of what I have is left over from my old business. But truth be told that’s all it is…just an excuse!
I thought perhaps things would change when I went digital. And they did…but in the wrong direction. I am constantly amazed at how one human can possess sooooo very much paper and yet still not be able to find just the right one at the right time.
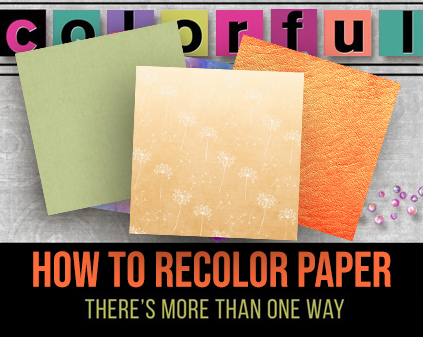
So, in last week’s post I talked about re-coloring elements. This week I’m going to give you some similar tips to find that right paper…
Step #6 Re-Coloring Paper
So now you’ve found (or created) the perfect elements for your current project. Unfortunately, the paper colors aren’t quite right. Rather than searching for the right colored papers elsewhere, you could always just re-color the ones available in the kit you’re using.
I do this a lot as it saves time and keeps me from having multiple kits open at the same time. If you’re anything like me…having too many kits open at once I can get distracted and confused. So better to stick with one kit whenever possible. Besides, maybe you actually love the papers. It’s just that the colors need some tweaking. We can fix that, and much easier than you might think!
Re-color Solid Paper Using Colorize
Wait, what…re-coloring solid paper? Believe it or not, if you haven’t already run into it, you’re likely going to at some point. You’d be shocked at the number of designers who go to great lengths creating lovely textured solid paper in gorgeous colors but forget to include some nice neutrals. Or maybe the colors are too vibrant, or too pastel.
If you use the “Paint Bucket” technique as I talked about in last week’s post when I re-colored that “flat” edge in the free template, you’ll lose all the texture. So how can you avoid doing that? The easiest way is to pick a solid paper from your kit that is closest to the color you’d rather use. I’m going to use this solid from “Real Moments – Metamorphosis” (now retired):
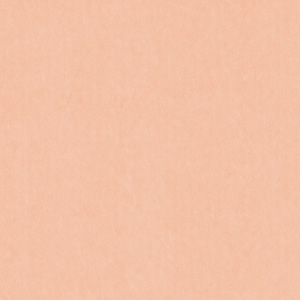
This paper doesn’t have a very defined texture to it but it’s not completely flat. There are some subtle variances in shading and depth that don’t show up very well in this small image. But, it’s there and I don’t want to lose that.
I just want something a bit more orange to go with that orange flower I ended up with last week. So, I’m going to once again use a basic orange paper (hex color #f47526) as a guide:

And now I’m going to follow the same process I described last week to change the foreground color chip to that vibrant orange. Then I’m going to select “Enhance” in the top tool bar; select Adjust Color; select Adjust Hue/Saturation.
And that familiar Hue/Saturation dialog box pops up again. At this point I’m going to check the “Colorize” box in the lower right corner of that dialog box. I had to play with the Saturation/Lightness “sliders” to achieve the color I liked. I used Saturation: 92 & Lightness: -28. Once I was happy with it, I just clicked OK. And this is what I got…

I know it’s hard to tell from this image but, I got the color I wanted and didn’t sacrifice any of the subtle nuances of the original paper.
Re-color Solid Paper Using Convert To Black & White
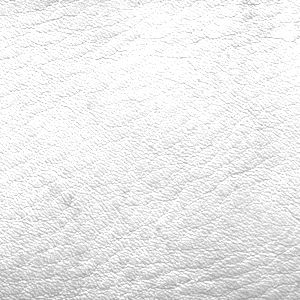
And if you ever find yourself with a kit that has great highly textured solids but no textured white paper…there’s a quick fix for that as well. For this I’m going to use this leather-textured solid (from my stash):
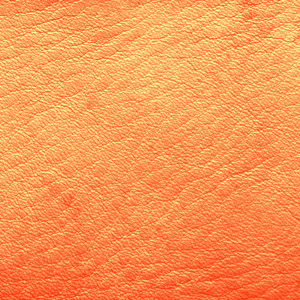
This paper has a very defined texture to it so you’ll be able to see the changes a bit better. Often times, it’s a simple matter of converting the image to black & white. Other times…that may not work. Sadly, it’s often a trial-and-error kind of thing. In any case here’s what to do.
Select “Enhance” in the top tool bar; select Convert to Black and White. At this point a different dialog box pops up:
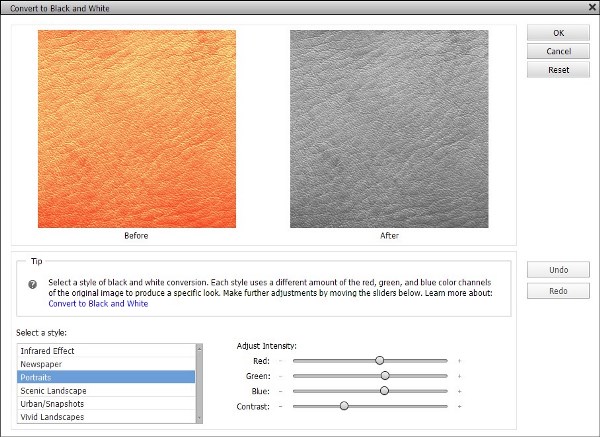
I can see that the orange leather paper now also appears in “grayscale”. There’s a section titled “Select a style:” under which there are the following styles available: Infrared Effect, Newspaper, Portraits, Scenic Landscape, Urban/Snapshots & Vivid Landscapes. I believe the default selection is Portraits which is the grayscale version in the image above. More often than not, Urban/Snapshots tends to produce the same (or very similar) result as the Portrait option. A lot just depends on the original color.
I played around with all of the style selections and decide to go with Infrared Effect. And this is what I got:
There’s also the ability to further tweak the results using the “Adjust Intensity:” sliders for Red, Green, Blue & Contrast. Sometimes it’s very beneficial to play around with those. Especially the Contrast. I didn’t see a need to do that this time.
There’s also a tip section in this dialog box that shows up below the two papers explaining how to fine-tune your adjustments. This should help you if you decide to play!
I would highly encourage you to play around with all of these settings just to see the varying results. Experimenting is exactly how we learn. Besides that, if you don’t like what you see, you can always start over.
Re-color Patterned Paper Using Colorize
So, now we’re going to talk about re-coloring something that is a bit more challenging. Patterned papers. These papers almost always have depth, more colors and often also have texture. But that doesn’t mean we can’t re-color them fairly easily.
The first option would be to try “Colorizing” just the way I did with the solid color paper. This time I’m going to use this lovely dandelion pattered paper also from the retired “Real Moments – Metamorphosis”:
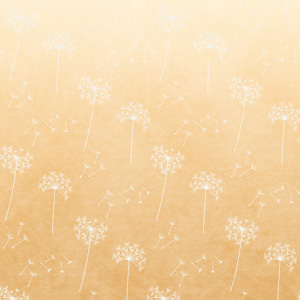
I know…you’re probably thinking “It’s already kind of orange. Why change it?” Exactly because it is kind of orange. I want this particular paper to be more on the green side. Cindy’s kit has a solid color green that would be the perfect shade:

I’m going to use that to set my foreground color chip to match (hex value # bcc58e). Then I’ll go into “colorize mode” just as I did above with that solid paper. I had to play with the Saturation/Lightness “sliders” to achieve the color I liked. I used Saturation: 48 & Lightness: -3 (Hue was already set to 70). Once I was happy with it, I just clicked OK. And this is what I got…
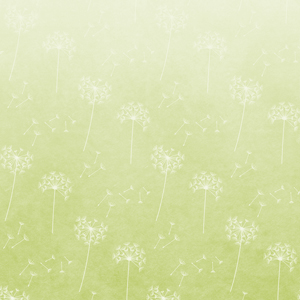
See how easy that was. But we’re not done yet. There’s one more paper “coloring” method that will probably blow your mind. Read on…
Paper Blending
Paper blending is such a fun and exciting approach to changing the papers in a kit. And it doesn’t require any color chips or changing hue/saturation. You just need two (or more) papers that you’d like to “merge”. To start out simply I’m going to use the exact same papers I used in the step above. Only this time I’m going to open the dandelion paper first then pull the solid green into the same window on its own layer.
For this example, I’ve placed the solid green under the dandelion paper. Now with the dandelion paper layer selected I’m going to go over to the layers panel (the right side of the screen). See the “box” right above the layers where it says “Normal”?
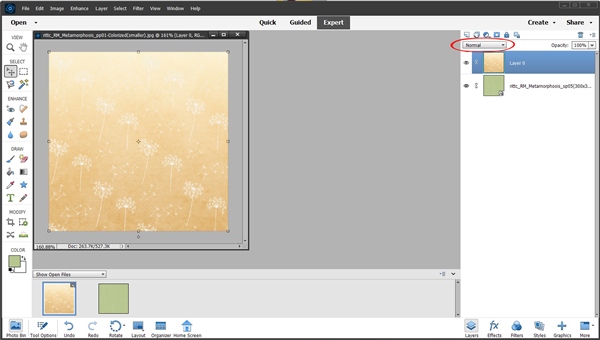
This is where we can change blend modes.
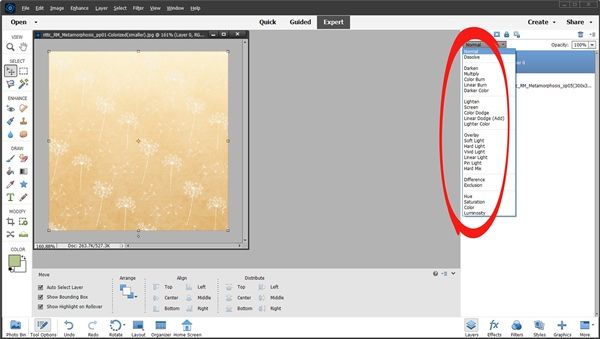
Once the “Blend” options are open all I have to do is use the down/up-arrow keys on my keyboard to “scroll” through the different blends to see what the results are. In doing that, I was happiest with selecting the Luminosity option. And this is what I got:
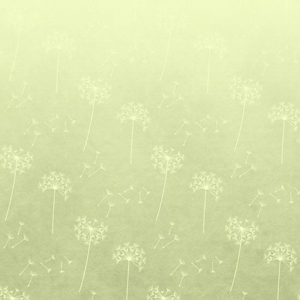
As you can see, it’s ridiculously similar to the result I achieved using the colorize option above. Of course, everything depends on the two papers you’re trying to blend. It also depends upon the order in which the papers are layered.
This is what happens if I change the order of the layers we already used and still select Luminosity as the mode for the solid green on top of the dandelion paper:
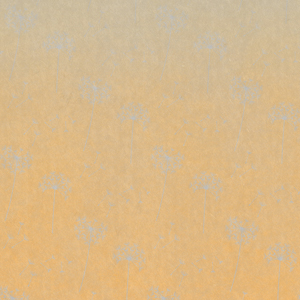
Strikingly different! But definitely not what I was going for.
Now, I want you to see what happens when I take a completely different paper from that same kit:
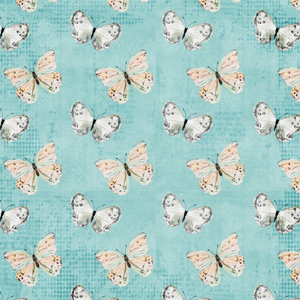
And blend it on top of that same solid green using Luminosity:
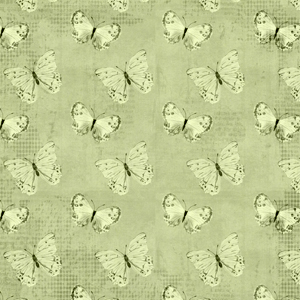
And now using Exclusion:
WOW…how did we get purple? I told you this might blow your mind. It’s truly exciting to see what can happen when you blend papers together.
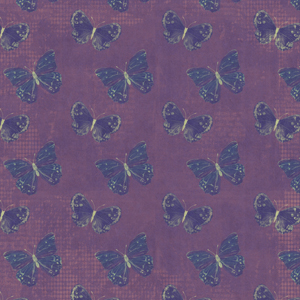
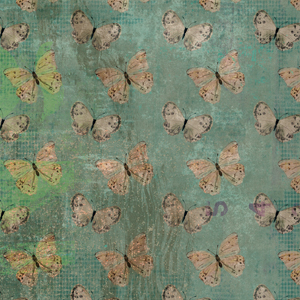
And don’t stop at blending solids with patterns. Try blending two patterns together. For example, I took that same butterfly paper from above and layered this paper from the same kit on top:
When I set the blend mode to multiply, this was the result:
Blend modes opens up a whole new realm of possibilities to “re-color” your paper!
One last tip on blending…don’t forget that you can also change the opacity of the top paper to achieve some interesting results as well. And you can try this either before or after you play with blend modes!
Most Important Re-Coloring Tips!
I would HIGHLY recommend that you do all your paper color changing outside of your actual layout…at least in the beginning. Just open your paper separately and play to your heart’s content. This keeps you from accidentally making changes to something more than the paper you’re trying to re-color. Besides that, if you’re really happy with the final product it will be easy to save your “new” creation for future use.
Remember not to be scared about experimenting with all of these techniques until you find the one that works best for you. If you’re not happy with the result the first time…there’s always the “undo button”!

The more you play around the better you’ll get at re-coloring! And if you get hopelessly lost or frustrated you can always “Message Me” and I’ll try to help!
If you like what you’ve been reading, please click on the “Follow Me” button so you’ll easily stay updated for Step #7…