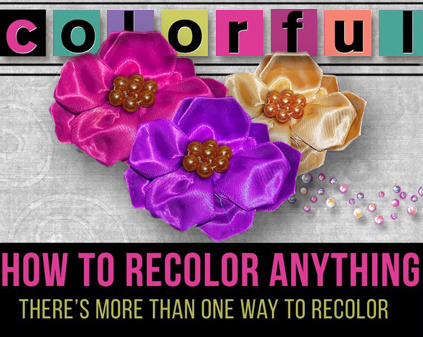
Enhancing Your Stash
So, in last week’s post I talked about enhancing your stash. I know how frustrating it can be when you’re working on a project and you just can’t seem to find the right color pallet in your existing supplies. But you don’t always have to go out and buy more product. Especially if money is tight. Instead, just get creative about using what you already have.
One of the things I love about digital scrapbooking is the ability to use items I’ve purchased over and over again. Not only can I use one flower multiple times, I also can re-color it if it doesn’t fit my current project.
Step #5: Re-Coloring Elements
Before I get too far along, I want to point out that my experience in re-coloring is based on how I use Photoshop Elements (PSE). If you don’t use PSE, I have some degree of confidence that you can find a way to accomplish the same things in whatever graphics package you are using. You can always try searching for re-coloring techniques (specific to your software) on the internet. If you run into a lot of trouble, please just “Message Me” and I’ll do what I can to help you out.
Re-color Flat (Non-Dimensional) Elements
If you’ve ever wondered how to colorize a simple/flat shape (not good for dimensional elements like bows, flowers, etc.) this is the tip for you! It’s a fairly simple process. If you have already “Followed Me” then you should have the free page template I provided. I’m going to take one of those elements and show you how to quickly re-color it…again using PSE. If you have the template & use PSE you can follow along.
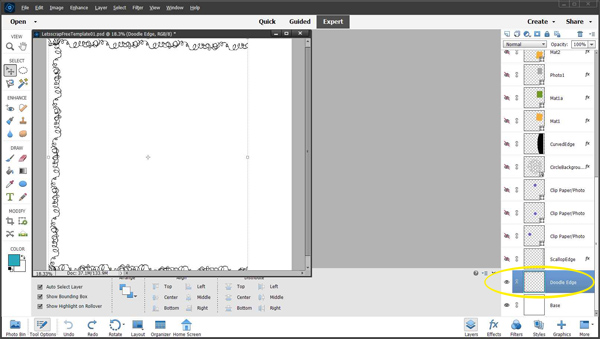
I’m using just the Doodle Edge element for this example. I’ve hidden all the other layers (except the base) to make it easier for us to concentrate on just that doodle.
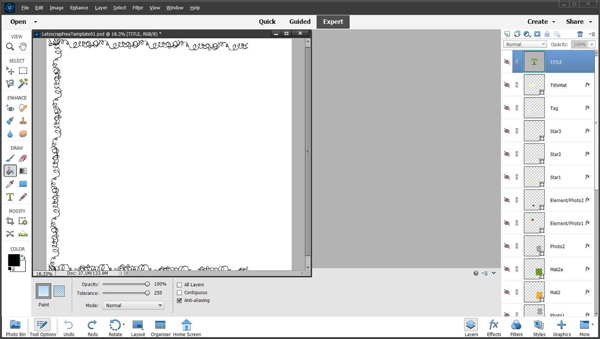
First, I need to change the foreground color so that it’s the color I’d like that edge to be. So, I’ll select the foreground color “chip” in the lower left corner. A dialog box will pop up allowing me to pick the desired color.
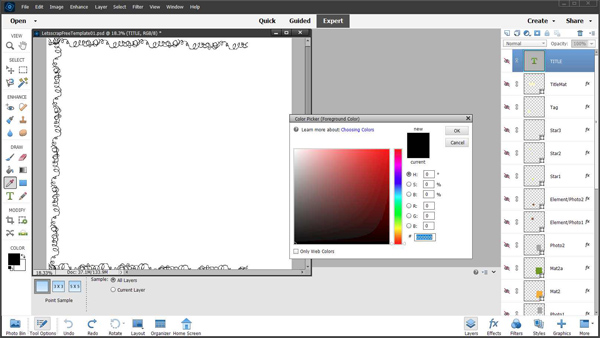
Select a color. I’m using a nice aqua color (hex color value #0babbe) so it stands out nicely. But you can use any color that you’d like.

Select “Ok”. Now I’m going to ensure that I have only the doodle edge layer selected.
Now I’m going to select the Paint Bucket Tool and ensure that the “All Layers” & “Contiguous” check boxes are unchecked and that the “Anti-aliasing” check box IS checked. Then I’ll position my “pointer” anywhere in the black part of the edge and click in that spot.
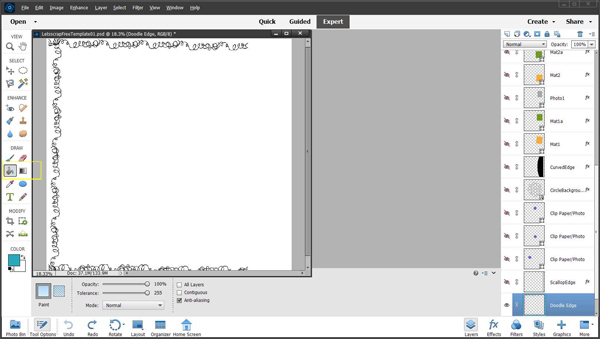
I now have an aqua colored doodle edge.

So easy right? I know it looks like a lot of steps but I wanted to do it step-by-step so the instructions were clear.
Bonus…there is a PSE short cut that makes it so much quicker. With the desired foreground color selected, just press Shift+Alt+Backspace on your keyboard (since a Mac doesn’t have a Backspace key, I’m not sure what the shortcut would be) and voila…color changed.
Re-color by “Clipping”
There is one other method for re-coloring flat shapes and even text. And it’s even easier than the steps outlined above. You can actually “clip” paper to your flat image…easy peasy. That is, as long as you know how to do that. Clipping allows you to re-color all parts of the object in question.
If you’re using PSE, simply add a paper layer above the element you want to re-color. Then in the layers panel (with the paper layer selected) press and hold the alt-key (option-key on a Mac) and hover toward the bottom edge of the thumbnail. You should see an icon that looks like a square with a downward facing arrow. Then just click. Now your element is the color of whatever paper you used.
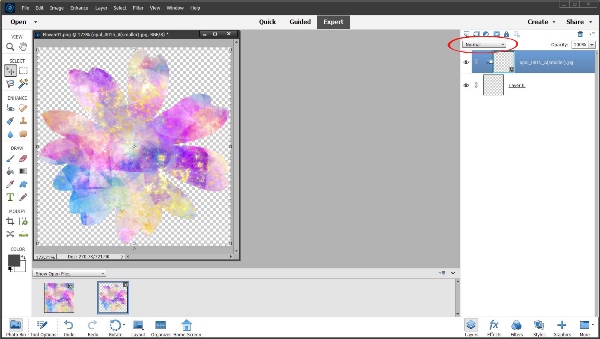
For example, I’m going to use a “watercolor” paper from my stash.
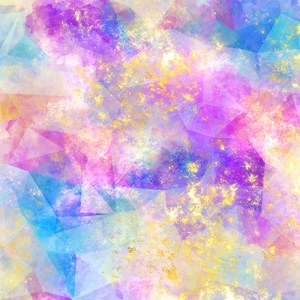
I placed it over the edge and clipped it to that layer. I’ve zoomed in pretty far so you can see what it looked like…
I could now also play with blend modes to get different looks. But since the edge is black, there really won’t be much that will change. And I’ll talk about blending in more detail further down.
Just bear in mind, this typically is only recommended for non-dimensional elements. If you try to clip paper to a flower, you’ll lose all of the flower’s detail.
So, this is as easy as re-coloring can be. But only if we’re talking about non-dimensional, single-color elements. If you want to re-color other things it’s not quite that easy. If you’re game…read on!
Re-color Dimensional Elements Using Hue/Saturation
So, now I’m going to talk about re-coloring something that is a bit more challenging. Dimensional things like flowers or buttons. These kinds of elements have depth and most often more than one color. Because of that I can’t just use the “Paint Bucket” method. But that doesn’t mean I can’t re-color them fairly easily.
There are multiple ways to do this. One of the easiest ways is to use the “colorize” feature in PSE. This time I’m only going to give you a few pictures to try and keep this post from getting ridiculously long. But it should be pretty easy to follow with the steps I’m going to give you.
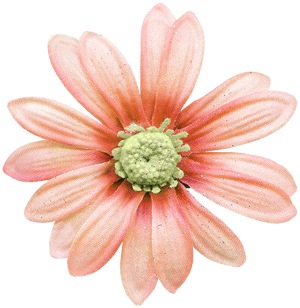
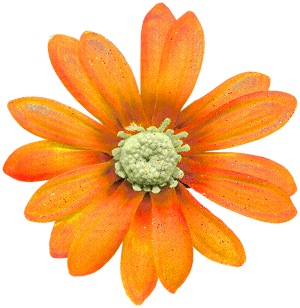
I’m going to use this flower from “Real Moments – Metamorphosis” (now retired):
- Select the flower layer.
- Set the foreground color so that it’s the color I want to use (see the steps above). I’m going to use a nice shade of purple (#8514d4)
- Select “Enhance” in the top tool bar.
- Then select Adjust Color
- Then select Adjust Hue/Saturation
The Hue/Saturation dialog box will pop up. At this point I’m just going to check the “Colorize” box in the lower right corner of that dialog box & click OK. And this is what I got…
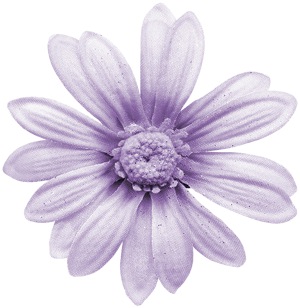
Nice but I’ve lost that greenish-yellow center. There are ways to, as my granddaughter says, “trick the computer” so we can keep that yellow center.
One way is this. Before colorizing the flower, I’m going to duplicate the layer and colorize only the top flower. Then I can go in and “mask” or erase the center portion of the purple flower so that the greenish-yellow portion from the pink flower layer shows through. So, I end up with this…
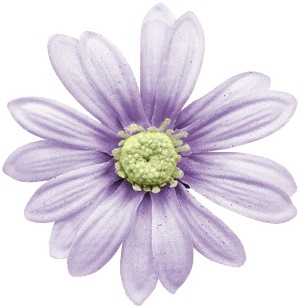
That might be a bit more work than what you’d like but it definitely gives you more control over what happens with the flower’s center.
Another way to re-color that pink flower would be:
- Select the flower layer.
- Select “Enhance” in the top tool bar.
- Then select Adjust Color
- Then select Adjust Hue/Saturation
That same Hue/Saturation dialog box pops up. At this point I can just play around with the Hue, Saturation & Lightness “sliders” until I come up with something suitable. Using this method, it doesn’t matter to what color the foreground color is set. I’ll control the color with the Hue slider. I changed my settings as follows: Hue= 0, Saturation= +39 & Lightness= 0. This is what I got…
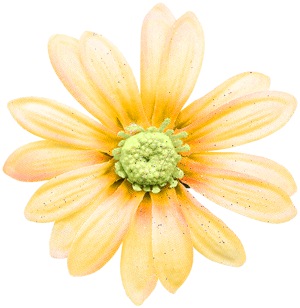
It too is nice but I wasn’t able to get the shade of orange I was hoping for without messing up the contrast. At least the center stayed that nice greenish-yellow color. I like this flower so I’m going to save it.
There are more ways to play with Hue/Saturation to achieve better results but I think that might be a bit much for this post. If you’d like more tips on adjusting Hue/Saturation I’d encourage you to search for more in-depth tutorials on the internet.
Re-color Dimensional Elements Using Replace Color
Next, I’m going to use the same pink flower that I used above. But this time I’m going to do things a bit differently. Aside from having the flower open I’ll also want to have either a piece of paper, or other element open that is the color I want for the flower. I’m going to be using a solid color paper from my stash…

Now I’ll change the foreground color, this time I’m going to use the Color Picker tool. I’ll click on the little eye-dropper in the tool bar along the left side. Then just move the eye-dropper over to the paper and select the color that I want. For this, it’s just a solid color (#f57527) so it wasn’t hard. But what I need to do at this point is either “copy” the color value (f57527) from the foreground chip or write the value down as I’ll need it in the next step.
Now, I’ll go back to the flower layer. But keep that paper “window” visible for a point of reference later.
- With the flower layer selected.
- Zoom in on the flower so I can see a lot of the finer details
- Select “Enhance” in the top tool bar.
- Then select Adjust Color
- Then select Replace Color.
A Replace Color dialog box pops up.
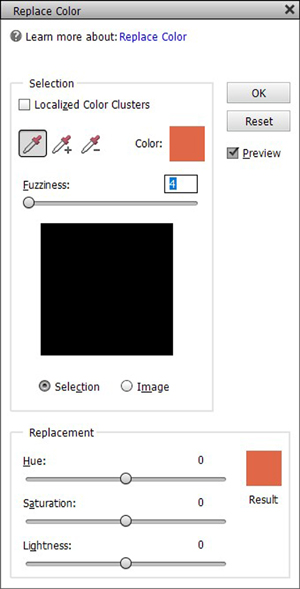
I’ll leave the localized Color Clusters box unchecked. This won’t always be the case but I don’t want to get things too complicated right now. If you’d like more information about replacing “clusters” of colors feel free to “Message Me” or you can search for more tips about replacing colors on the internet.
Then I need to ensure that the first “eye dropper” icon is selected. This is how I’ll pick the starting point of my re-coloring.
For this flower I’m going to set the Fizziness to 15. This makes it easier to control what portions of the flower will be re-colored. I’m going to leave the Selection “radio button” on. This lets me see (in the black square) what parts of the flower are being selected.
I’m doing nothing with the Hue/Saturation/Lightness sliders right now.
My pointer is in the shape of an eye dropper. Now I can make my initial color selection from the flower. I almost always tend to select a color in the mid-range…not too dark and not too light. So, I clicked on the medium pink near the flower’s center.
At this point I can see that both color chips (Color & Result) in the dialog box are identical. I need to change the value of the “Result” color to the color I selected from the paper. So, I’ll select the Result color chip and the now familiar color picker dialog box pops up.
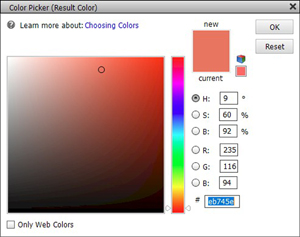
See how the color ‘s “hex” value is already highlighted? This is where I’ll enter the color value I previously copied/wrote down (f57527). Then I’ll click OK. I don’t see much of a change on the flower immediately (especially if I haven’t zoomed in). But I can see some little white specks show up in the “Selection” window (that black box).
This may or may not be the right time to make any adjustments with the Saturation/Lightness since I may not be able to see much of a change. And I won’t mess with the Hue…that will change my replacement color dramatically.
Next, I’ll click on the “Eye Dropper+” icon. This is how I’ll select other sections of the flower for re-coloring. I’ll just click around the flower until I see the color changing. And again, the yellow center remains unchanged unless I click there as well. This is how replacing differs from just “colorizing”.
Once I’ve selected all of the areas I want to change, I can then play around with the Saturation & Lightness “sliders” (using my reference paper as a guide) until I come up with something that meets my liking. Here’s how mine turned out…
Using this method takes a lot of practice and fine-tuning. Once you do it more than a few times, you’ll start to get the hang of it. Trust me it’s almost always a matter of trial and error. A lot depends on the element with which you’re working. Some are harder than others to re-color this way.
If you’re not totally confused or overwhelmed, I’ve got one more re-coloring option…
Re-color Dimensional Elements By Clipping & Blending
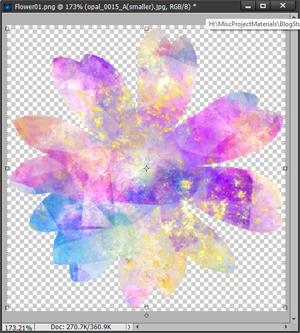
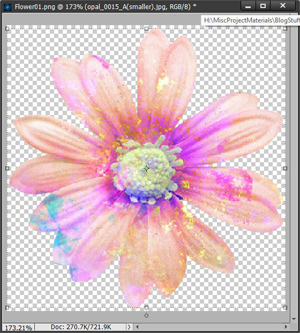
There is one final option I’m going to offer, though it’s not one I use too often. You can try clipping paper (solid or patterned) to the flower and changing the blend mode (as I mentioned up above on re-coloring that template edge). For example, I’m again going to use that “watercolor” paper from my stash and that original pink flower from above.
I placed it over the flower and clipped it to that layer. This is what it looked like without blending…
Now with the watercolor paper layer selected I’m going to go over to the layers panel (the right side of the screen). See the “box” right above the layers where it says “Normal”?
This is where we can change blend modes. This is where we can change blend modes.
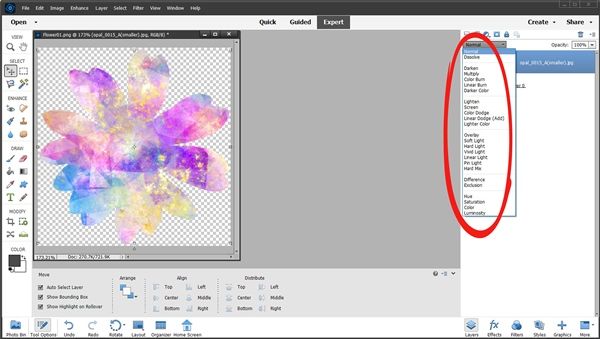
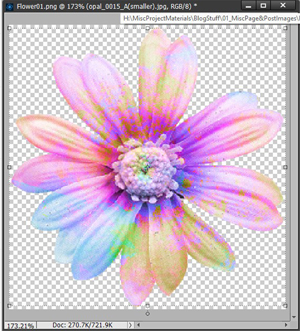
Once the “Blend” options are open all I have to do is use the down/up-arrow keys on my keyboard to “scroll” through the different blends to see what the results are. In doing that, I found that Pin Light & Hue gave the most interesting results. Here’s what I got using Pin Light:
And this is what I got using Hue:
Just bear in mind, this typically is only recommended for non-dimensional elements. If you try this with elements like flowers, you won’t necessarily lose all of the flower’s detail but results can be fairly unpredictable. Sometimes it works…other times, not so much! Regardless, I thought it was worth giving you this option and you can play with it if you like.
Most Important Re-Coloring Tips!
I would HIGHLY encourage you to do all your color changing outside of your actual layout. Just open your element separately and play to your heart’s content. This keeps you from accidentally making changes to something more than the element you’re trying to re-color. Besides that, if you’re really happy with the final product it will be easy to save your “new” creation for future use.

Don’t be afraid to experiment with all of these techniques until you find the one that works best for you. If you’re not happy with the result the first time…there’s always the “undo button”!

The more you play around the better you’ll get at re-coloring! And if you get hopelessly lost or frustrated you can always “Message Me” and I’ll try to help!
If you like what you’ve read and want to see what other re-coloring tips I have in store for you next week, be sure to click the “Follow Me” button. That way you’ll easily stay updated for Step #6…