
Quilt Outlines
In last week’s post about Busy Quilts, I talked about using quilt patterns for backgrounds and even showed you how to create your own version of the cathedral window quilt pattern.
Last week I also mentioned that this week I’d show you how to add what looks like an “outline” around the individual pieces that make up the window pattern. In real quilting these outlines are formed when the edges of a fabric circle are folded over itself creating the almost diamond-like shape you see here:
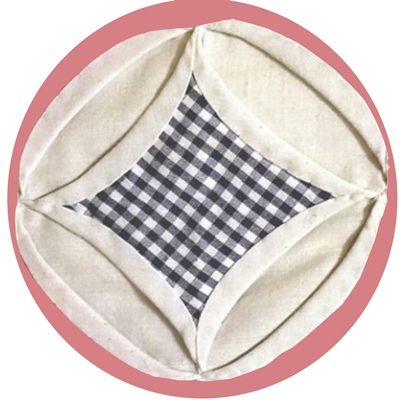
This is why some call this pattern the Folded Circle quilt instead of the Cathedral Window quilt.
If you look at the quilt image featured at the top of this post, you’ll also see its color pattern is very different from the one we looked at last week:

Even though the color patterns appear to be very different they aren’t. It’s just that the one at the top of this post only has colored prints “inside” or under the ellipses that make up the quilt “circles”.
Regardless of the differences between these quilt designs, each appear to have outlines of sorts.
Today I’m going to show you how to achieve that look without having to fold paper…
More Complex Quilt
If you read last week’s post you know I started off by using a template from “Patchwork Templates” by Scrapping with Liz:

Clearly by now you know I love the cathedral window/folded circle quilt design and last week I used template#3 from this set:

Last week I walked you through the steps to separate all four of the ellipse “corners” on each circle. This allows more flexibility when clipping papers to the quilt pieces.
Now that we have the individual ellipses, it’s time to add the outline…
Adding Stokes
Before I get started, just a quick reminder…I use Photoshop Elements (PSE – 2024). So, my screen shots may look different than what you see on your screen.
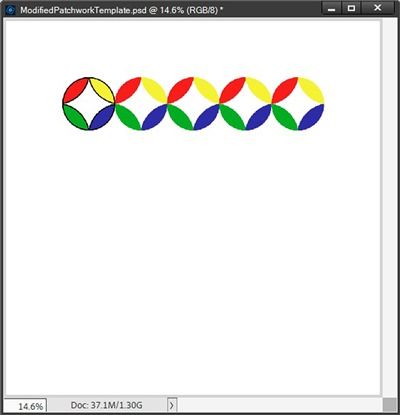
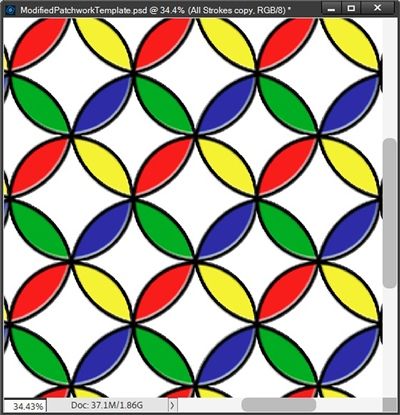
If you followed along last week, you know that we ended with this complete quilt pattern:
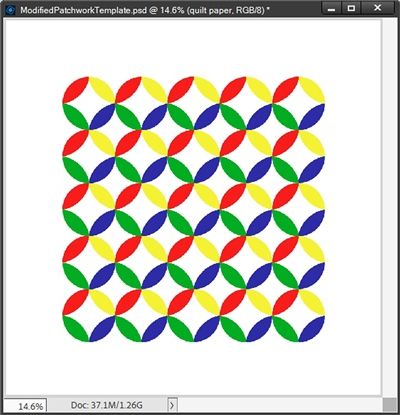
And you should also remember that all of the colored ellipse “circles” in each individual row were grouped together creating five groups named Row 1 thru Row 5.
To create the outlines for the ellipses in each row I’m going to use a technique I talked about in my “Stroking Shapes & Stuff” post back in April 2024.
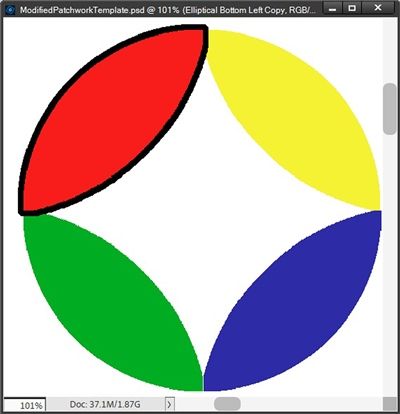
Using the template I created last week, I’ve, hidden everything except the white background and the first set of separated and re-colored ellipses in the first row:

I’m going to add a stroke (on its own layer) to each piece of that quilt “circle”. If you aren’t sure how to do this, for your convenience, I will run through the steps very quickly here.
Note: The “quick method” steps I’m going to present next will not allow you to make changes (easily) to the size of the stroke once you create it. For more details on the alternate method, please refer back to my post about Stroking Shapes I mentioned above.
After selecting the red ellipse first, I Ctrl-Click on the ellipse layer thumbnail. PSE again loads the shape as a selection and I see the marching ants around it.
Now I create a new layer above the ellipse and rename it to Elliptical Top Left Stroke. Ensuring that new layer is active, I go to the top tool bar & select Edit->Stroke (Outline) Selection. PSE opens the Stroke settings dialog box:
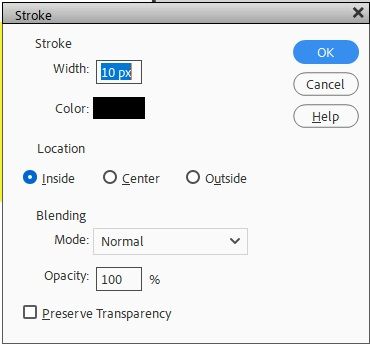
The Color is already set to black and I’m fine with that for this demonstration. You can set your color to whatever suits your needs. The only other settings I’m going to change are Width and Location. I keep the remainder of the options as the defaults.
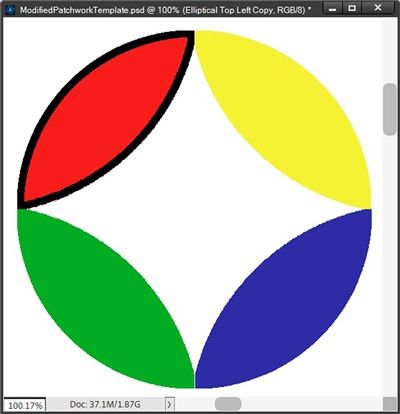
I set the width to 10 px, the Location to Inside and click OK to confirm. Voilà the ellipse now has an outline on its own layer:
Note: You can set your stroke Size to whatever looks best for you. Just be very careful not to make your Size setting too large. You don’t want your “outlines” to overlap.
You may be wondering why I set the stroke Location to Inside. That’s because if I set the Location to Outside, PSE will create the stroke along the outer edge of the ellipse:
Can you see the difference between the two stroke images above. The one immediately above was set to Outside and has the stroke overlapping the adjoining ellipses. We really don’t want the strokes to overlap, themselves let alone the underlying ellipses. That’s why setting the location to Inside is so important!
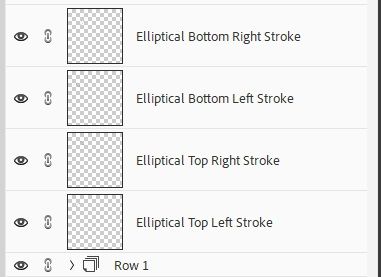
With that location “question” cleared up, I simply follow the steps above on the remaining three ellipses. I rename each stroke layer consistent with the name I used on the red ellipse – using the location of the ellipse. And this is how it looks with the colored ellipses hidden:

Next, I re-order the stroke layers (Elliptical Top Left Stroke-Elliptical Bottom Right Stroke) so they are together and above my ellipse layers (right now that is Row 1). My Layers Panel looks like this:
Then I link those stroke layers together. I am going to keep all my strokes (outlines) the same so I could also merge these stroke layers. However, I am not going to merge the layers just yet.
Note: If you want the ability to later color your outlines individually, you can do that…just don’t merge the stroke layers.
Once you have the corresponding strokes for the ellipses of the first quilt “circle”, it’s just a simple matter of duplicating & repositioning the strokes.
I’m going to unhide all of the colored ellipses in the first row before moving forward:
Now, I link those stroke layers together, duplicate them and position the duplicates over the next set of ellipses in that top row:

As I completed the strokes for the first row of the quilt pattern, I grouped the stroke layers for that row and named the group “Strokes Row 1”. Then I just duplicated that group, renamed it to “Strokes Row 2” and repositioned it over the next row of quilt circles. And I just repeat that process until I have all the rows with strokes around the ellipses:

Note: I hope I didn’t confuse you in the above paragraph. When I said reposition “the group” I didn’t mean to move the group in the Layers Panel. What I meant was to “nudge” the duplicate group down until it is over the next row. Of quilt circles. The new group should remain at its original location in the Layers Panel because I want the Stroke groups kept together. Here is what my Layers Panel looks like now:

If like me you choose to have all the strokes the same color, there’s one more thing I want to do. Since I want them all to be the same, I’m going to merge these stroke rows. This will create a single image to which I can clip a paper or simply re-color.
To preserve the existing rows (just in case I ever what to make changes later) I duplicate the five stroke groups and hide them. I then select all five of the duplicate stroke groups. Then I just Right-Click anywhere within the grey area in the Layers Panel and select Merge Layers:

Note: You do not have to merge the stroke groups if you’d rather not. Just be aware that if you follow the finishing touches I’m going to explain below, you would need to do so on either individual stroke layers or the individual Group levels. Please understand that I will be using a layer style. If you apply a layer style at the Group level there is no way to copy or even clear the layer style once you do this. However, it is still possible to “turn off” the style completely. Just double click the Effects icon (fx) at the left edge of the layer to uncheck whichever style option you want to eliminate. So, with that in mind, it is still a very quick way to add a style to every layer within the group.
With the layers merged I rename the new layer “All Strokes”. I can now make the final finishing touches to the quilt outlines.
Finishing Touches

If you are re-coloring your strokes individually, please do that before you consider following this next step.
This step is completely optional. I just like my outlines to look more like the folded edges we see in the image featured at the top of this post. To do this, I’m going to apply a very slight bevel to the “outlines”.
With the All Strokes layer active I apply the standard PSE Simple Emboss bevel:
That’s a bit too extreme. So, I just double click the Effects icon (fx) at the left edge of the layer to open the Style Settings dialog box and change the settings as follows:
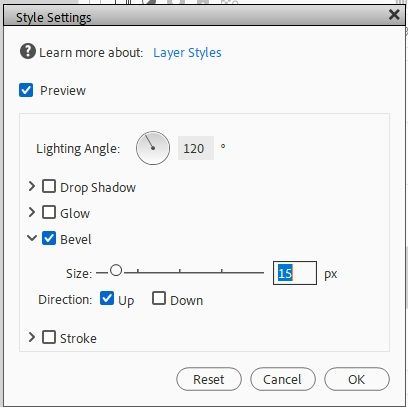
This will add just a bit of a bend to the edges of the outline making it look more like it’s folded.
Note: You can play with the Lighting Angle and Size settings to get the “folded” look you prefer.
I think this looks great. Just the right amount of bend to those edges. And I also think this takes care of any need for shadows. You can decide for yourself whether or not shadows are necessary.
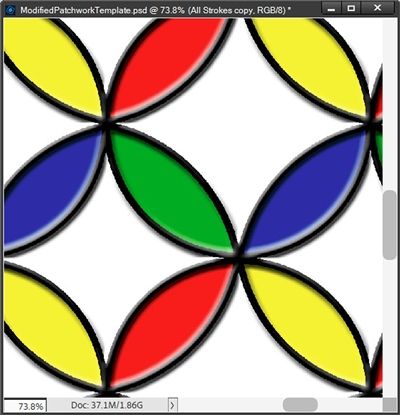
One final thing before I let you go. I wanted you to see how the outline shows up after clipping a paper to the All Strokes layer:
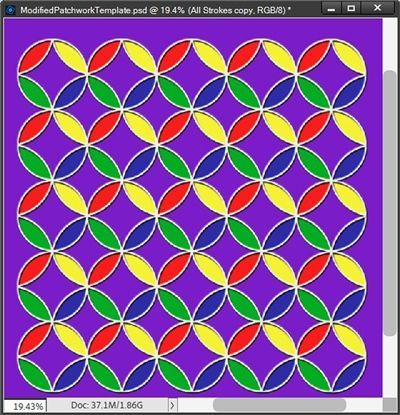
Note: I used a solid paper from “Seaside Treasures” by CarolW Designs. I also changed the background color to purple simply so you could see how the outline shows up.
Final Tips

You never have to add an outline to the ellipses that make up a Cathedral Window pattern. But if you’re trying to make it look more like the folded circles, these outlines will do the trick
When creating the strokes around the individual quilt ellipses, take your time and try to keep the layers organized by row.
Using a bevel on the outlines is not necessary. You can choose whether to leave the outline flat or add a bit of a bend to the edges. Either way you’ve created the outline look.
As always, if you have any questions or want to make a suggestion about a topic you’d like me to cover, please don’t ever hesitate to “Message Me”.
Thanks for reading this week’s Tuesday Tip. If you want to stay informed about new posts, just click “Follow Me” to stay in touch. I hope you have a wonderful week!
