Your Own Handwriting
Have you ever flipped through some of your mom’s old recipes and just loved seeing her handwriting on those cards? Do you cherish seeing your dad’s handwriting on letters he sent to mom? Do you ever want to leave your own legacy in your scrapbooks that make them even more personal?
Keeping our memories through scrapbooking is one of the main reasons that most people scrapbook. But the written word in our journaling can be just as visually powerful as the photos themselves. When we use our own handwriting, instead of some random font we got off the Internet, it leaves behind a part of us.
Once you’ve tackled placing photographs and some basic decorations, the next thing you should be looking at is trying to use your own handwriting.
Incorporating letters, drawings and other handwritten journaling into digital layouts is truly wonderful. And digitally capturing drawings and handwriting of our little ones is a wonderful way to keep those precious memories safe.
Note: If you’d like more details about the featured image above you can find them in my gallery here.
Step #13: Incorporating Real Handwriting
In last week’s post about journaling, I promised I’d give you tips on how to incorporate real handwriting in scrapbook layouts. So here we go…
In traditional scrapbooking that’s pretty easy. You just write your words either directly on the layout or on a separate piece of paper (mat) that can be mounted on the page.
With digital scrapbooking, things aren’t quite that simple. But it can still be accomplished.
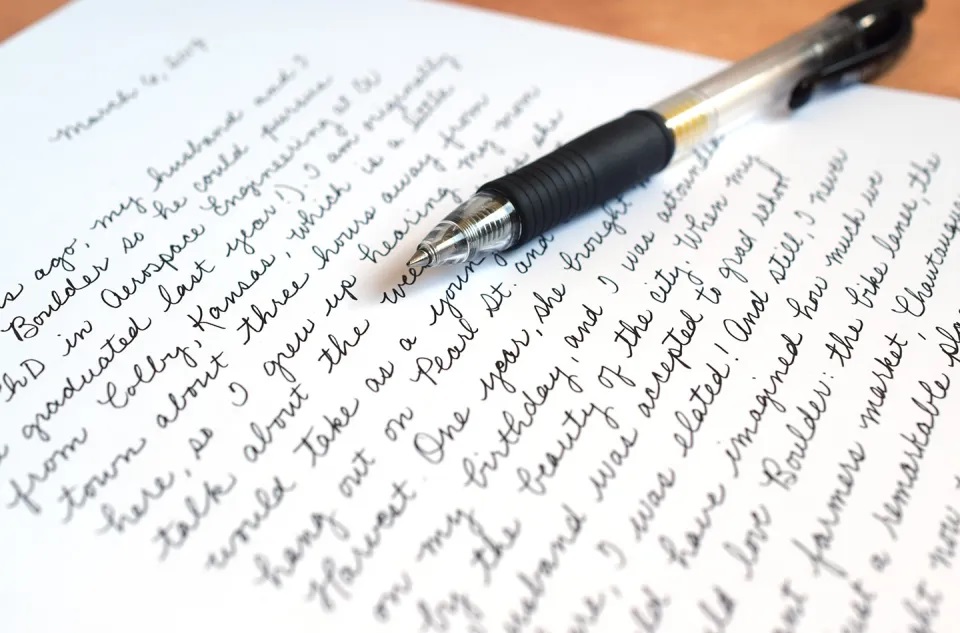
Start with a piece of plain white paper (preferably without lines). Don’t use a heavy bond or one with any kind of texture. Simple, home-use printer paper will work great. Then using a black ink pen with a medium to heavy point (but not too heavy) just write your journaling. A piece of advice here…write (or even type – good for spell checking) your words beforehand so you can wordsmith the story prior to writing on the final paper.
And before you panic about writing on unlined white paper there’s a trick for that. I, even before doing digital layouts, created my own solution. I just took a piece of standard notebook paper and drew over the lines (using a ruler) with a black “Sharpie” pen. I then placed that sheet under my clean white paper. This allowed me to see the lines well enough to follow them as I wrote on the unlined paper. Problem solved!
Capture The Written Word
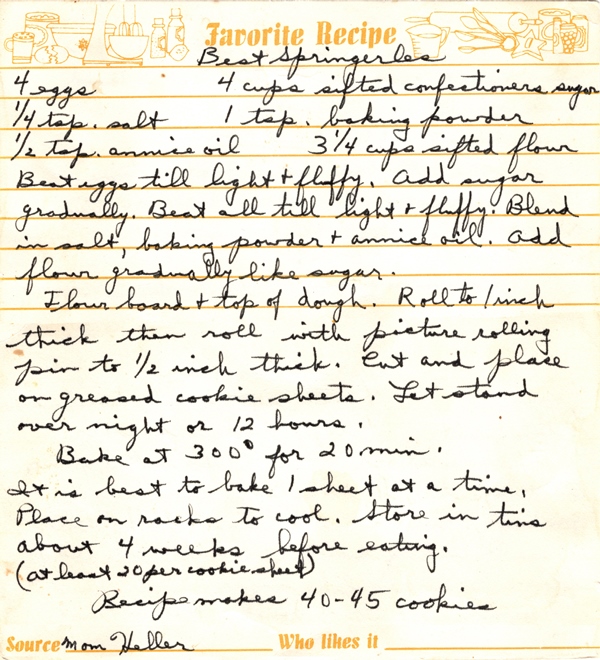
Scan the handwritten page using a high-resolution setting of 300 dpi. Save the scanned page as a jpg/jpeg file rather than a PDF. If you don’t have a scanner, you can take a picture with your phone (or camera). Just be sure to use good (preferably natural) light and good focus trying to eliminate as much shadow as possible. I’m using a scanned version of one of my mother’s old cookie recipes. It’s featured on the layout at the top of the post.
I know…it’s not on white paper and it has all the lines & other “background” imaging. But there’s a “method to my madness”, as they say. Sometimes you may want to capture something handwritten by someone else that isn’t on white paper. And what I’m about to show you will fix all of that. It’s just easier if we start with plain black & white whenever we can.
Preparing The Image
With the handwritten document now uploaded to your computer, open the image in your graphics editor. The rest of what I explain is done using Photoshop Elements (PSE). If you don’t use PSE, I’m fairly certain you can accomplish the same in whatever software you are using. And if you need more help, I know there are a variety of online tutorials. Just search for tutorials specific to your software.
If your initial image is perfectly white & black, you can generally skip this step. If like me you’re using something else (like an old recipe card) you can make some adjustments. So, select Layer> New Adjustment Layer> Threshold.
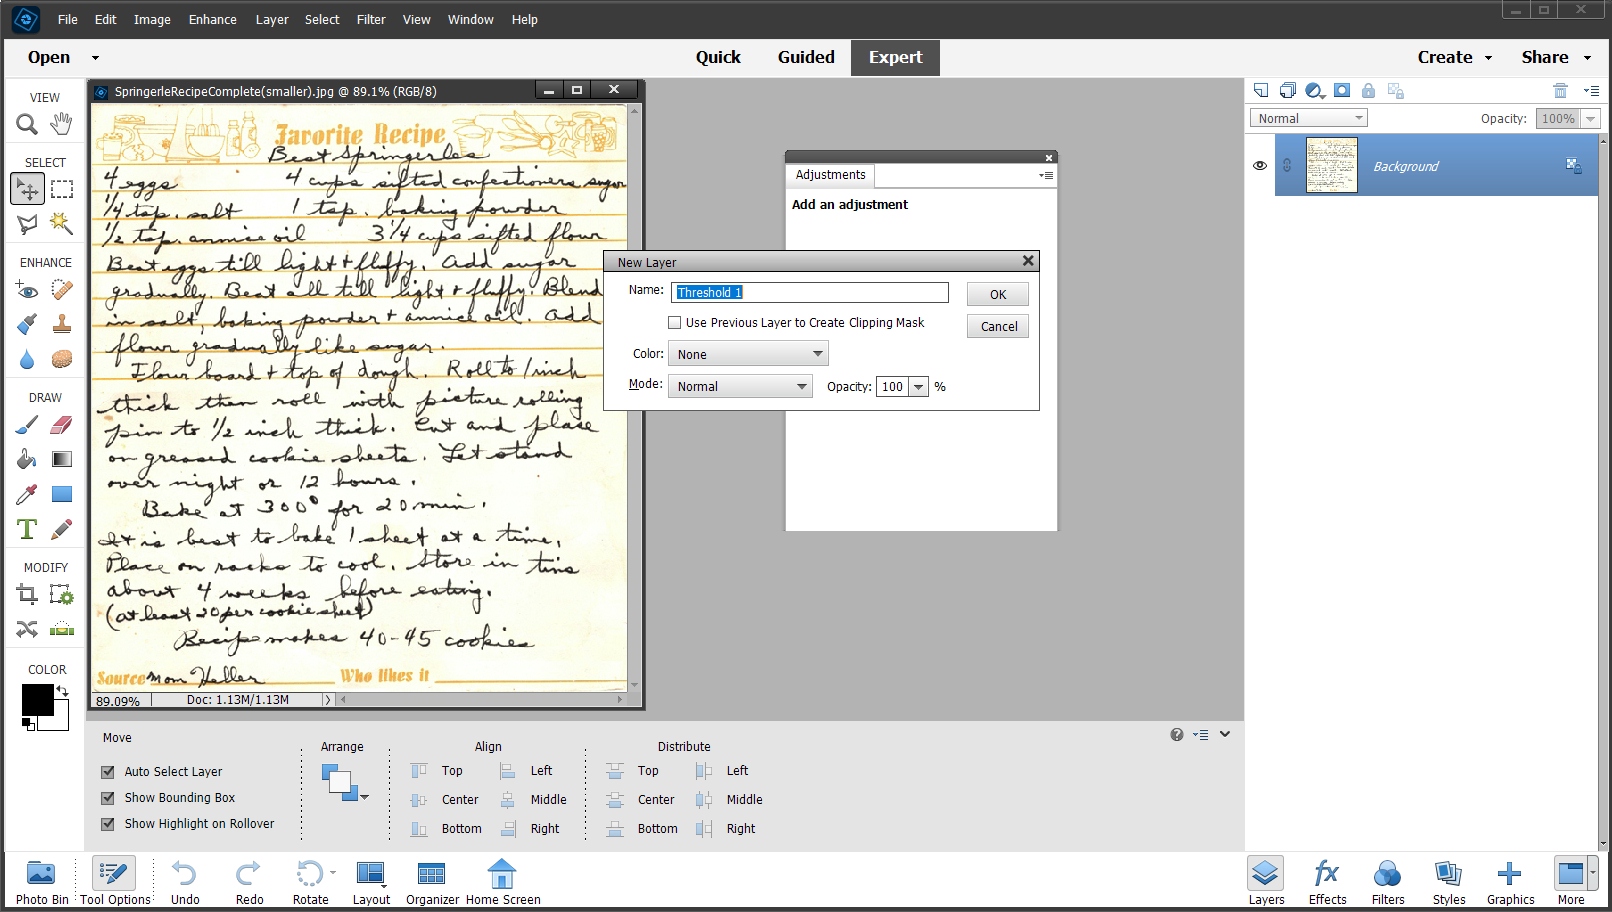
It’s fine to keep the default layer name for this step so just click OK. Now you’ll see the Threshold level adjustment box. You can either slide the “button” or simply increase/decrease the number itself.
Adjusting the threshold level will turn the image to black and white (no grey, no color). Be careful not to set the threshold so high that the words get so thick/fuzzy that letters start to “fill in”.
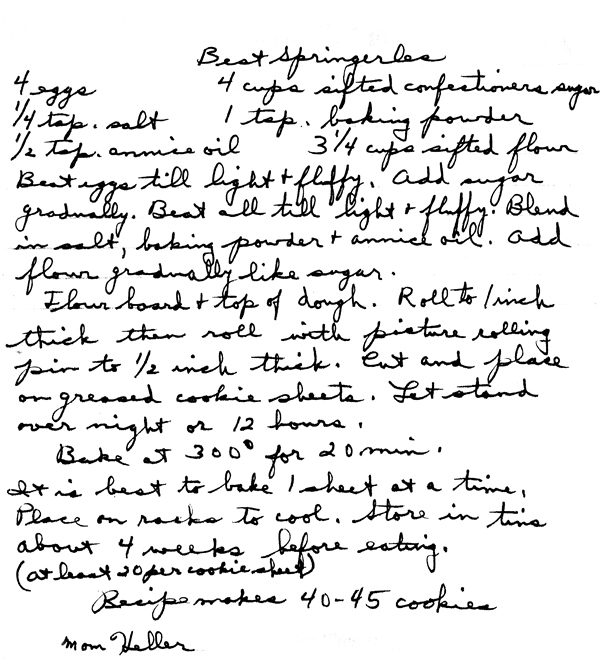
I was happiest using a threshold of 177. I could have gone a bit higher but it started to get too closed in.
If you notice that there are still some unwanted blemishes/lines on the image, those can easily be cleaned up later using the spot healing brush, clone tool or brush tool.
Save the image under a different name so as to preserve the original scanned image as a backup.
Extracting The Image
With the “threshold adjusted” version of your image open, make the necessary touch ups to any remaining blemishes and re-save the document.
Next create a new transparent document that is slightly larger than your handwriting sample. Select File> New> Blank File and choose Transparent for the background contents and the height/width based on what you need then click OK.
Next drag your handwriting sample from the Photo Bin onto the new transparent document. Click on the handwriting sample layer to select it.
Sometimes it helps to adjust the contrast. If you need to make this adjustment, press Ctrl+L (Mac: Command+L) to get the Levels dialog box. I recommend that you leave the “Channel” at the default setting. Then move the right and left sliders under the histogram inward slightly, which will make the black blacker and the white whiter. You generally don’t need to move the middle slider. Click OK.

Make the necessary adjustments and re-save the document.
Now, select the Magic Wand tool. Check the Options Bar to make sure that Contiguous is not checked. Also ensure that Anti-Aliasing IS checked.
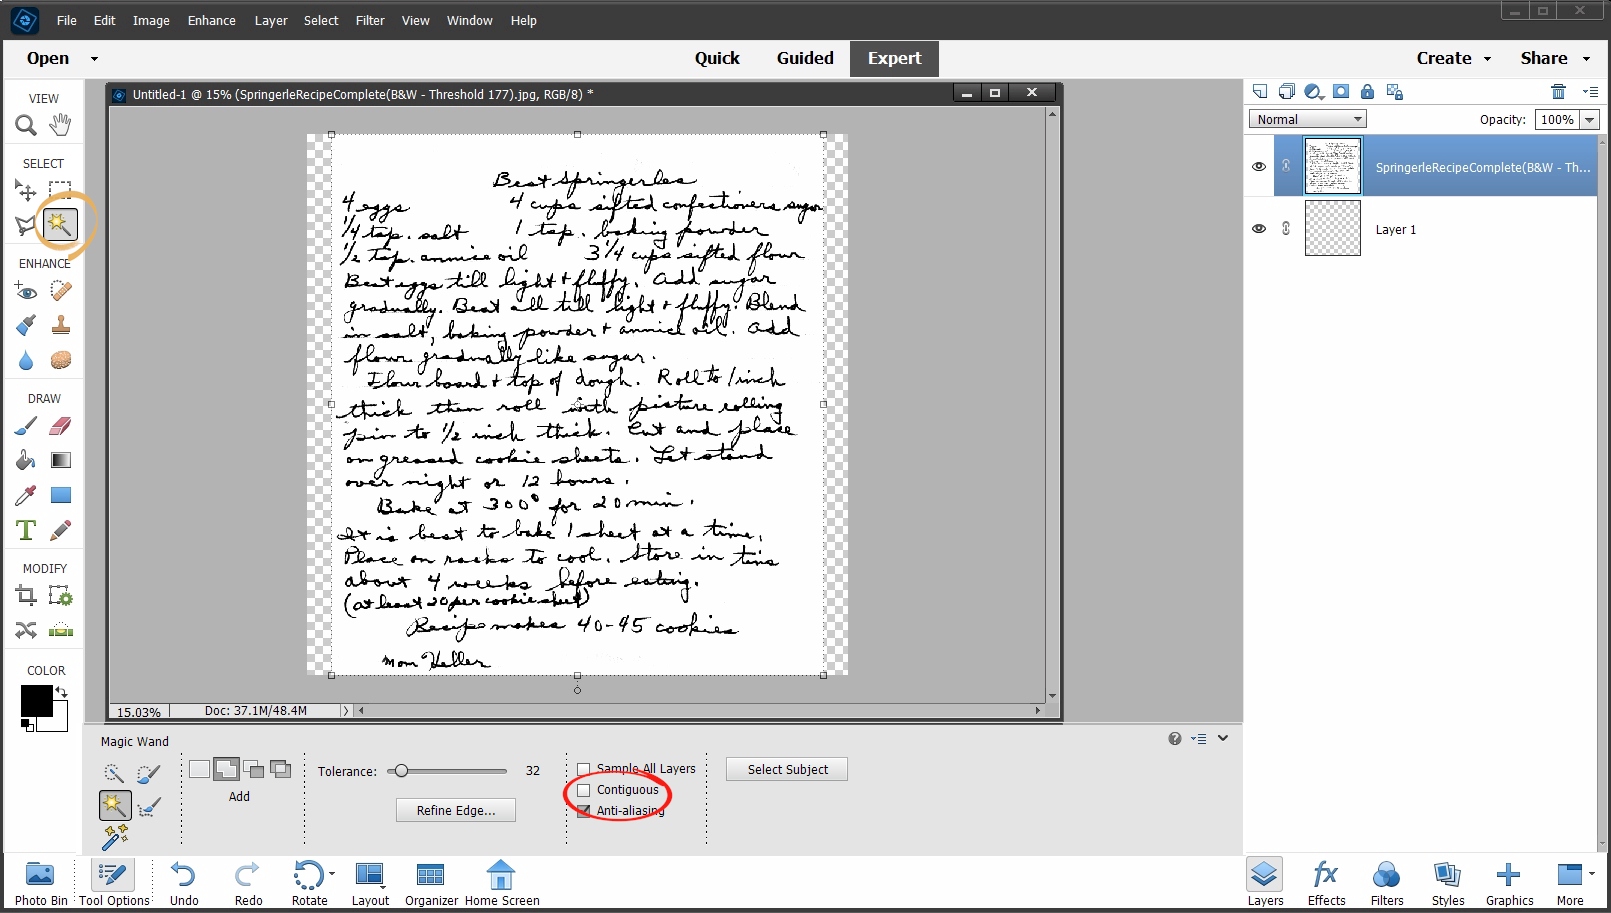
Next, click once on the background surrounding the text. This creates a selection which looks like marching ants around the text (and the background).
It’s hard to see in the image below. Depending on the device you’re using to view this page you may be able to see a larger version by tapping/selecting the image below.

Now, press Delete or Backspace on your keyboard to delete the background. And there’s the handwriting with no white background.
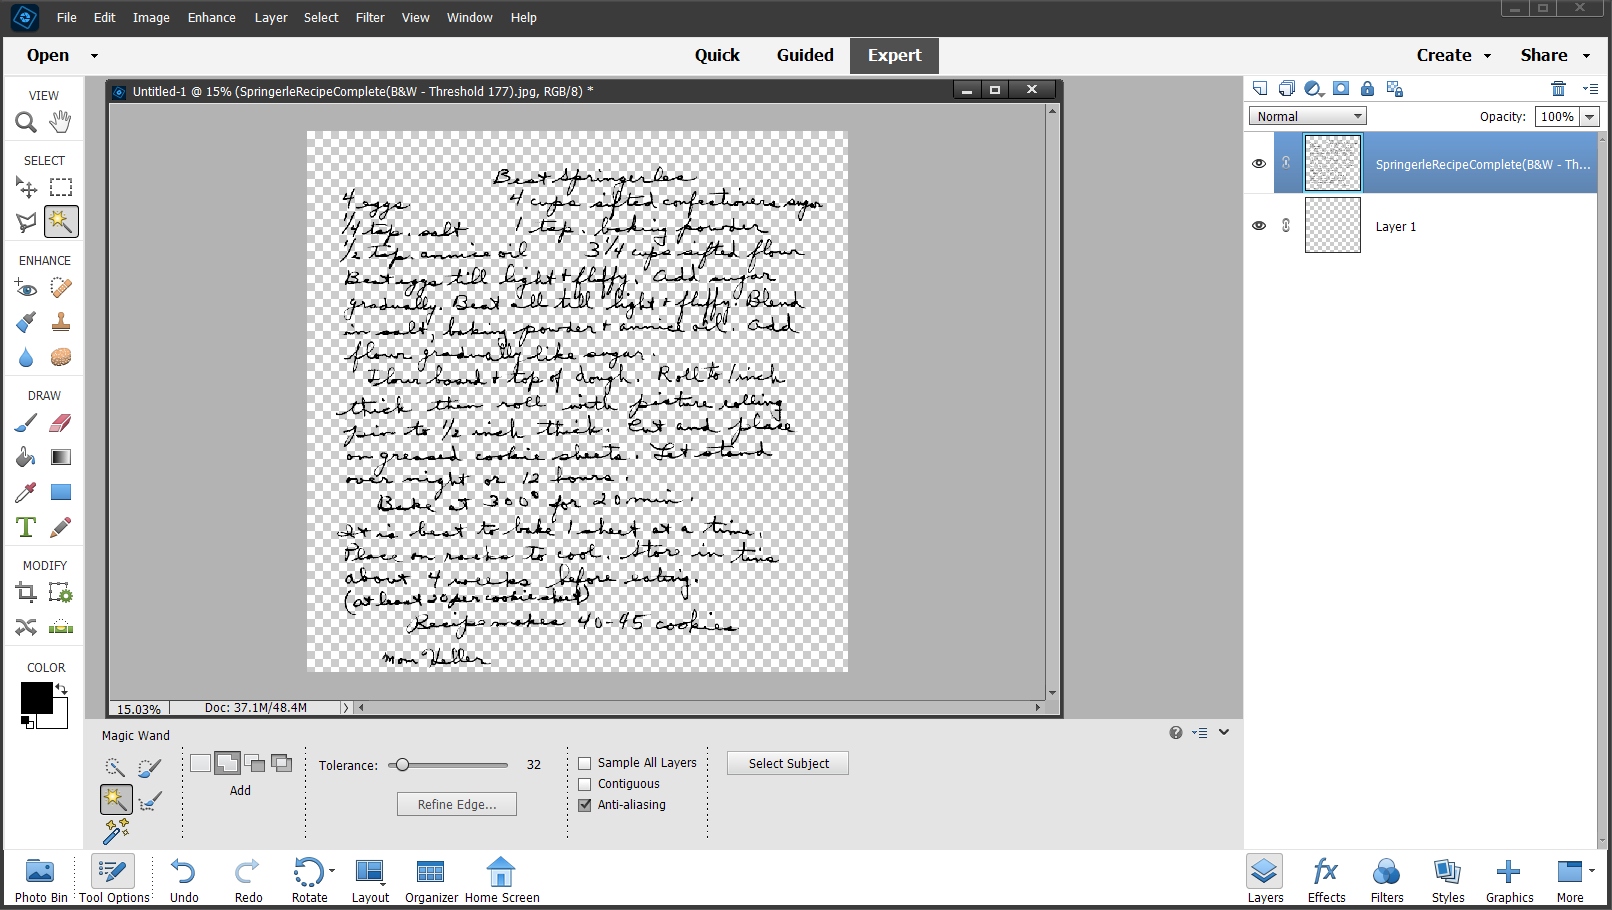
Sometimes a bit of the white background may cling to the words. If that happens, press the letter D to ensure your Color Chips are set to black and white. Then press Alt+Shift+Backspace (Mac: Opt+Shift+Delete) to fill the words with black.
Now, save the handwriting sample as a PNG file to preserve the transparency.
Now you know how to use your handwriting and your creativity to create custom designs with text. Try creating personalized, handwritten titles or handwritten journaling. Capture sample text from your child/grandchild at each age. Include a letter from a loved one in their own handwriting. You can even use the text from immigration documents, deeds, letters to Santa or passport information to create one-of-a-kind background papers.
I hope you’ll take the time to experiment with capturing your handwriting. And if you get lost or too confused, please don’t hesitate to “Message Me”. I’ll certainly do whatever I can to assist.
Create A Font From Your Handwriting

Have you ever wished you could turn your handwriting into a font? There are at least a few tools around that can take your own writing and turn it into a usable font. It doesn’t take long and as long as you can write legibly, it can produce a nice, quality font for almost any use.
There are a number of websites that offer to turn your handwriting into a font but one of the most common ones is Calligraphr (formerly MyScriptFont). It isn’t the only service of its kind out there, but it does make short work of this process.
You will first need to register with the site, but after that you can create as many fonts as you’d like (at least that’s what it says today). There are some limitations to the free version: limited to 75 characters, no ligatures (glyphs), and other limits. If you find that the free version doesn’t suit your needs you can upgrade to the Pro version (currently $8.00 monthly or $4.00 per month with a six-month upgrade). All pricing is in USD.
All you will need is a printer, a scanner and a good ball point pen for this to work. The website does everything else.

Just navigate to Calligraphr by clicking here. Once you have registered, just create your template. The site has a nice little tutorial that will help you do that.
Then download your template, complete all the boxes in your own handwriting (cursive or printing) and scan it. Then all you have to do is upload the template and let Calligraphr do its thing. It will digitize your handwriting and turn it into a font file ready for you to download.
A couple tips. When printing the template, make sure to use portrait format. Complete it using a good quality black pen and make sure all letters are clear and legible. Practice a few lines to get yourself warmed up. Writing out your alphabet cold turkey often leads to a bit of stress when things don’t seem to line up. But don’t overthink your writing, either. Just be casual in how you write your letters and think of them as flowing out of your hand, even though the letters aren’t connecting to each other. When scanning, make sure it is 300dpi and no larger than 4000 x 4000 pixels.
Single Most Important Tip About Using Real Handwriting
It’s truly a treasure to capture real handwriting of our own or our loved ones. Even if you don’t feel like creating your own font, please do find a way to capture your handwriting. You don’t have to do it all the time. But I know your loved ones will enjoy seeing your, or their own handwriting in the years to come.
Thanks for stopping by the blog for another edition of the Tuesday Tip series. If you like what you’ve been reading click “Follow Me” to stay updated for more…and until next time, “Happy Scrapping!”