
Old Dog – New Tricks?
Like most adages, this one has a following of folks who truly believe that old dogs cannot be taught new things, but this is not the case. Old dogs AND people can learn new tricks.
It’s true, as we get older, we usually get a little lazier with learning new things. We feel we’ve been through enough and already know enough. Our brain is full so why fit anything more in there? We are also much more independent and have more control over what we want to do. That’s the tricky thing with adult learning. Not only does the information need to be accurate, but the material also has to be made interesting enough for people to want to pay attention to it.
The short answer to the question posed by the title of this page is a definite yes. The idea that people (dogs too) can’t learn anything new after a certain point is a huge misconception. It might get a bit harder to learn a new subject or master a new skill, but all of us (older or not) are generally capable of fitting new stuff into our brain.
One of my biggest hopes is that my blog content is interesting enough for people to pay attention. I always try to offer tips & tricks that I believe could make things easier for you.
I want to remind you that I use Photoshop Elements (PSE) so every tip/trick I post about is done using that software. Also keep in mind that some things behave differently in full Photoshop than the way I see things in PSE. I point this out because this difference is actually the root cause for this quick tip.
A very dear friend of mine uses full Photoshop and was very recently trying to help me figure out a better way to do something I’ve been doing (for a while) in PSE. Anyway, this old dog learned a new trick as a result of that little teaching lesson. If only I’d known before last week’s post. Read on to see what I have to share this week…
Clipping Papers
So, in last week’s post about reducing file sizes I talked about how to manage the papers we clip to shapes/elements. I mentioned that any time you clip a paper/photo to a shape you very likely won’t need to keep the full-sized original. I went into detail about how to best cut that paper/photo down to only the size required.
Today I’m going to give you a better (hopefully easier) method of doing that. I’ll be using the same “Lighthouse” layout as last week to discuss the new tip. Again, for more information about that layout you can view it in “my gallery”
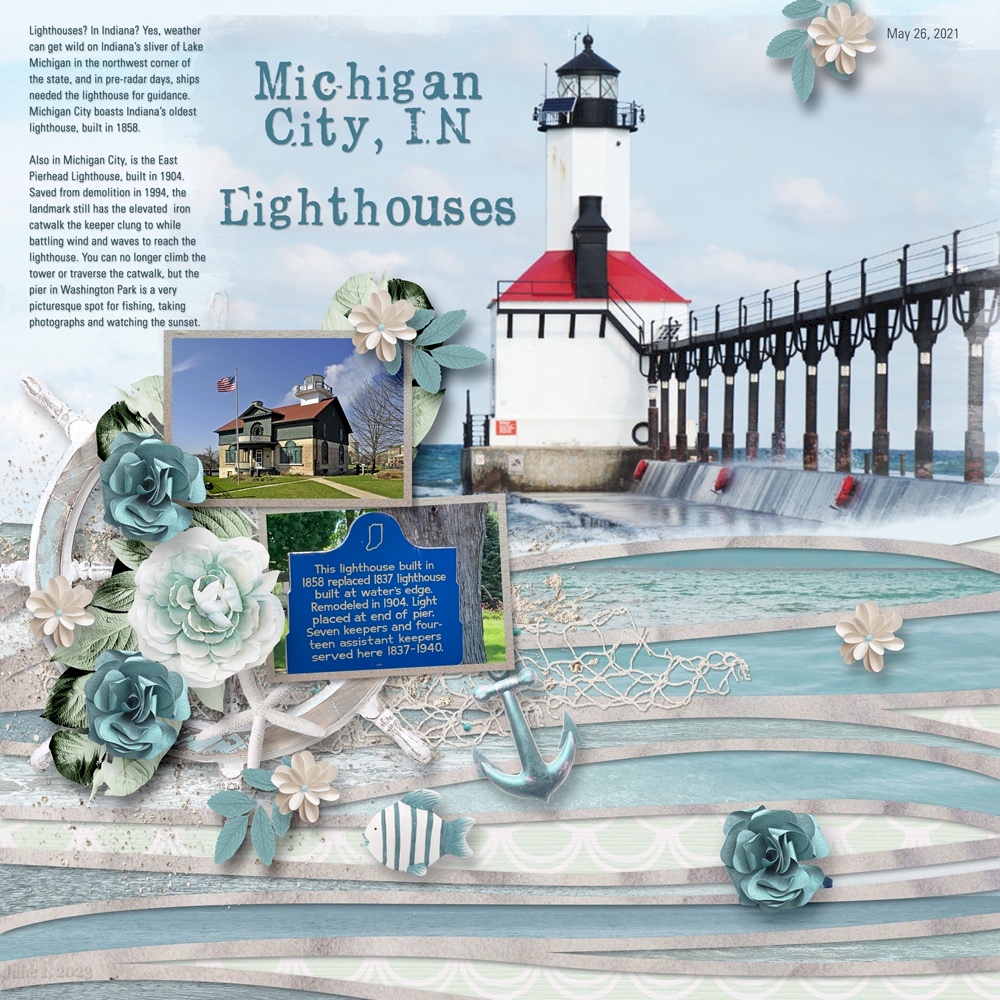
Now, looking at the PSD file for this layout, you can see the “outline” of the full sheet of paper still visible in the layout’s workspace? Clearly, the entire piece of paper is not needed. But it will remain full size when we save the PSD file.
In cases like these the best thing to do is create a new layer of that paper with only the portion required to cover the shape to which it will be clipped.
The twist to my directions from last week is about making the selection for that new layer. Instead of using the Rectangle Marque Tool and drawing a selection around only the portion of the paper needed, I’m going to show you a different method.
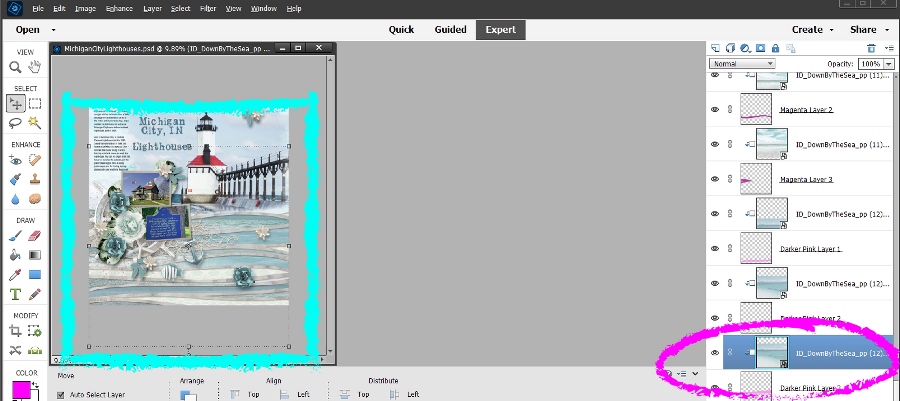
With the paper layer selected, I Ctrl+Click on the shape layer’s thumbnail in the Layers panel:

Once I do that you can see I now have those “marching ants” around the shape to which the paper is clipped:
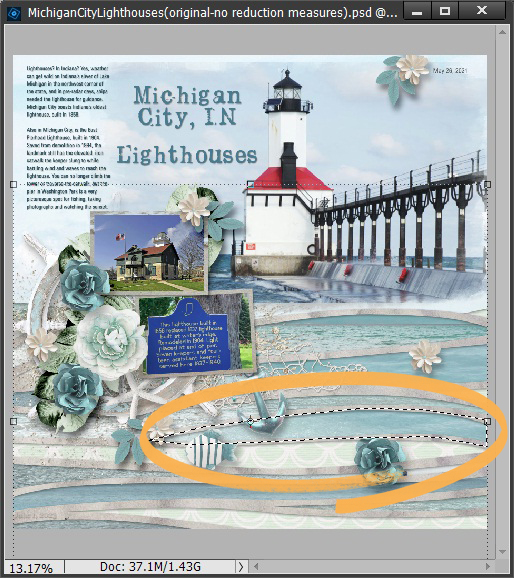
Ensuring that the paper layer is still selected, I then create a new layer via copy. And just like last week…in order to preserve the name of the original paper, I rename the new layer to the same name as the original paper. I then delete the original paper and clip the new layer to the appropriate shape layer.
No more fussing about not being able to see exactly what portion of the paper needs to be kept. No longer will I be making a selection “box” that typically is larger than what I might need. And I’ll always be sure its exactly the right size (and no more) to cover the layer to which it is clipped!
Yes, it’s still basically the same number of steps but I do find this new method to be easier and more efficient (from a size reduction perspective) than the old way. Which oh by the way, I’ve been doing for years!
Note: I do want to mention that this method may not always work well with objects that have “fuzzy” edges. Things like paint, transfers, stamps, etc., having very diffuse edges can make it tricky. Still give it a try. If you find that not all of the object gets selected you can revert to the method I described last week.
Most Important Tips About New Tricks
It turns out that human adults—the most senior ones among us included (like me)—are capable of learning new skills, whether it’s learning a new scrapbooking trick or how to play a musical instrument. Our brain may get rusty with age in some ways, but it doesn’t lose the ability to pick up new tricks. There’s promise for us all!
It’s never too late for people to learn a new skill—let’s blow that thinking out the water, shall we?
Remember always to only start cutting clipped papers down to size AFTER you’re certain the layout is finished.
As usual, if you have any questions or need a bit of help, please don’t hesitate to “Message Me” for some assistance.
Thanks for reading this week’s Tuesday Tip. If you want to stay informed about next week’s post, just click “Follow Me” to get an update. I hope you have a wonderful week!
